
Page 1 of 2 • 1, 2 
 KitbashAdmin
- Posts : 276
Join date : 2015-01-25
Age : 54
Location : Georgia 
 51 Chevy Custom
Mon Mar 16, 2015 12:43 am
yup
i had to rip open another one lol
mainly pulled this one out so i could do the top chop on it and use it as a tutorial

i figured since it says build stock or drag.. i would do the easy thing and go custom lol
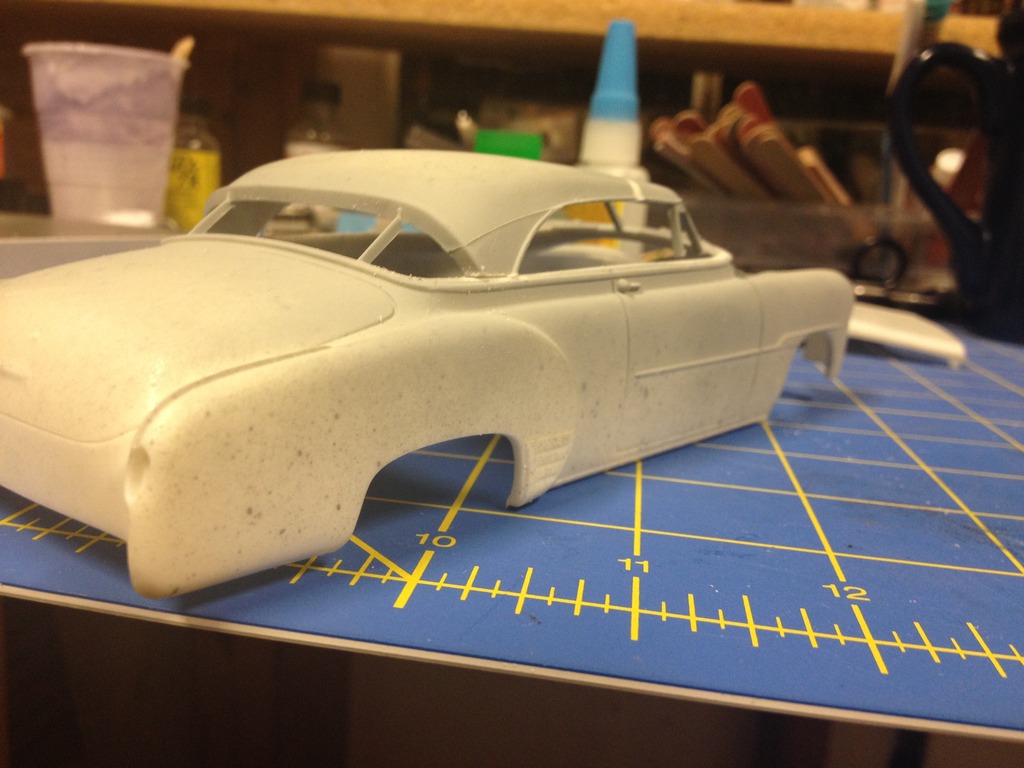
start out with a side shot of how the body looks stock

now i use 1/8 inch tape to mark out my lines where i plan to cut

you will notice that i pick the upper portions of some areas and the lower portions of others

i also lay a line across the roof line because i will have to reposition it and lengthen it a bit to make it fit right

now i dont know if anyone else does this, but its a habit i picked up a while ago on a chop job that the tape kept moving while i was laying things out.
with the tape in place, i grab a can ( yes i said can, not worried about the finish here yet ) and i lay on a light coat

once it dries i remove the tape

first cuts with the razor saw are on the window moldings as they are fragile and i dont want them to bend with the other cuts i have to make.


next i cut the A pillars and the wing window frames, always making the cuts on the closest line to the center of the part because it is easier to trim from the larger area than it is to try to cut on the wobbly end twisting around all over the place
once i cut the B pillars, the top comes off easy enough

i trim down the thin trim pieces with a pair of nippers because it is the easiest thing to do.


test fit on the back once i remove the excess plastic
yea this will work

now, the reason for the line on the roof, with the back in its proper place, the front a pillars no longer line up where they should

out comes the razor saw again

now i use a scrap piece of .010 styrene sheet

using one of the high tech clamps and some liquid cement, i glue my alignment shim on

while i wait on that to set up i am gonna remove the wiper arms..these will be replaced later

all gone

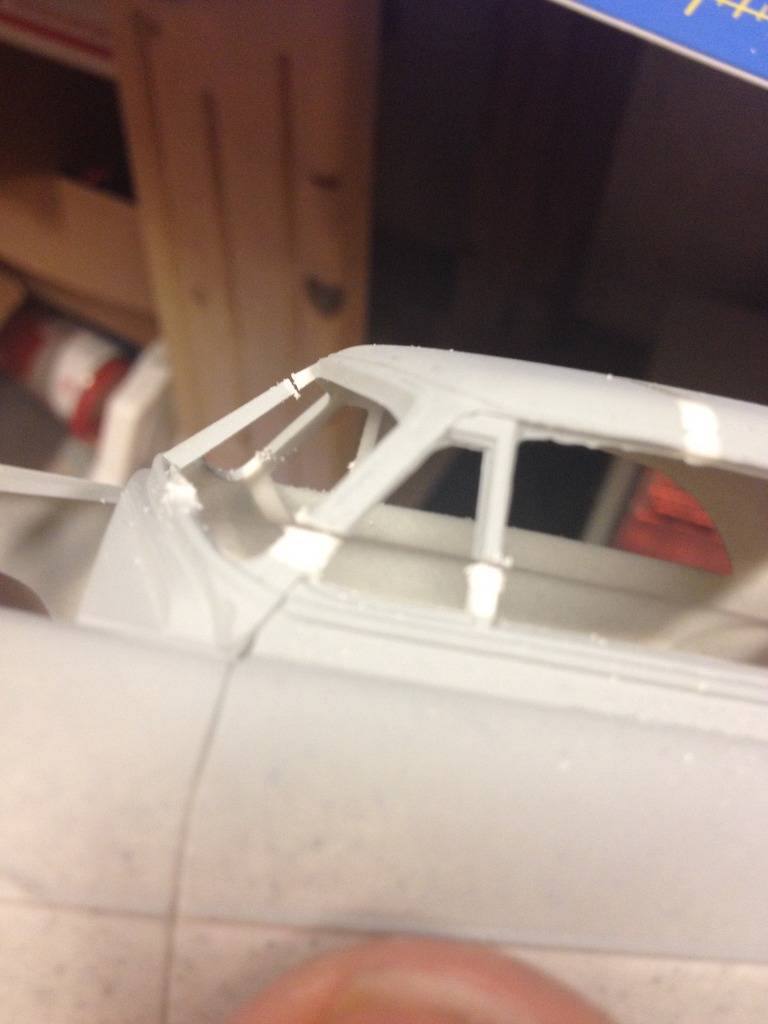
ok i glue the A pillars in place and get all of the corners lined up now i have to fill the gap in the middle of the roof
out comes the styrene....

thats gonna be pretty close

using a lighter , i curl the ends to kinda match the roofline

i measure and get close enough to be happy, then trim it down a bit so its not so long

almost the perfect width, will only require one thin shimm to take up the little bit of excess

shim in place and everything has a fresh coat of liquid cement for the evening

will let that dry for a day or two and then continue on the tutorial hopefully on weds
cya then
i had to rip open another one lol
mainly pulled this one out so i could do the top chop on it and use it as a tutorial
i figured since it says build stock or drag.. i would do the easy thing and go custom lol
start out with a side shot of how the body looks stock
now i use 1/8 inch tape to mark out my lines where i plan to cut
you will notice that i pick the upper portions of some areas and the lower portions of others
i also lay a line across the roof line because i will have to reposition it and lengthen it a bit to make it fit right
now i dont know if anyone else does this, but its a habit i picked up a while ago on a chop job that the tape kept moving while i was laying things out.
with the tape in place, i grab a can ( yes i said can, not worried about the finish here yet ) and i lay on a light coat
once it dries i remove the tape
first cuts with the razor saw are on the window moldings as they are fragile and i dont want them to bend with the other cuts i have to make.
next i cut the A pillars and the wing window frames, always making the cuts on the closest line to the center of the part because it is easier to trim from the larger area than it is to try to cut on the wobbly end twisting around all over the place
once i cut the B pillars, the top comes off easy enough
i trim down the thin trim pieces with a pair of nippers because it is the easiest thing to do.
test fit on the back once i remove the excess plastic
yea this will work
now, the reason for the line on the roof, with the back in its proper place, the front a pillars no longer line up where they should
out comes the razor saw again
now i use a scrap piece of .010 styrene sheet
using one of the high tech clamps and some liquid cement, i glue my alignment shim on
while i wait on that to set up i am gonna remove the wiper arms..these will be replaced later
all gone
ok i glue the A pillars in place and get all of the corners lined up now i have to fill the gap in the middle of the roof
out comes the styrene....
thats gonna be pretty close
using a lighter , i curl the ends to kinda match the roofline
i measure and get close enough to be happy, then trim it down a bit so its not so long
almost the perfect width, will only require one thin shimm to take up the little bit of excess
shim in place and everything has a fresh coat of liquid cement for the evening
will let that dry for a day or two and then continue on the tutorial hopefully on weds
cya then
 Rhodes
- Posts : 55
Join date : 2015-01-26
Age : 59
Location : Conneautville, PA
Re: 51 Chevy Custom
Mon Mar 16, 2015 1:14 am
I like the tape and spray method. good idea. I have one of these also, but I'm building it box stock (drag car version)with the inline six.
 Custom Mike
- Posts : 273
Join date : 2015-01-26
Age : 60
Location : North Carolina
Re: 51 Chevy Custom
Mon Mar 16, 2015 1:31 am
Nice start Wayne, I don't have the testicular fortitude to chop a top yet...I've really gotta try it someday!
- KitbashAdmin
- Posts : 276
Join date : 2015-01-25
Age : 54
Location : Georgia
Re: 51 Chevy Custom
Mon Mar 16, 2015 10:17 am
Rhodes wrote:I like the tape and spray method. good idea. I have one of these also, but I'm building it box stock (drag car version)with the inline six.
thats cool bud, i think the lid is bit too high for my tastes ( plus it gives me more to do lol ) cant seem to leave things alone.....
Custom Mike wrote:I don't have the testicular fortitude to chop a top yet
lol with all the other detailing you do it would be cake work for you bud. tis only plastic after all
- Rhodes
- Posts : 55
Join date : 2015-01-26
Age : 59
Location : Conneautville, PA
Re: 51 Chevy Custom
Mon Mar 16, 2015 3:16 pm
does look good with the chop.
Page 1 of 2 • 1, 2
Permissions in this forum:
You cannot reply to topics in this forum|
|
|