
 Custom Mike
- Posts : 273
Join date : 2015-01-26
Age : 60
Location : North Carolina 
 Re: 1965 Chevy Pickup & Hemi Hydro combo
Wed Jan 28, 2015 4:15 am
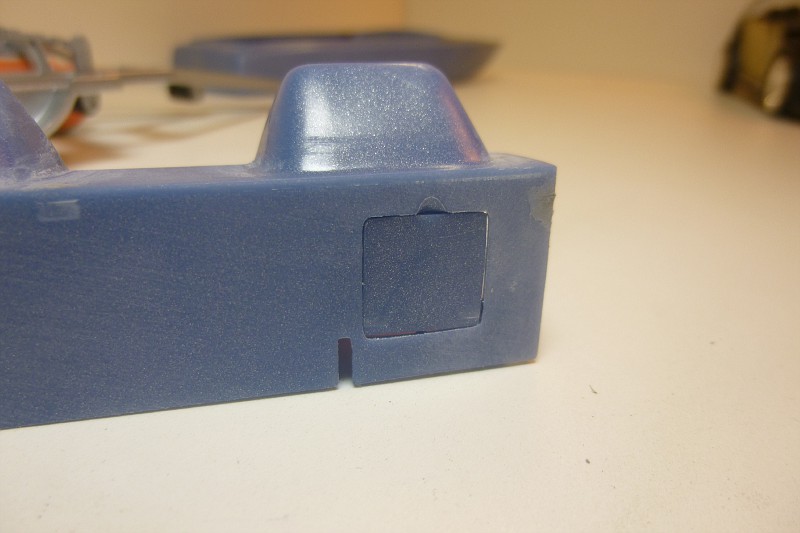
Before I glued the top of the boat hull back in place, I made a small modification to the dash area. The molded-in 3 gauge cluster looked crappy, so I sanded it smooth, broke out my photo-etched street rod gauge sets, and got the Dremel out. Since the last one of these I used came out good, but not good enough (My '50 Chevy's dash), I went a different route. Watch and see the insanity at work!
I laid the photo-etched gauge bezel in the recess, and covered it in putty....
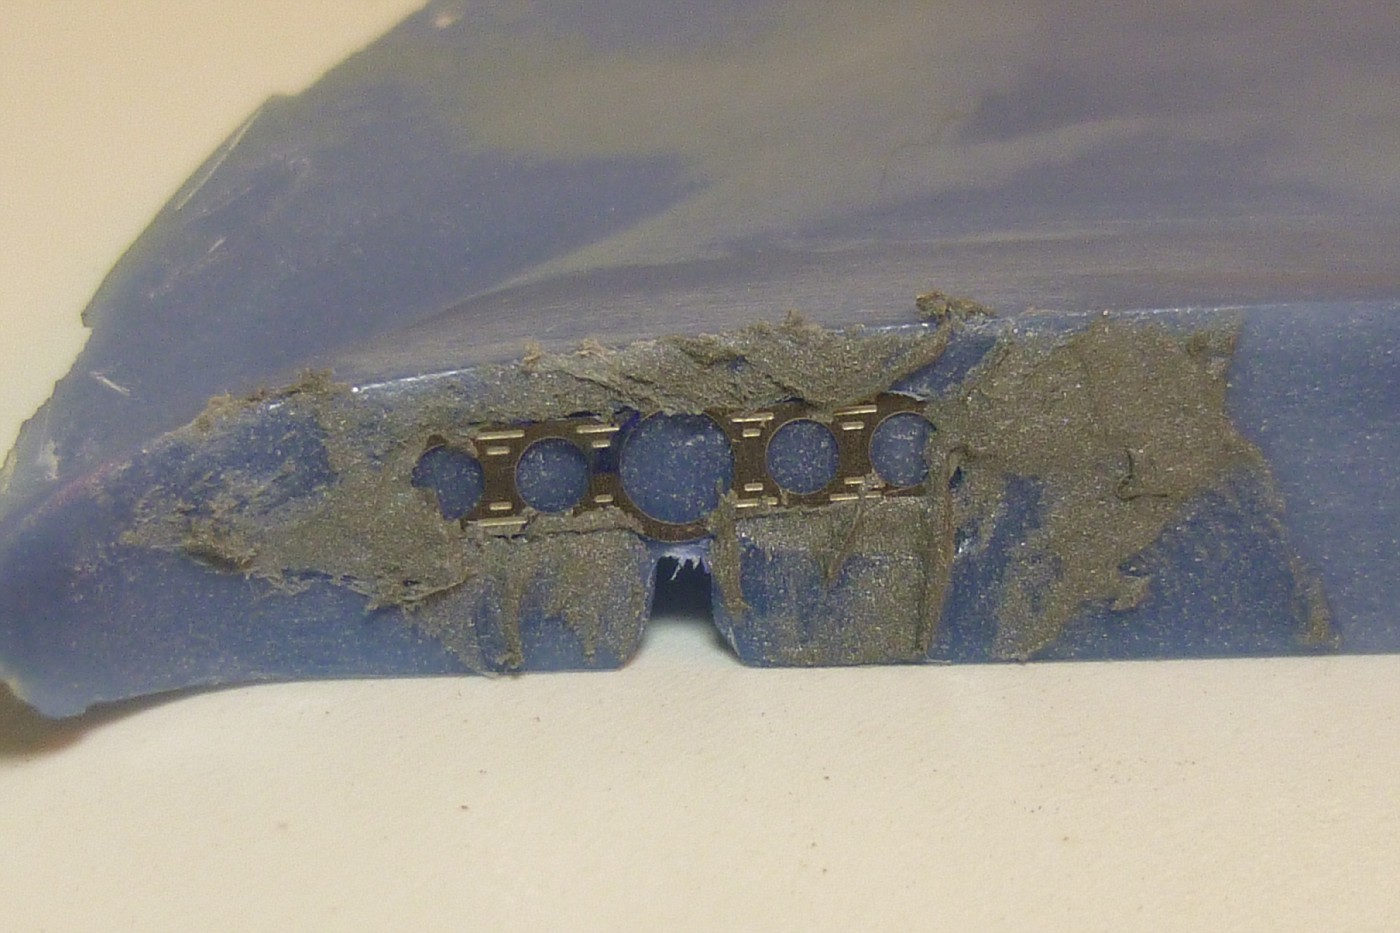
I sanded carefully until, removing the putty covering the bezel slowly...

Until the bezel popped free, leaving me with a perfect (Hopefully) "surround" for the bezel!


I laid the photo-etched gauge bezel in the recess, and covered it in putty....
I sanded carefully until, removing the putty covering the bezel slowly...
Until the bezel popped free, leaving me with a perfect (Hopefully) "surround" for the bezel!
- Custom Mike
- Posts : 273
Join date : 2015-01-26
Age : 60
Location : North Carolina
Re: 1965 Chevy Pickup & Hemi Hydro combo
Wed Jan 28, 2015 4:16 am
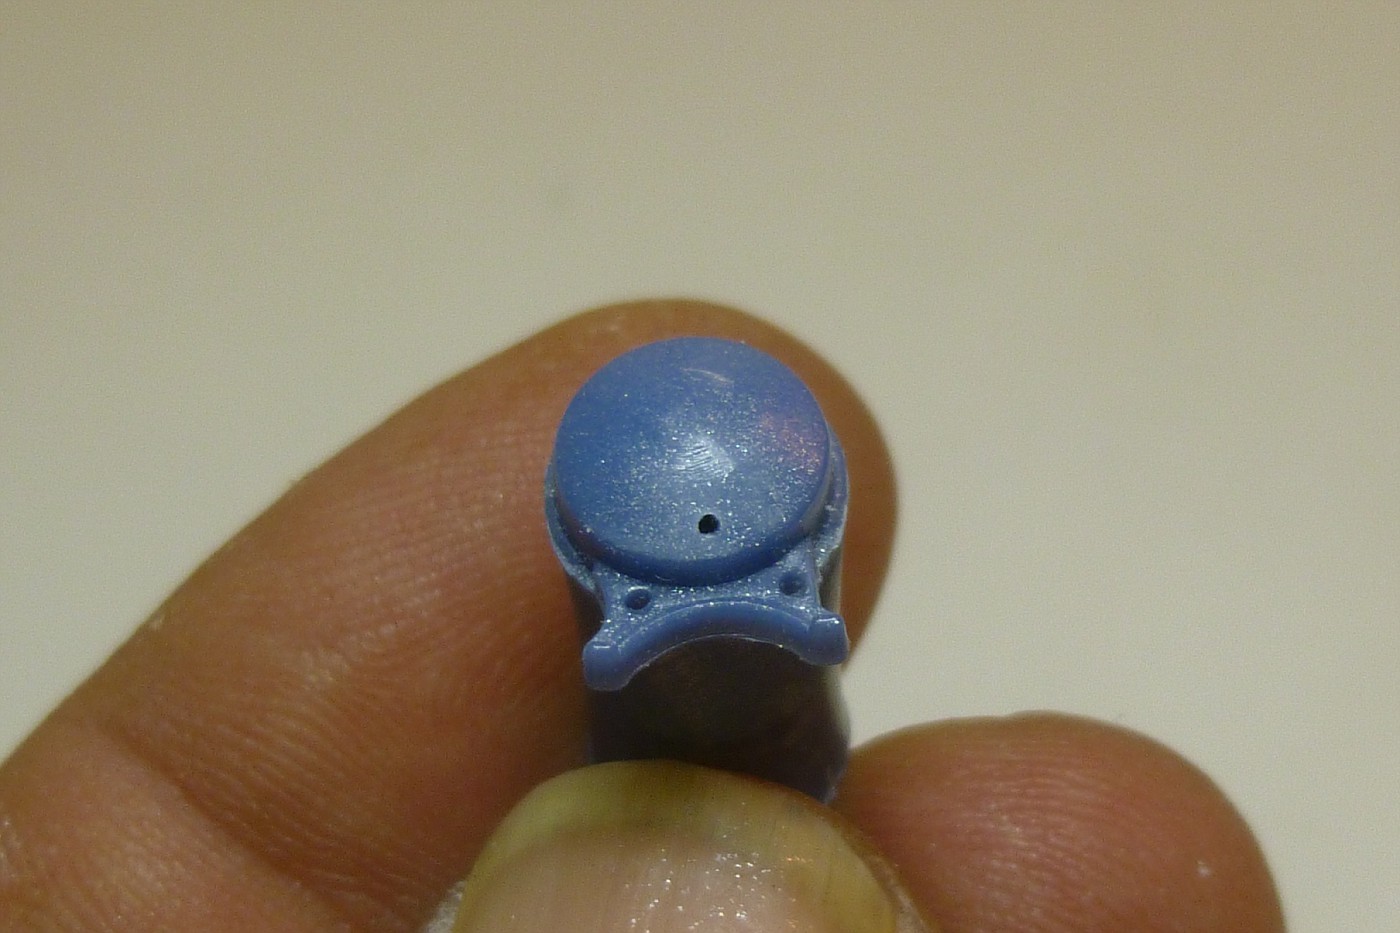
Completing the new gauge assembly, I added some Testors Clear Parts Cement to the gauges, laid the bezel over the gauges, and mocked it up in the dash...pretty slick!
I'll add a bit more of the Clear parts Cement later to give each gauge a nice "lens", but for now it's setting off to the side to insure the gauges stay attached to the bezel! And yes, I know the gauges are slightly off, but trust me, you can't tell without an extreme close-up with the camera...besides, I can't move 'em now, the glue has dried!


I'll add a bit more of the Clear parts Cement later to give each gauge a nice "lens", but for now it's setting off to the side to insure the gauges stay attached to the bezel! And yes, I know the gauges are slightly off, but trust me, you can't tell without an extreme close-up with the camera...besides, I can't move 'em now, the glue has dried!
- Custom Mike
- Posts : 273
Join date : 2015-01-26
Age : 60
Location : North Carolina
Re: 1965 Chevy Pickup & Hemi Hydro combo
Wed Jan 28, 2015 4:16 am
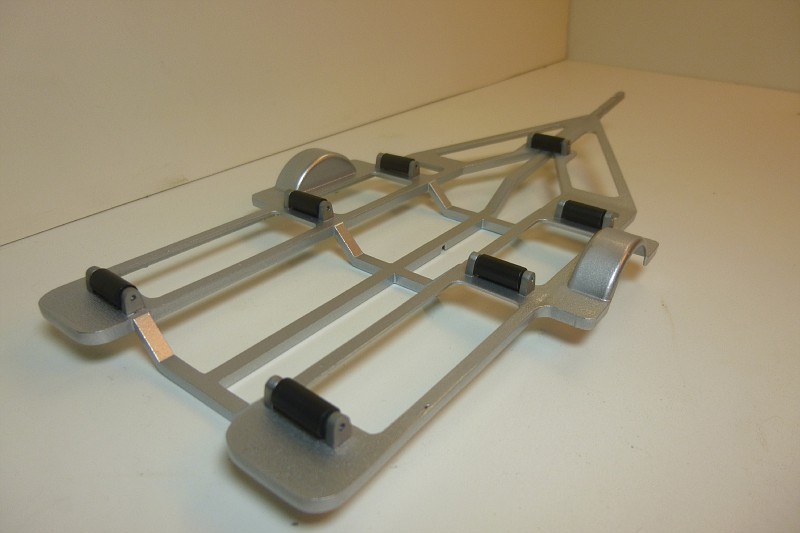
I realized I forgot to install the tongue on the trailer, so I glued it in place, hit it with some Primer/Sealer. and re-shot the entire trailer with some more GM Ultra Silver...it looks much better this time around!


Next up were the rollers for the trailer. I sprayed the roller parts with some Dupli-Color Black primer, and the brackets with some Metalizer Stainless Steel, then put them all on the trailer.
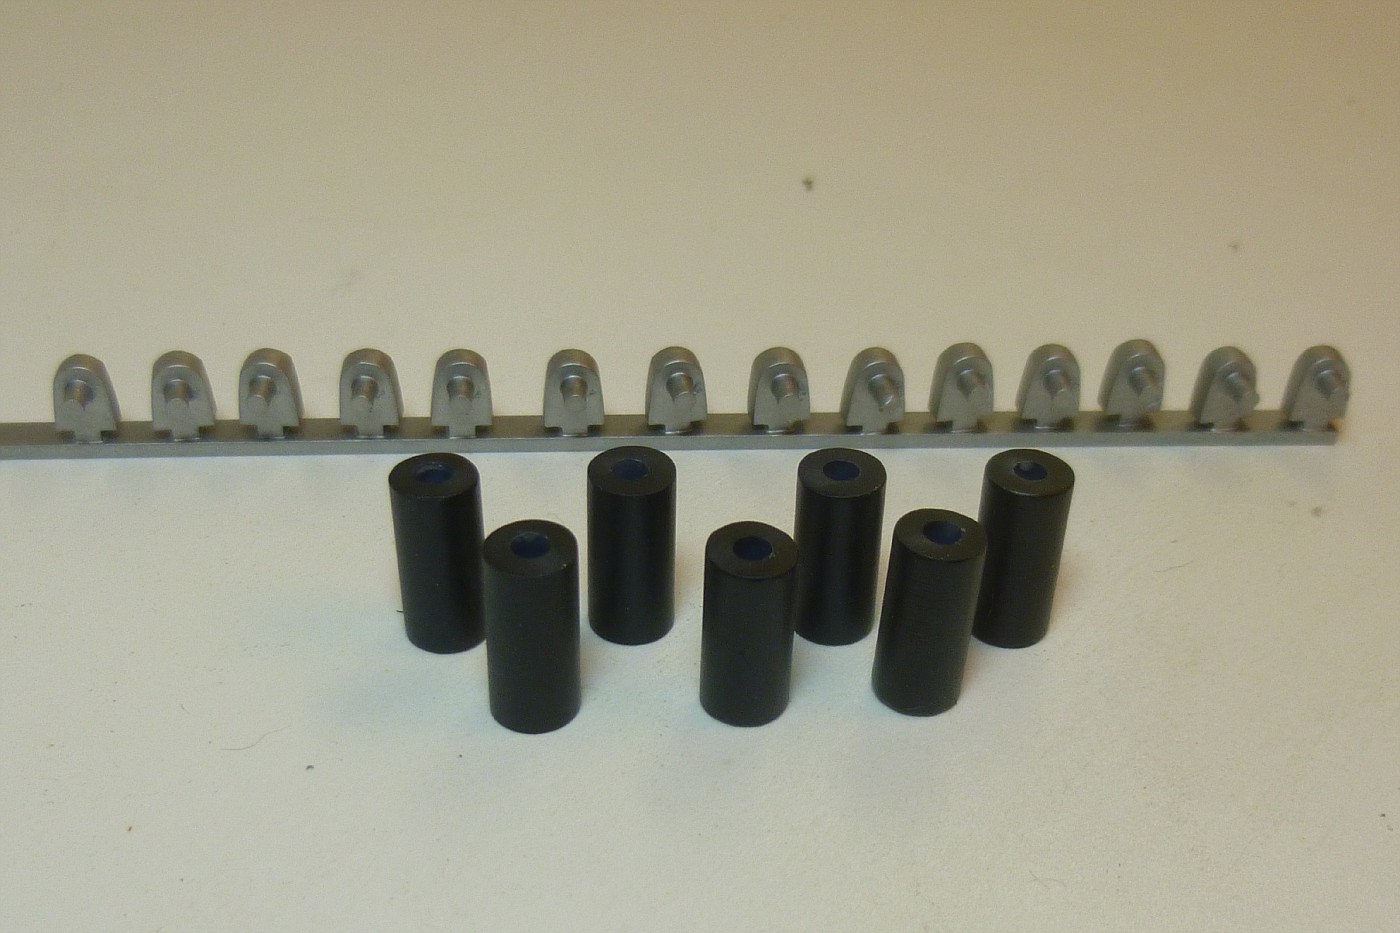
Looking pretty good, and they all roll too!
Next up were the rollers for the trailer. I sprayed the roller parts with some Dupli-Color Black primer, and the brackets with some Metalizer Stainless Steel, then put them all on the trailer.
Looking pretty good, and they all roll too!
- Custom Mike
- Posts : 273
Join date : 2015-01-26
Age : 60
Location : North Carolina
Re: 1965 Chevy Pickup & Hemi Hydro combo
Wed Jan 28, 2015 4:17 am
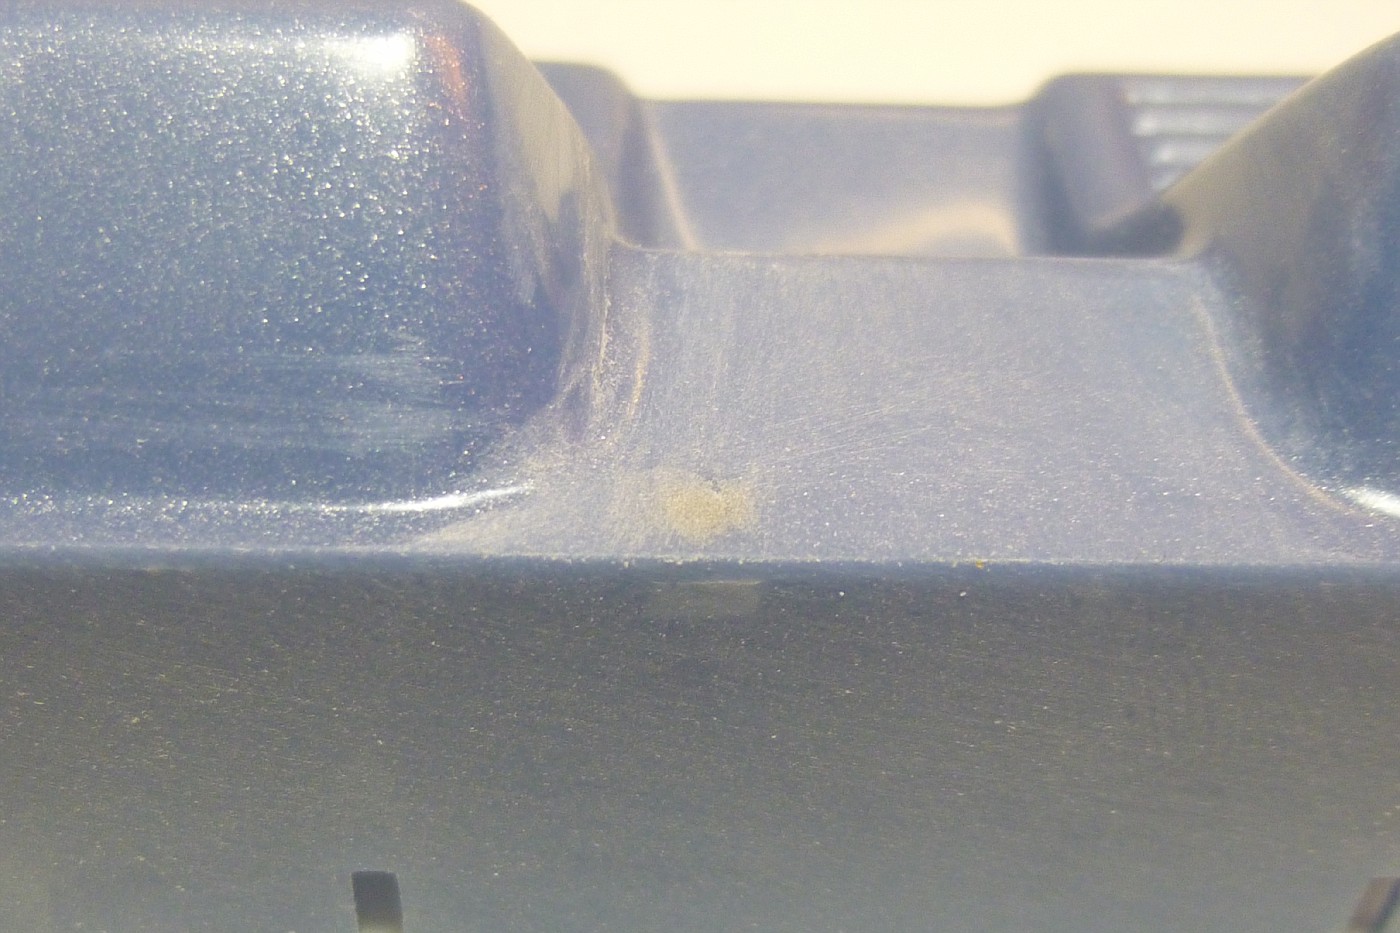
Next up was the seats. there was one small sink mark on the top between the seats, and a small hole on the top at the side of the passenger seat, both were taken care of with a dab of putty and a little sanding....

Finally, the jump seat on the back side was assembled and installed. It's not too smooth of a fit once it's closed, but it does work, so I'm happy. I'll just display it in the open position!

Finally, the jump seat on the back side was assembled and installed. It's not too smooth of a fit once it's closed, but it does work, so I'm happy. I'll just display it in the open position!
- Custom Mike
- Posts : 273
Join date : 2015-01-26
Age : 60
Location : North Carolina
Re: 1965 Chevy Pickup & Hemi Hydro combo
Wed Jan 28, 2015 4:17 am
I cleaned up the oil filter and starter from the original engine, they'll get painted and installed on the new engine soon!

Since this engine doesn't have a fuel pump (Neither did the old one), I made a very crude electric fuel pump from some sprue and strip styrene...

Not the prettiest thing I've ever made, but it'll do for this one, it's gonna be buried behind the engine anyhow!

While I was doing all that, I grabbed the fuel tank and drilled a hole in it for the fuel line.
Since this engine doesn't have a fuel pump (Neither did the old one), I made a very crude electric fuel pump from some sprue and strip styrene...
Not the prettiest thing I've ever made, but it'll do for this one, it's gonna be buried behind the engine anyhow!
While I was doing all that, I grabbed the fuel tank and drilled a hole in it for the fuel line.
Permissions in this forum:
You cannot reply to topics in this forum|
|
|