
Page 4 of 5 •  1, 2, 3, 4, 5
 KitbashAdmin
- Posts : 276
Join date : 2015-01-25
Age : 54
Location : Georgia 
 Re: the Leviathan
Tue Nov 24, 2015 12:38 am
thanks guys
gonna mess a bit with some engine parts today
well atleast the making of some engine parts lol
first i grab 4 dominators out of the parts box

you will see what happens to them in a few minutes. first i will need something to mount them to.
lets make the top plate for a tunnel ram
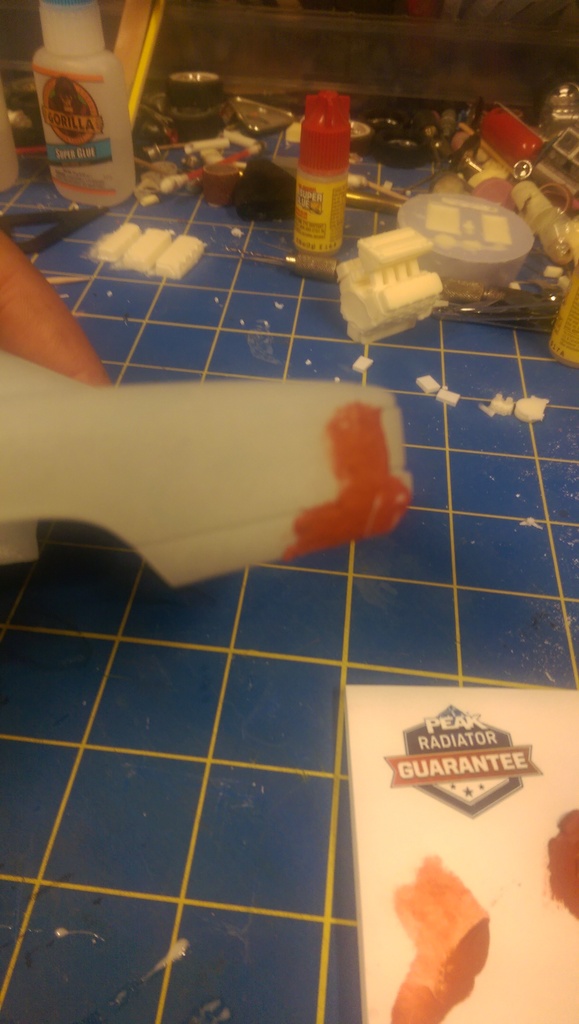
take some styrene and sand it to the shape of the plenum
the test block i am using for mock ups, will tweak it up and cast it in resin when done tweaking

ok now using scrap styrene i make the upper plenum plate base

damn i hate white styrene but i need to keep this bare plastic so the glue bonds well during the building process
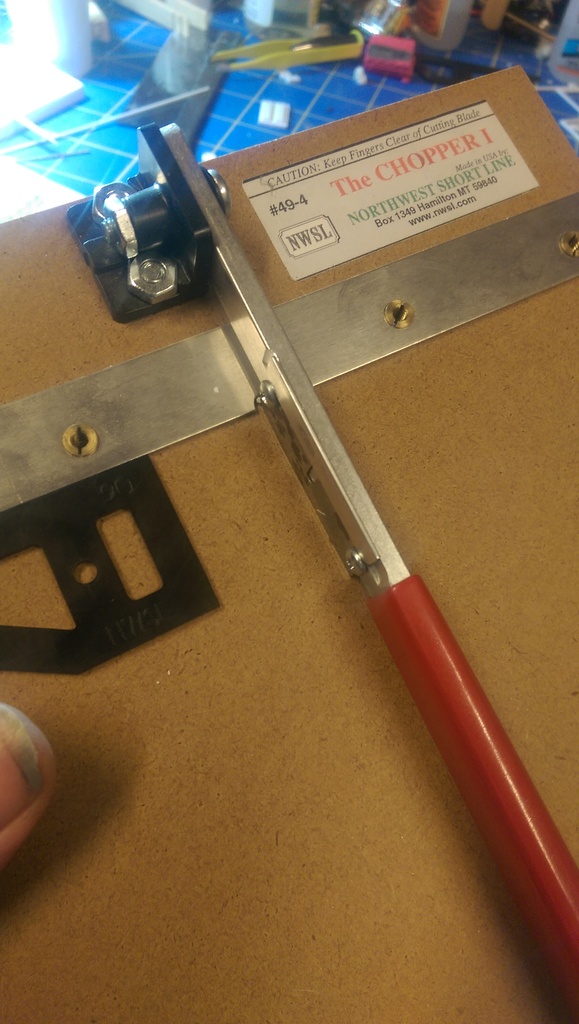
out comes the chopper again, this time to trim some runners for the tunnel ram

i cut 4 pieces of square styrene

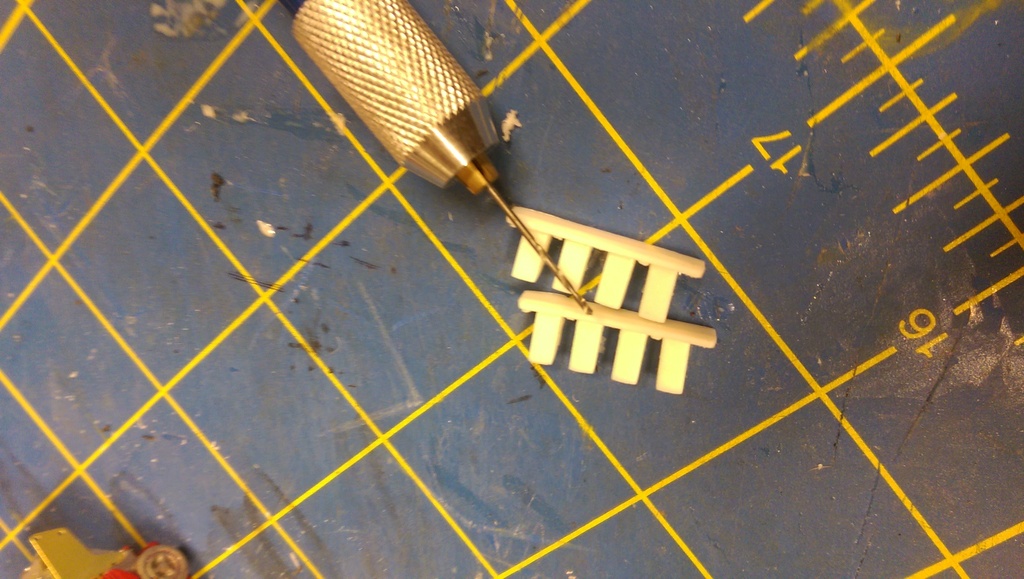
i mark out about where i want the runners on the mounting plate, i made 2 plates even though i am only using one, once i get it the way i want i will cast them in resin to get an exact pair

using some liquid cement i bond the runners to the mounting plate

i get the other 3 in place and angle them just a touch

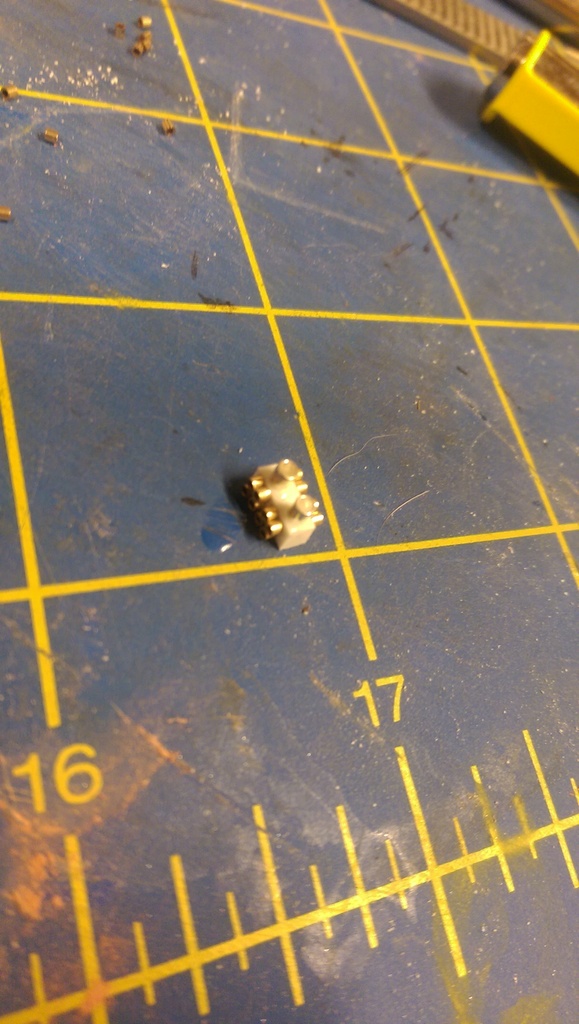
now while that dries for a bit i am gonna make a fuel distribution block for both the fuel and nitrous system

bit of scrap square rod and some crimp beads
and some patience....must be gettin old, eyes are not so fond of the small stuff lol

2 larger feed line fittings on the backside of the block
back to the dominators

yup, chopper time

i know its not technically the same but for this scale it will work for me
upper plenum plate and 2 pair of split carbs, it took 2 carbs to make each pair as i cut just past the center line on each then sanded them to get the final shape.


now that i know they will fit i can detail the upper plate a bit
and get them all into mold rubber so i can play with em again in a day or so ( prolly thurs )

tis all for now, cya when i can
gonna mess a bit with some engine parts today
well atleast the making of some engine parts lol
first i grab 4 dominators out of the parts box
you will see what happens to them in a few minutes. first i will need something to mount them to.
lets make the top plate for a tunnel ram
take some styrene and sand it to the shape of the plenum
the test block i am using for mock ups, will tweak it up and cast it in resin when done tweaking
ok now using scrap styrene i make the upper plenum plate base
damn i hate white styrene but i need to keep this bare plastic so the glue bonds well during the building process
out comes the chopper again, this time to trim some runners for the tunnel ram
i cut 4 pieces of square styrene
i mark out about where i want the runners on the mounting plate, i made 2 plates even though i am only using one, once i get it the way i want i will cast them in resin to get an exact pair
using some liquid cement i bond the runners to the mounting plate
i get the other 3 in place and angle them just a touch
now while that dries for a bit i am gonna make a fuel distribution block for both the fuel and nitrous system
bit of scrap square rod and some crimp beads
and some patience....must be gettin old, eyes are not so fond of the small stuff lol
2 larger feed line fittings on the backside of the block
back to the dominators
yup, chopper time
i know its not technically the same but for this scale it will work for me
upper plenum plate and 2 pair of split carbs, it took 2 carbs to make each pair as i cut just past the center line on each then sanded them to get the final shape.
now that i know they will fit i can detail the upper plate a bit
and get them all into mold rubber so i can play with em again in a day or so ( prolly thurs )
tis all for now, cya when i can
- KitbashAdmin
- Posts : 276
Join date : 2015-01-25
Age : 54
Location : Georgia
Re: the Leviathan
Thu Nov 26, 2015 12:10 pm
happy turkey day guys
bit more time in the hobby room this morning
looking at the big block i am using i went on a search for an oil pan to fit it

might be a bit of a problem since the biggest one i can find right now is a bit too small....

only one answer for it..gotta make one
out comes the styrene again
i cut a piece as big as the pan gasket lip

then its off to the chopper again
i find some rectangular stock i think i can make work

all i have to do is bond them together to make one larger rectangle
first in pairs

then into a whole

sand the edges flush and grab an extra thinner piece of stock to be the front seal area

now, aside from having to sand the front seal area down a bit, the pan is the size i want it

once sanded it looks decent enough

now i will add bolt detail to it and get that into mold rubber
cya soon with another update
bit more time in the hobby room this morning
looking at the big block i am using i went on a search for an oil pan to fit it
might be a bit of a problem since the biggest one i can find right now is a bit too small....
only one answer for it..gotta make one
out comes the styrene again
i cut a piece as big as the pan gasket lip
then its off to the chopper again
i find some rectangular stock i think i can make work
all i have to do is bond them together to make one larger rectangle
first in pairs
then into a whole
sand the edges flush and grab an extra thinner piece of stock to be the front seal area
now, aside from having to sand the front seal area down a bit, the pan is the size i want it
once sanded it looks decent enough
now i will add bolt detail to it and get that into mold rubber
cya soon with another update
 fletch
- Posts : 250
Join date : 2015-01-25
Age : 53
Location : Maryland
Re: the Leviathan
Thu Nov 26, 2015 1:37 pm
Wow, that is pretty cool. I wouldn't have thought to do that.
 Rhodes
- Posts : 55
Join date : 2015-01-26
Age : 59
Location : Conneautville, PA
Re: the Leviathan
Mon Nov 30, 2015 12:19 am
nice pan, man 
- KitbashAdmin
- Posts : 276
Join date : 2015-01-25
Age : 54
Location : Georgia
Re: the Leviathan
Thu Dec 17, 2015 1:45 pm
thanks guys, been a minute since i posted, mainly because my laptop was sent back again to texas to have acer do the repair they never did the first or second time, laptops back and boxed up to go back yet again ( problem still not fixed ) so i dug out my old standby lappy so i could atleast get a post up
i left off posting after i made the oil pan, now that is cast in resin
i assembled a prototype for the first few mock ups

looks like it will be a good fit to me

once the carbs are on it is gonna fill out the hood scoop pretty well from this angle

seams between the bumpers and the body are a bit wide for my liking

out comes the 2 part spot putty
gonna take a bit of file work and sanding to get it the way i want but it will be worth it

time to add the beginning of a cage to the framework

start with the basic front roof bends

the test fit

start with the angle back for the a pillars

tweak and test fit, tweak and test fit

to get this mounted on the frame, i need something close to the height of the roofline, one of my paint bottles looks like it will be close enough

touch of liquid cement and set it aside

same drill for the rear hoop

after they set, its time for a test fit

not bad with very little tweaking
i join the 2 hoops together with 2 roof rails and then add 2 of the main side rails to stabilize everything

anyone trying this, remember this is trial and error to get the sizes right, always cut a bit longer than you think you need and sand down the end till it fits the way you want it.
2 more cross braces added

and a rear bar so i will have something to attach the rear sections to later

constant test fitting is the key

i set that aside for a bit and do some prep work on the engine
this will have custom headers on it made from 2mm solder

out comes the 2mm drill bit and we drill some holes

resin engine is heading to the paint booth

engine mount plate is a photo etch unit from dirtmodeler.com, engine is dull aluminum, electric water pump is cardinal red and heads are bright aluminum

valve covers got a coat of gloss black then a shot of alclad

intake runners getting some drill treatment before paint to hold the 2 NOS injectors per runner
found some decals in the parts bin

valve covers on

they needed something on them so they got some comp cams decals lol

building up the block

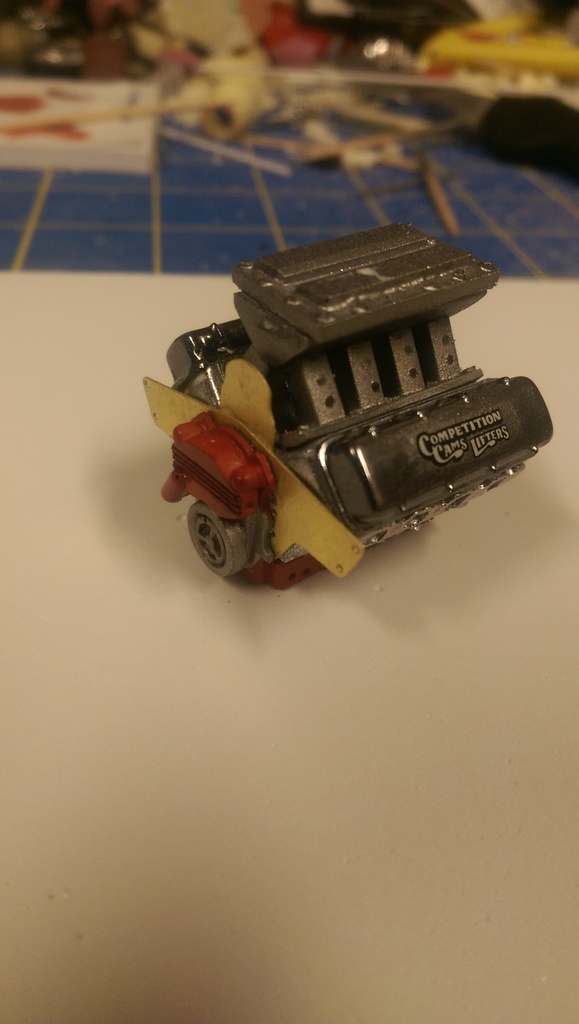
nos distribution block, painted brass and installed

one bit i forgot, i am gonna add a crossover pipe to the valve covers, forgot to drill the holes..

fixed it

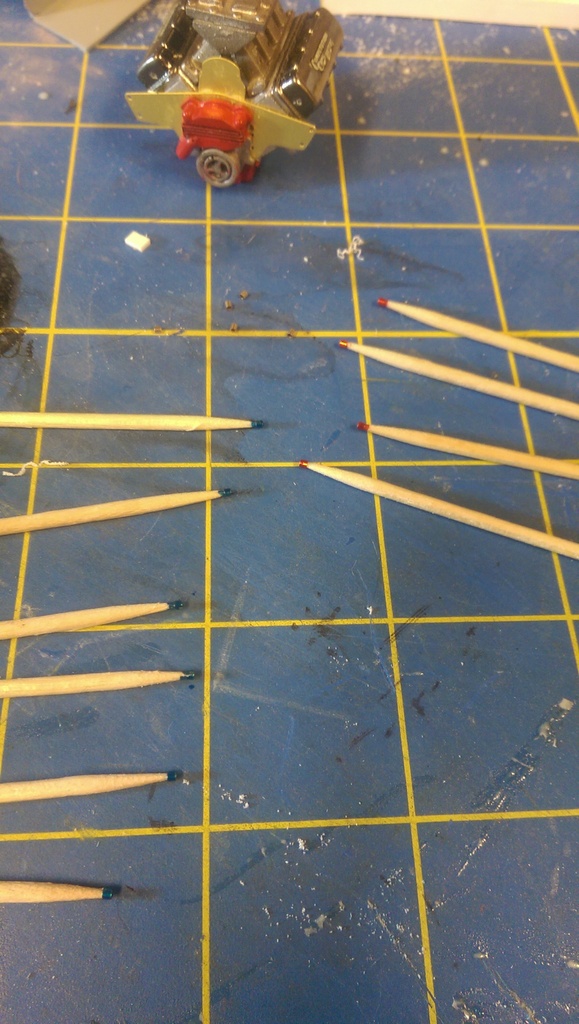
now before i wrap up todays post, i am gonna annodize some fittings for the plumbing later
i grab some tamiya clear blue ( and red also but no pic lol )

and fit some crimp beads on the end of pointed toothpicks

those can dry till i need them
cya in a bit
i left off posting after i made the oil pan, now that is cast in resin
i assembled a prototype for the first few mock ups
looks like it will be a good fit to me
once the carbs are on it is gonna fill out the hood scoop pretty well from this angle
seams between the bumpers and the body are a bit wide for my liking
out comes the 2 part spot putty
gonna take a bit of file work and sanding to get it the way i want but it will be worth it
time to add the beginning of a cage to the framework
start with the basic front roof bends
the test fit
start with the angle back for the a pillars
tweak and test fit, tweak and test fit
to get this mounted on the frame, i need something close to the height of the roofline, one of my paint bottles looks like it will be close enough
touch of liquid cement and set it aside
same drill for the rear hoop
after they set, its time for a test fit
not bad with very little tweaking
i join the 2 hoops together with 2 roof rails and then add 2 of the main side rails to stabilize everything
anyone trying this, remember this is trial and error to get the sizes right, always cut a bit longer than you think you need and sand down the end till it fits the way you want it.
2 more cross braces added
and a rear bar so i will have something to attach the rear sections to later
constant test fitting is the key
i set that aside for a bit and do some prep work on the engine
this will have custom headers on it made from 2mm solder
out comes the 2mm drill bit and we drill some holes
resin engine is heading to the paint booth
engine mount plate is a photo etch unit from dirtmodeler.com, engine is dull aluminum, electric water pump is cardinal red and heads are bright aluminum
valve covers got a coat of gloss black then a shot of alclad
intake runners getting some drill treatment before paint to hold the 2 NOS injectors per runner
found some decals in the parts bin
valve covers on
they needed something on them so they got some comp cams decals lol
building up the block
nos distribution block, painted brass and installed
one bit i forgot, i am gonna add a crossover pipe to the valve covers, forgot to drill the holes..
fixed it
now before i wrap up todays post, i am gonna annodize some fittings for the plumbing later
i grab some tamiya clear blue ( and red also but no pic lol )
and fit some crimp beads on the end of pointed toothpicks
those can dry till i need them
cya in a bit
Page 4 of 5 • 1, 2, 3, 4, 5
Permissions in this forum:
You cannot reply to topics in this forum|
|
|