
 KitbashAdmin
- Posts : 276
Join date : 2015-01-25
Age : 54
Location : Georgia 
 Re: Tamiyas North American P-51D - Kitbash
Sun Jan 25, 2015 2:08 pm
just some quick posts to get things moving again here

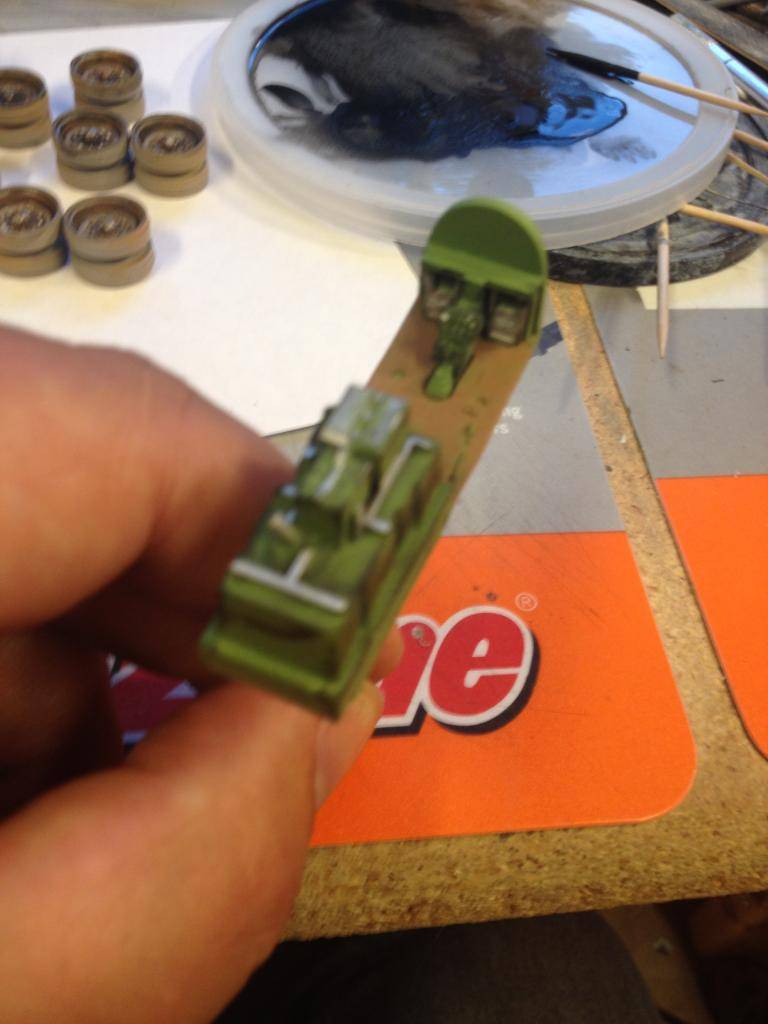
painted up the photo etch side braces for the seats

a touch of super glue to hold them in place
also hit some of the other parts with base colors

landing gear

exhaust manifolds

radiator

and some zinc chromate in the wheel houses
all i have time for right now, will see another from me by the end of the week
- KitbashAdmin
- Posts : 276
Join date : 2015-01-25
Age : 54
Location : Georgia
Re: Tamiyas North American P-51D - Kitbash
Sun Jan 25, 2015 2:08 pm
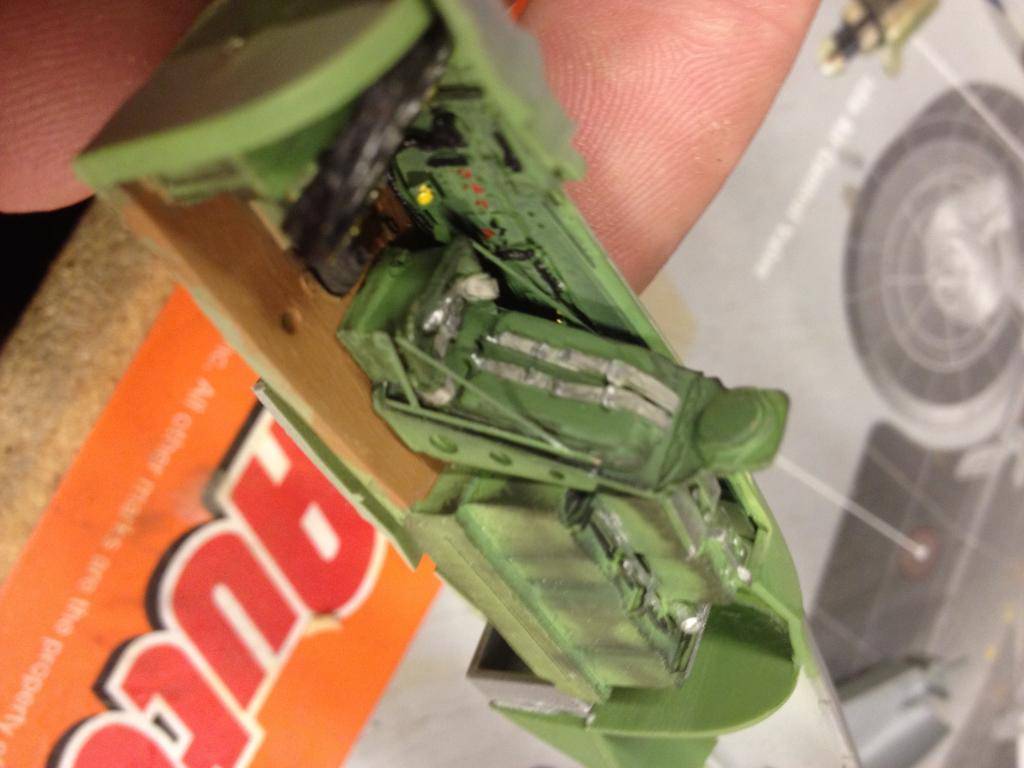
still doing some work on the cockpit here
the dash has the photo etch insert in it but i need to define the gauges a bit

i am gonna see what happens when you drybrush with a toothpick
i put some silver onto the toothpick and rub most of it off

insert the tip into each hole and spin lightly

not too bad, bit of touch up needed but i can live with it
now the hoto etch insert came with the gauge layout printed on white paper, which isnt bad as all i had to do is trim it down and install from the rear with white glue

but i still beed some clear over the gauge faces to make them look a bit better

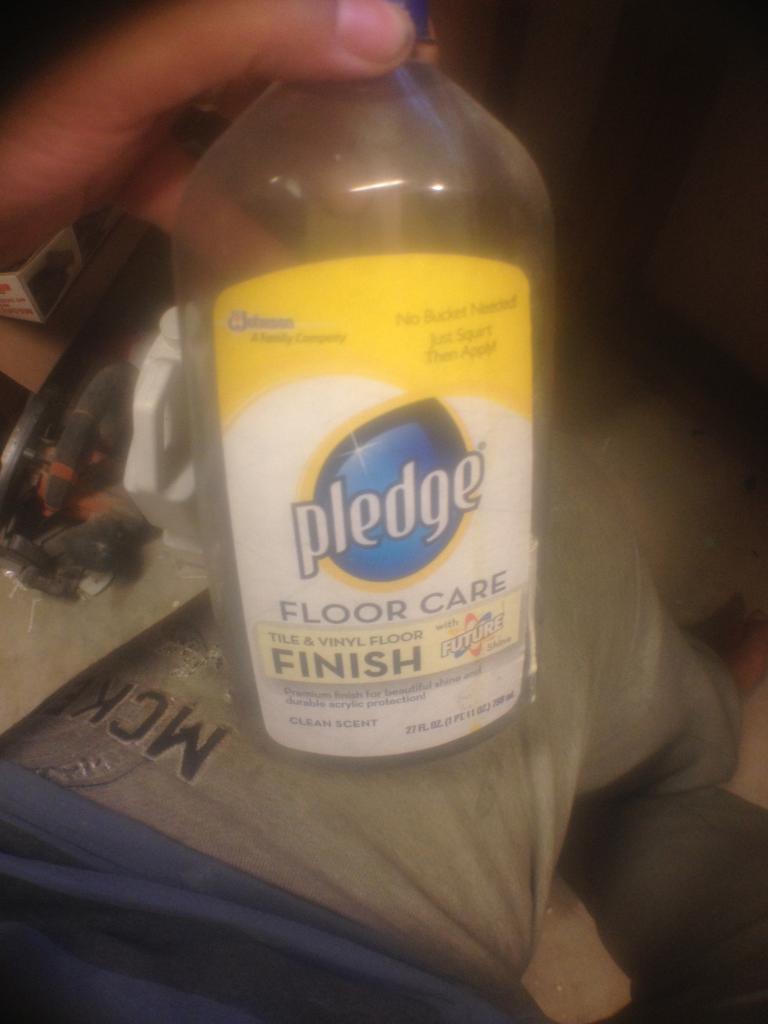
out comes the trusty acrylic floor finish, a small dab into each of the gauge openings and then i set it aside to dry

seat does not look bad but i might change the color of the head rest for a bit of contrast

interior is coming along
i use a toothpick again, this time with black, to help add depth to the corners and creases

test fit shows that things are lining up properly for a change


almost time to button up the interior so i can start on the outside =o)
cya next update
the dash has the photo etch insert in it but i need to define the gauges a bit

i am gonna see what happens when you drybrush with a toothpick
i put some silver onto the toothpick and rub most of it off

insert the tip into each hole and spin lightly

not too bad, bit of touch up needed but i can live with it
now the hoto etch insert came with the gauge layout printed on white paper, which isnt bad as all i had to do is trim it down and install from the rear with white glue

but i still beed some clear over the gauge faces to make them look a bit better

out comes the trusty acrylic floor finish, a small dab into each of the gauge openings and then i set it aside to dry

seat does not look bad but i might change the color of the head rest for a bit of contrast

interior is coming along

i use a toothpick again, this time with black, to help add depth to the corners and creases

test fit shows that things are lining up properly for a change


almost time to button up the interior so i can start on the outside =o)
cya next update
- KitbashAdmin
- Posts : 276
Join date : 2015-01-25
Age : 54
Location : Georgia
Re: Tamiyas North American P-51D - Kitbash
Sun Jan 25, 2015 2:09 pm
thanks guys, just got promoted at work and now i have my own shop
means a few more hours a week but i will still do what i can to get posts up as i build
trying something i have read a few times with the canopy

i am gonna soak them in future and let them dry
supposed to make them look more clear and somehow thinner

now i am gonna set them aside and let them dry under a plastic bowl to keep the dust off
gonna work on the radiator in the meantime

little too much bling in the bare aluminum

hit it with a bit of a black wash to pull out the fins

yea thats better

installed the rear bulkhead
almost time to start closing this thing up

i keep hearing how tamiya kits are so great with the fitting bit

meh.. i must have gotten a monday or friday kit


gonna take a bit of creative glueing to get it close then some filing and sanding to smooth things out
figured since it is a tamiya kit, i would try some of the tamiya extra thin cement to glue er up

started by lining up the top and flowing the glue into the seam

i let the capillary action draw the glue into the joint and use a few clamps to hold things snug until the glue dries

then i start working my way around the body, bit by bit, glue then set, glue then set
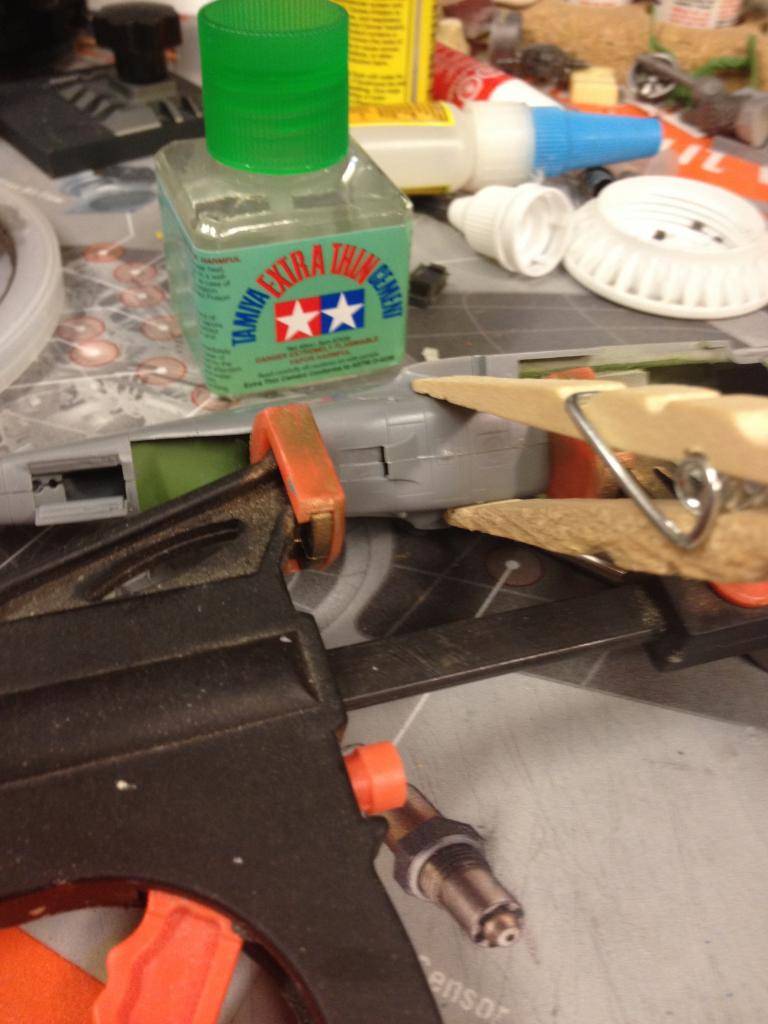


the last for the evening is to add the wheel bay area and get them set for next time

cya as soon as i can
means a few more hours a week but i will still do what i can to get posts up as i build
trying something i have read a few times with the canopy

i am gonna soak them in future and let them dry

supposed to make them look more clear and somehow thinner

now i am gonna set them aside and let them dry under a plastic bowl to keep the dust off
gonna work on the radiator in the meantime

little too much bling in the bare aluminum

hit it with a bit of a black wash to pull out the fins

yea thats better

installed the rear bulkhead

almost time to start closing this thing up

i keep hearing how tamiya kits are so great with the fitting bit

meh.. i must have gotten a monday or friday kit


gonna take a bit of creative glueing to get it close then some filing and sanding to smooth things out
figured since it is a tamiya kit, i would try some of the tamiya extra thin cement to glue er up

started by lining up the top and flowing the glue into the seam

i let the capillary action draw the glue into the joint and use a few clamps to hold things snug until the glue dries

then i start working my way around the body, bit by bit, glue then set, glue then set


the last for the evening is to add the wheel bay area and get them set for next time

cya as soon as i can
- KitbashAdmin
- Posts : 276
Join date : 2015-01-25
Age : 54
Location : Georgia
Re: Tamiyas North American P-51D - Kitbash
Sun Jan 25, 2015 2:09 pm
ok, snuck a bit of time in the hobby room today so its time for an update
after glueing the 2 halves of the fuselage together, there are a few seam lines and other areas i want to fill
out comes my 2 part body filler, applied with a flat tooth pick

keeps the excess to a minimum and keeps cleanup and sanding simple
hit all seams, top and bottom

15 mins later i sand it down ( thats why i love the 2 part fillers =o) )


time to wing it a bit
lower portion of the wings are a bit finicky, took the creative clamp and glue approach to get them to sit how they should

once the bottoms were in place, i attached the wing tops

- KitbashAdmin
- Posts : 276
Join date : 2015-01-25
Age : 54
Location : Georgia
Re: Tamiyas North American P-51D - Kitbash
Sun Jan 25, 2015 2:10 pm
thanks guys
time to look at some of the fitting on the kit
wing fitment is ok on the left wing

but lacking a bit on the right

after a bit of filling with my spot putty and some sanding, its time to close off a few of the larger openings

we dont want to get paint in there and ruining all we have done up till now
hmmm how about some of the paper shop towels.....
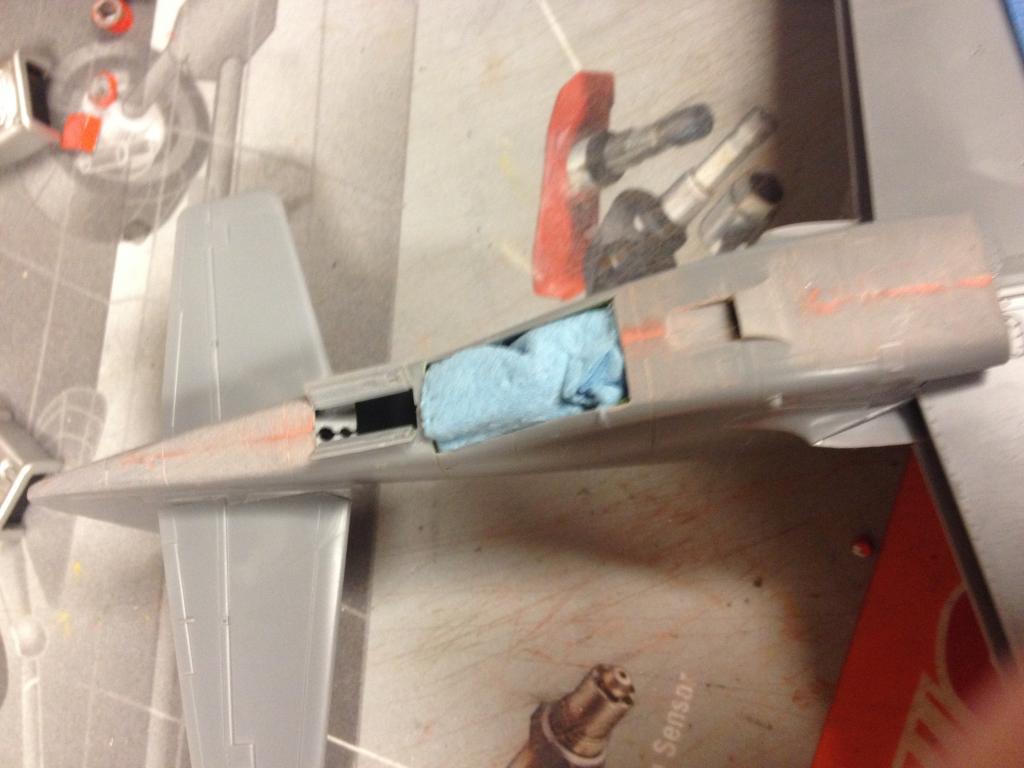
lower fuselage hole filled
now being careful, i pack the cockpit with the same blue shop towels

and then the wheel bays

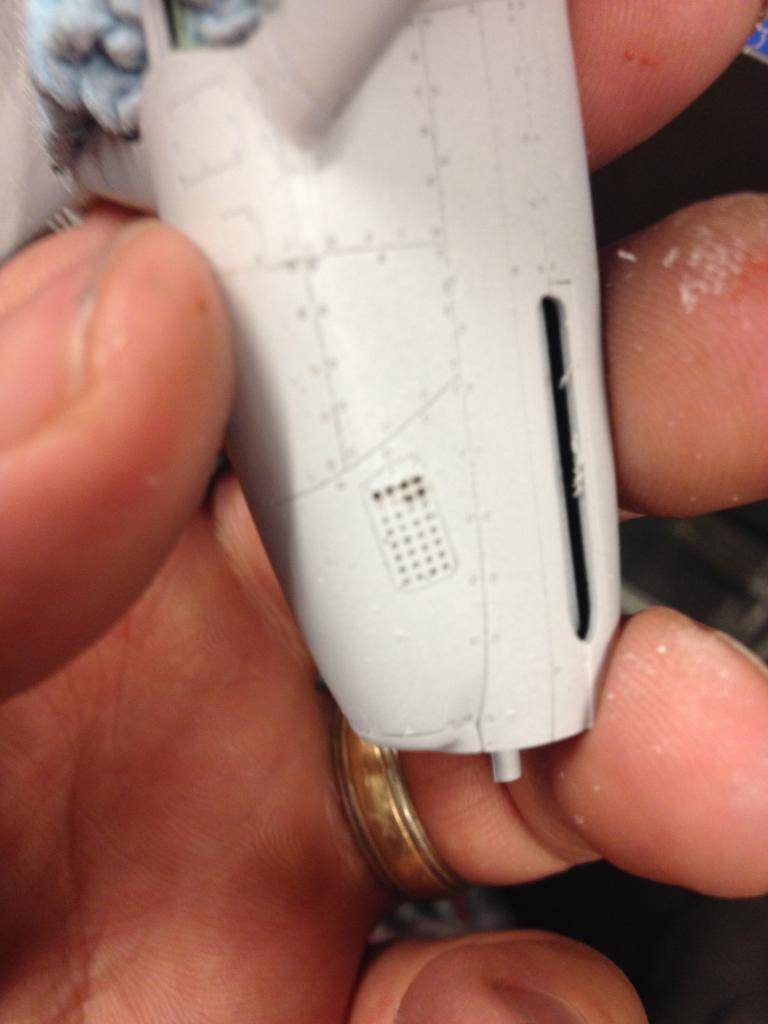
now i have not tried the valejo primers yet but i have heard nothing but good things about them.. so on my last trip to hobby town i picked up a bottle

loaded up the airbrush and primed the fuselage

i will tell you now, while the valejo primer flows well and lays down well enough. i dont like it. after allowing the kit to sit for 3 days i picked it up to go to the next stage and i was not impressed, i used my fingernail lightly on the surface and the primer flaked off way too easily for my liking.
you can see the result in this pic

i then scrubbed it off with a toothbrush and warm water and went to my normal standby for primer

next i decided to take a queue from jeff and open up some vent holes

weapon of choice

32 holes on each side, about 2 mins per hole to drill with the pin vise
there went an hour
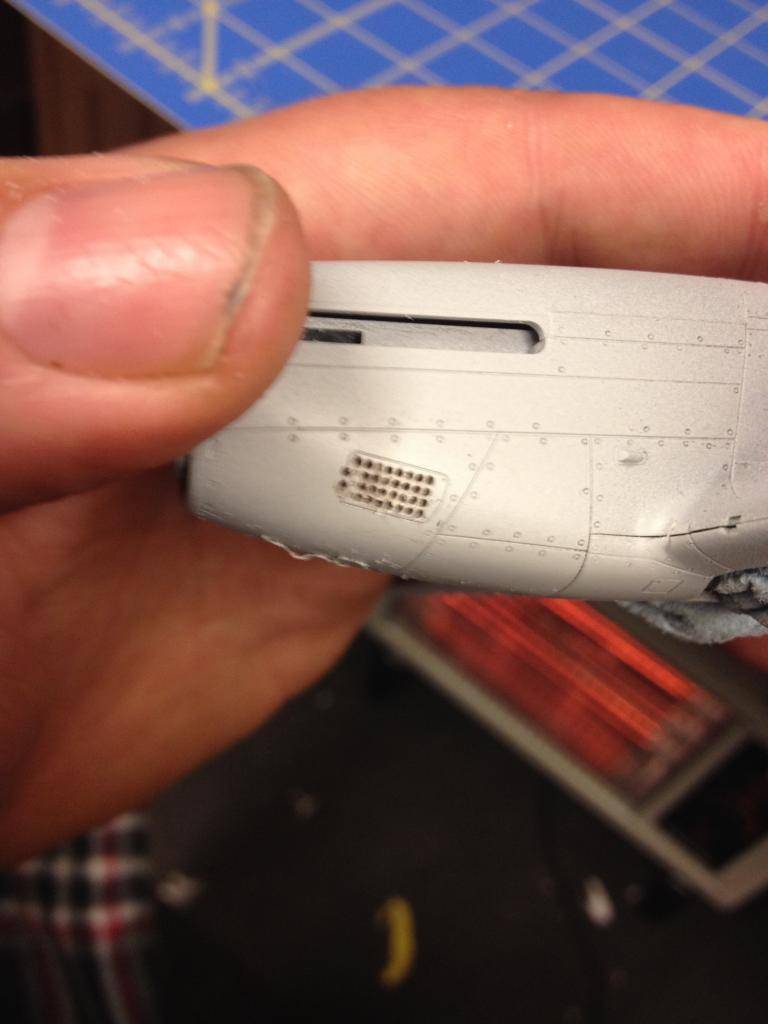
and i have to fill the front row and redrill them to make them right. thats what happens when the eyes bug out from staring too much lol
ok i shall see you in a few days, hopefully i can sort out the vent holes in the next post
time to look at some of the fitting on the kit
wing fitment is ok on the left wing

but lacking a bit on the right

after a bit of filling with my spot putty and some sanding, its time to close off a few of the larger openings

we dont want to get paint in there and ruining all we have done up till now
hmmm how about some of the paper shop towels.....

lower fuselage hole filled
now being careful, i pack the cockpit with the same blue shop towels

and then the wheel bays

now i have not tried the valejo primers yet but i have heard nothing but good things about them.. so on my last trip to hobby town i picked up a bottle

loaded up the airbrush and primed the fuselage

i will tell you now, while the valejo primer flows well and lays down well enough. i dont like it. after allowing the kit to sit for 3 days i picked it up to go to the next stage and i was not impressed, i used my fingernail lightly on the surface and the primer flaked off way too easily for my liking.
you can see the result in this pic

i then scrubbed it off with a toothbrush and warm water and went to my normal standby for primer

next i decided to take a queue from jeff and open up some vent holes

weapon of choice

32 holes on each side, about 2 mins per hole to drill with the pin vise

there went an hour

and i have to fill the front row and redrill them to make them right. thats what happens when the eyes bug out from staring too much lol
ok i shall see you in a few days, hopefully i can sort out the vent holes in the next post
Permissions in this forum:
You cannot reply to topics in this forum|
|
|