
Page 4 of 5 •  1, 2, 3, 4, 5
 fletch
- Posts : 250
Join date : 2015-01-25
Age : 53
Location : Maryland 
 Re: cool fitty 50 olds mild custom
Wed May 25, 2016 2:38 pm
Looking good, Wayne. I get the problem with the engine. 
The molding looks pretty good, I like it a lot.
I still think that you should do the front grill to look like a monster mouth, with "fangs". Not sure how to explain it, I have seen it in the past, I think GHOK did it for one of his.
The molding looks pretty good, I like it a lot.
I still think that you should do the front grill to look like a monster mouth, with "fangs". Not sure how to explain it, I have seen it in the past, I think GHOK did it for one of his.
 KitbashAdmin
- Posts : 276
Join date : 2015-01-25
Age : 54
Location : Georgia
Re: cool fitty 50 olds mild custom
Wed May 25, 2016 2:47 pm
i was toying with that idea and i think i want to keep it cleaner on this one, maybe some wider mesh in the opening so i can see the radiator n stuff when done
- KitbashAdmin
- Posts : 276
Join date : 2015-01-25
Age : 54
Location : Georgia
Re: cool fitty 50 olds mild custom
Sun Jun 12, 2016 10:24 pm
ok bit of bench time this week, been fun fitting it in while i work and we took the weekend to set up a pool
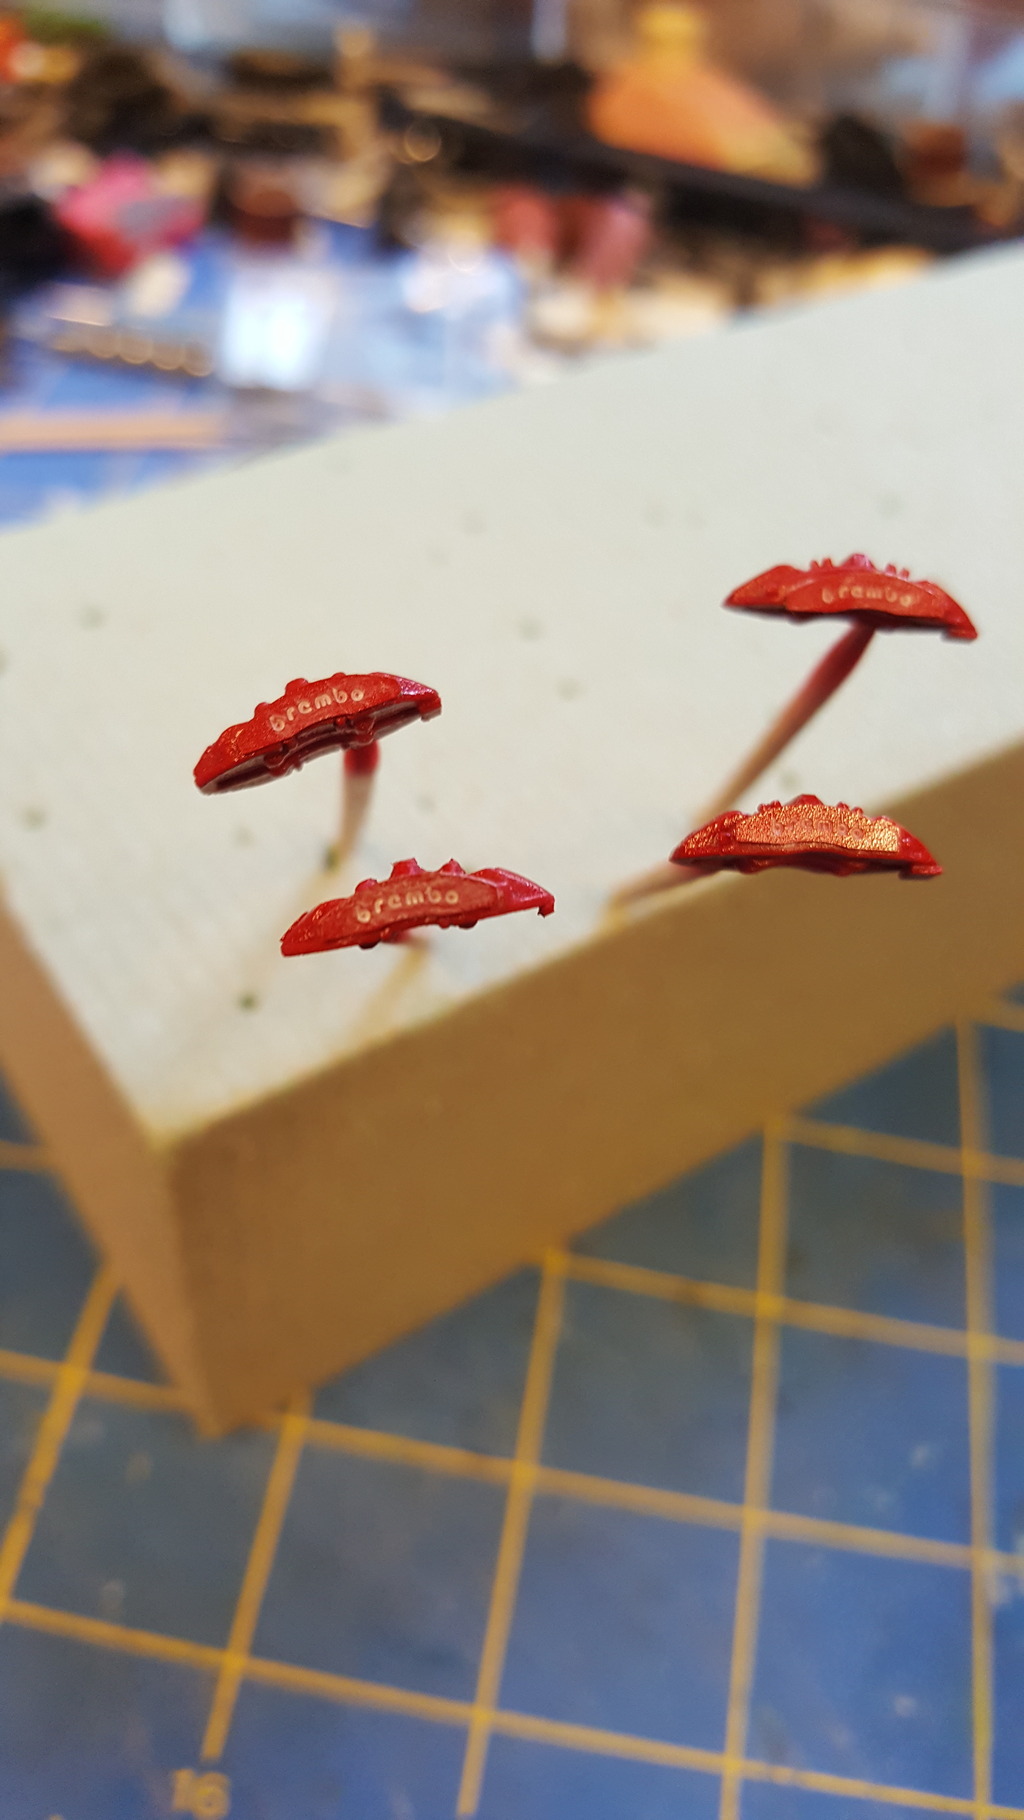
got a few new toys in the mail the other day
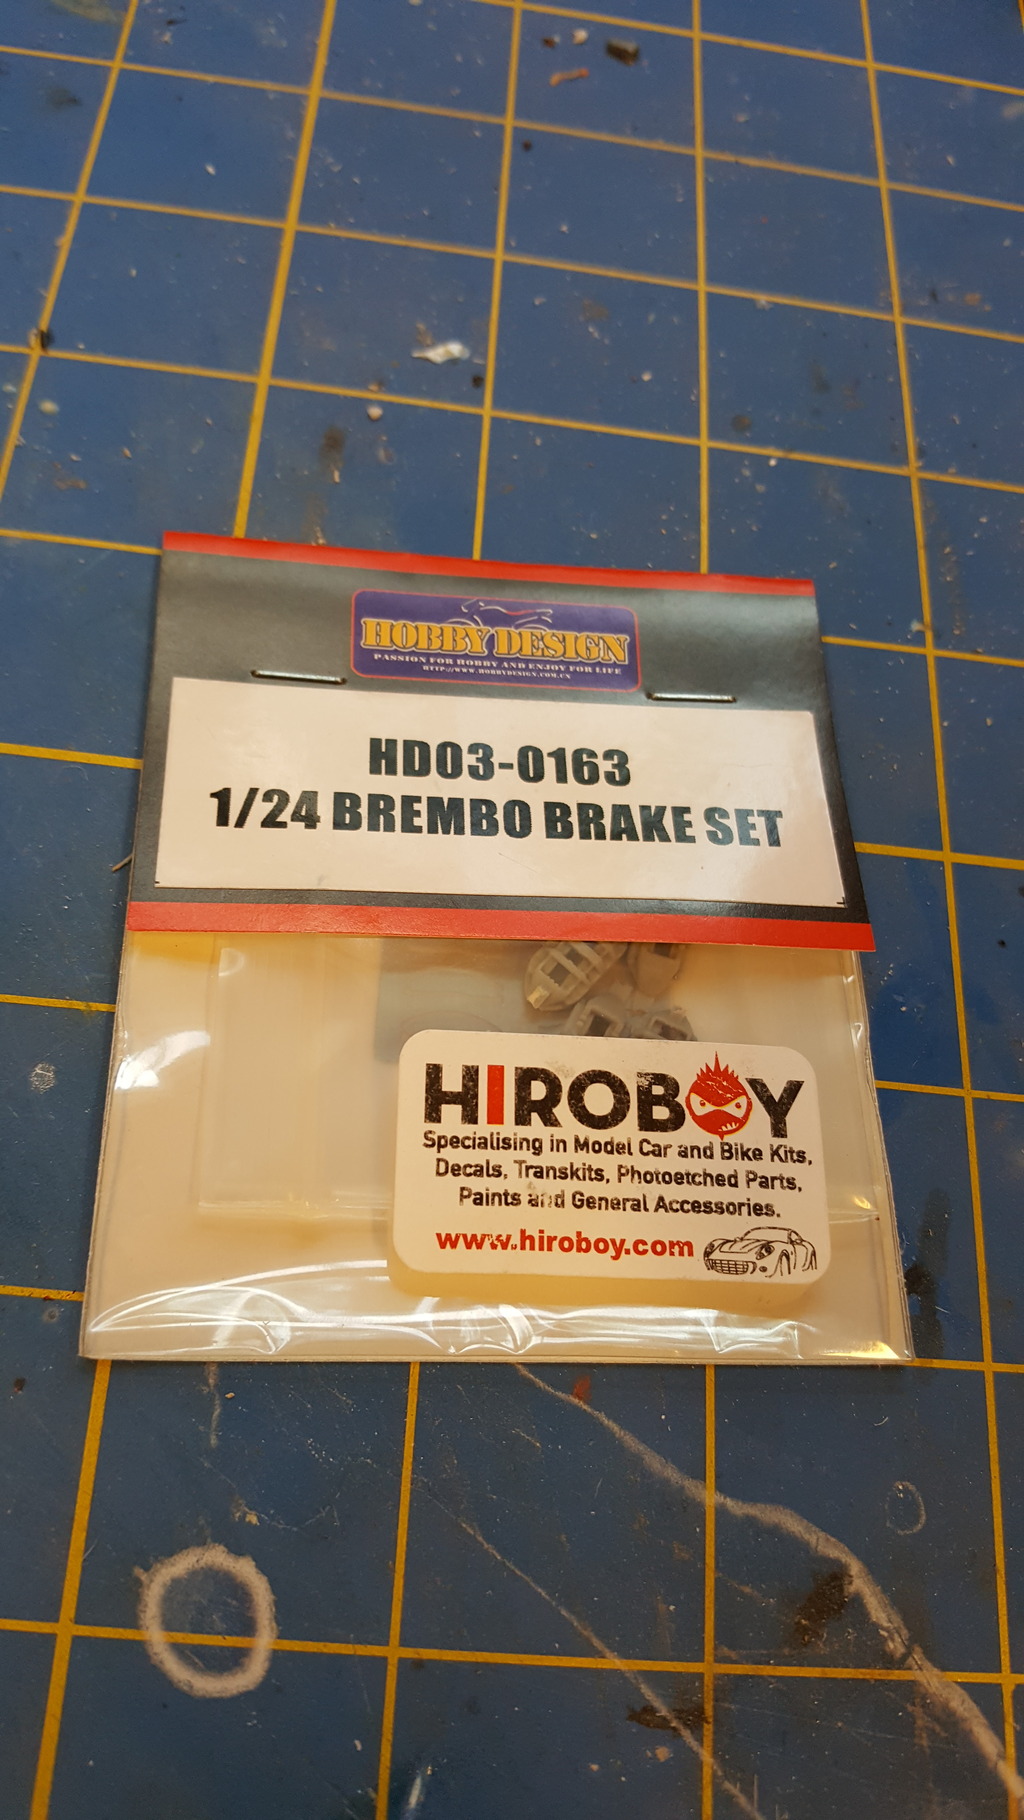
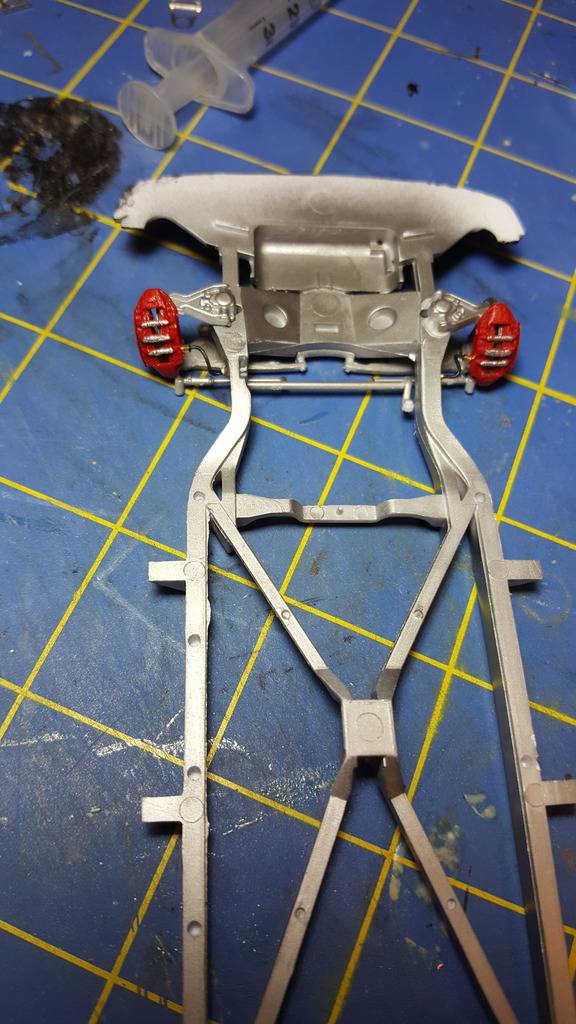
lot of detail for a caliper set
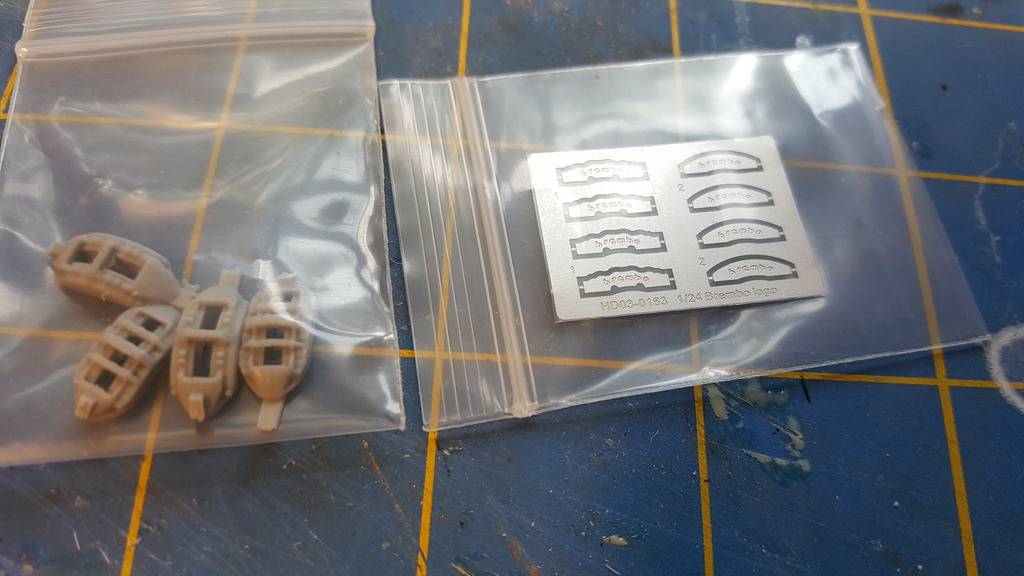
but yanno we always have to add a bit more

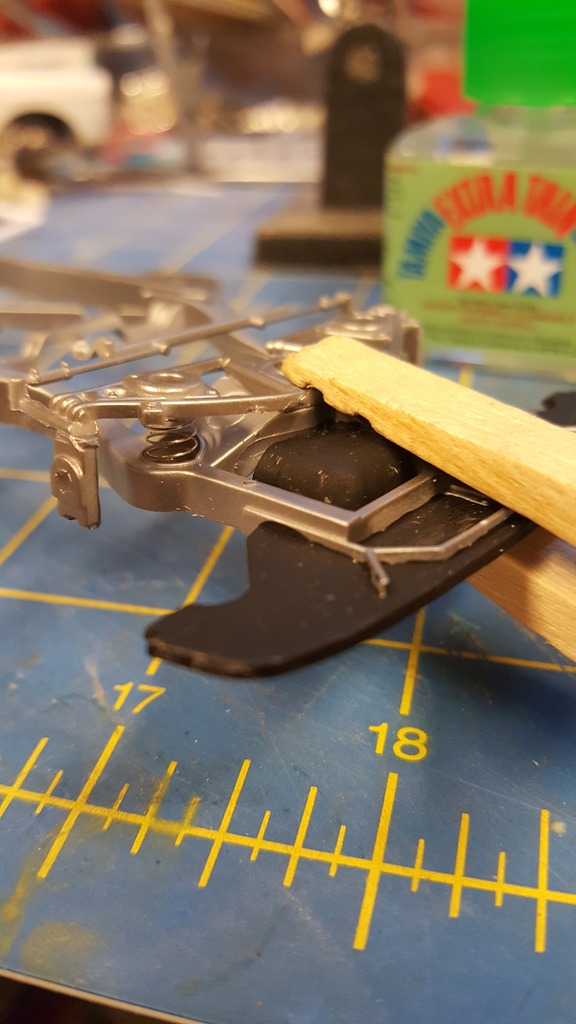
drilled holes for the brake hoses

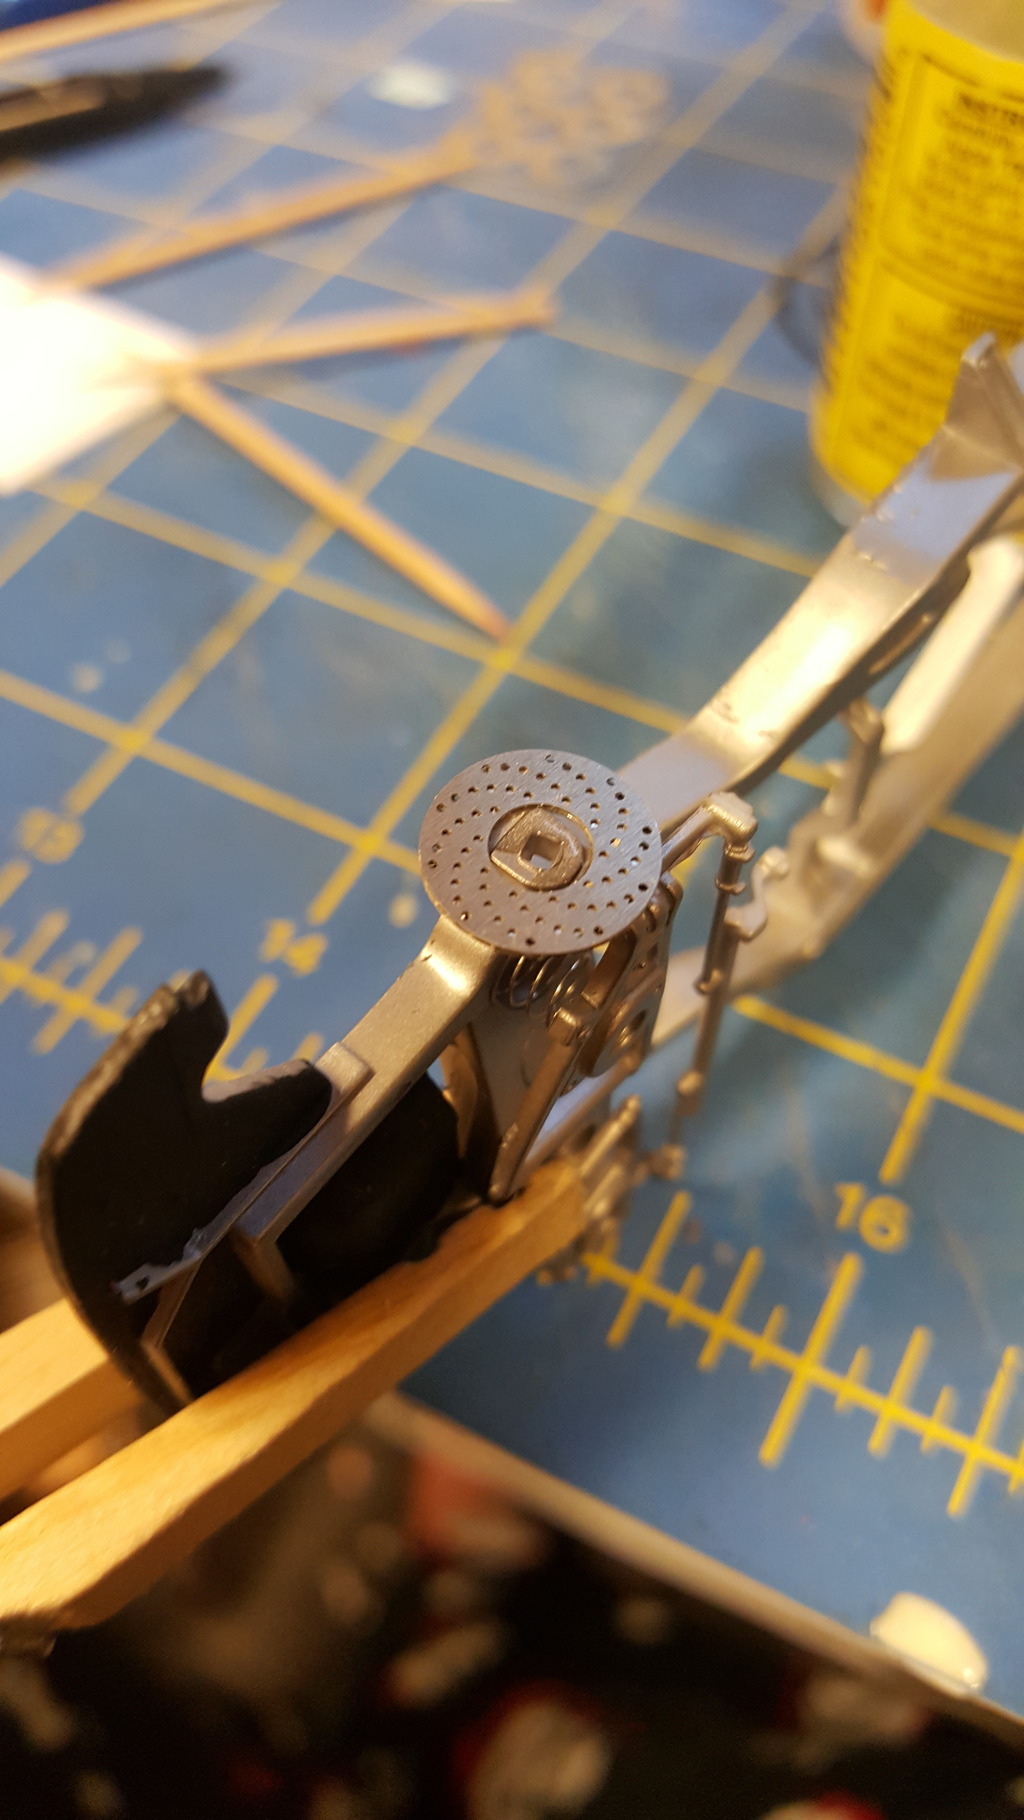
added the front name badge labels
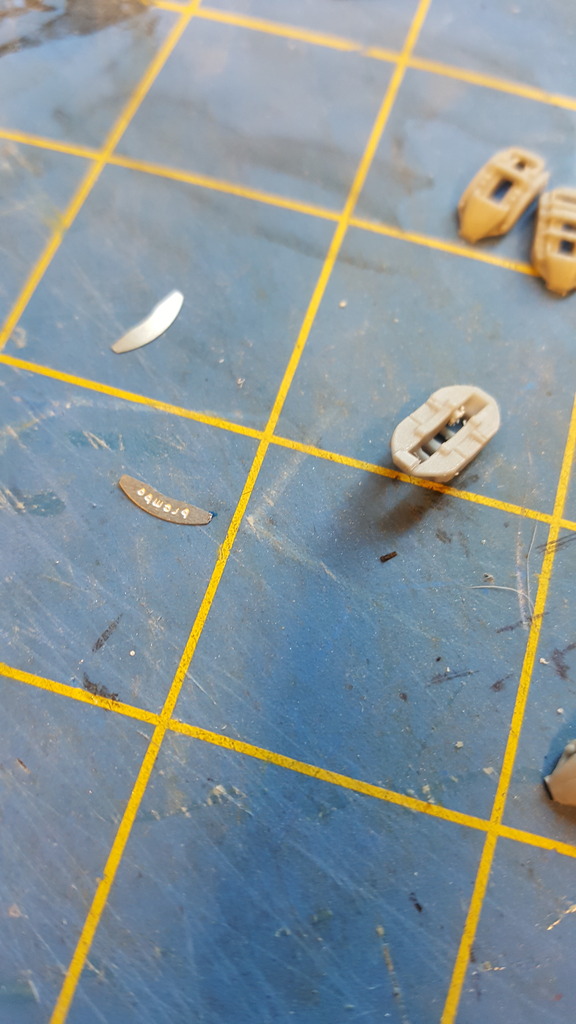
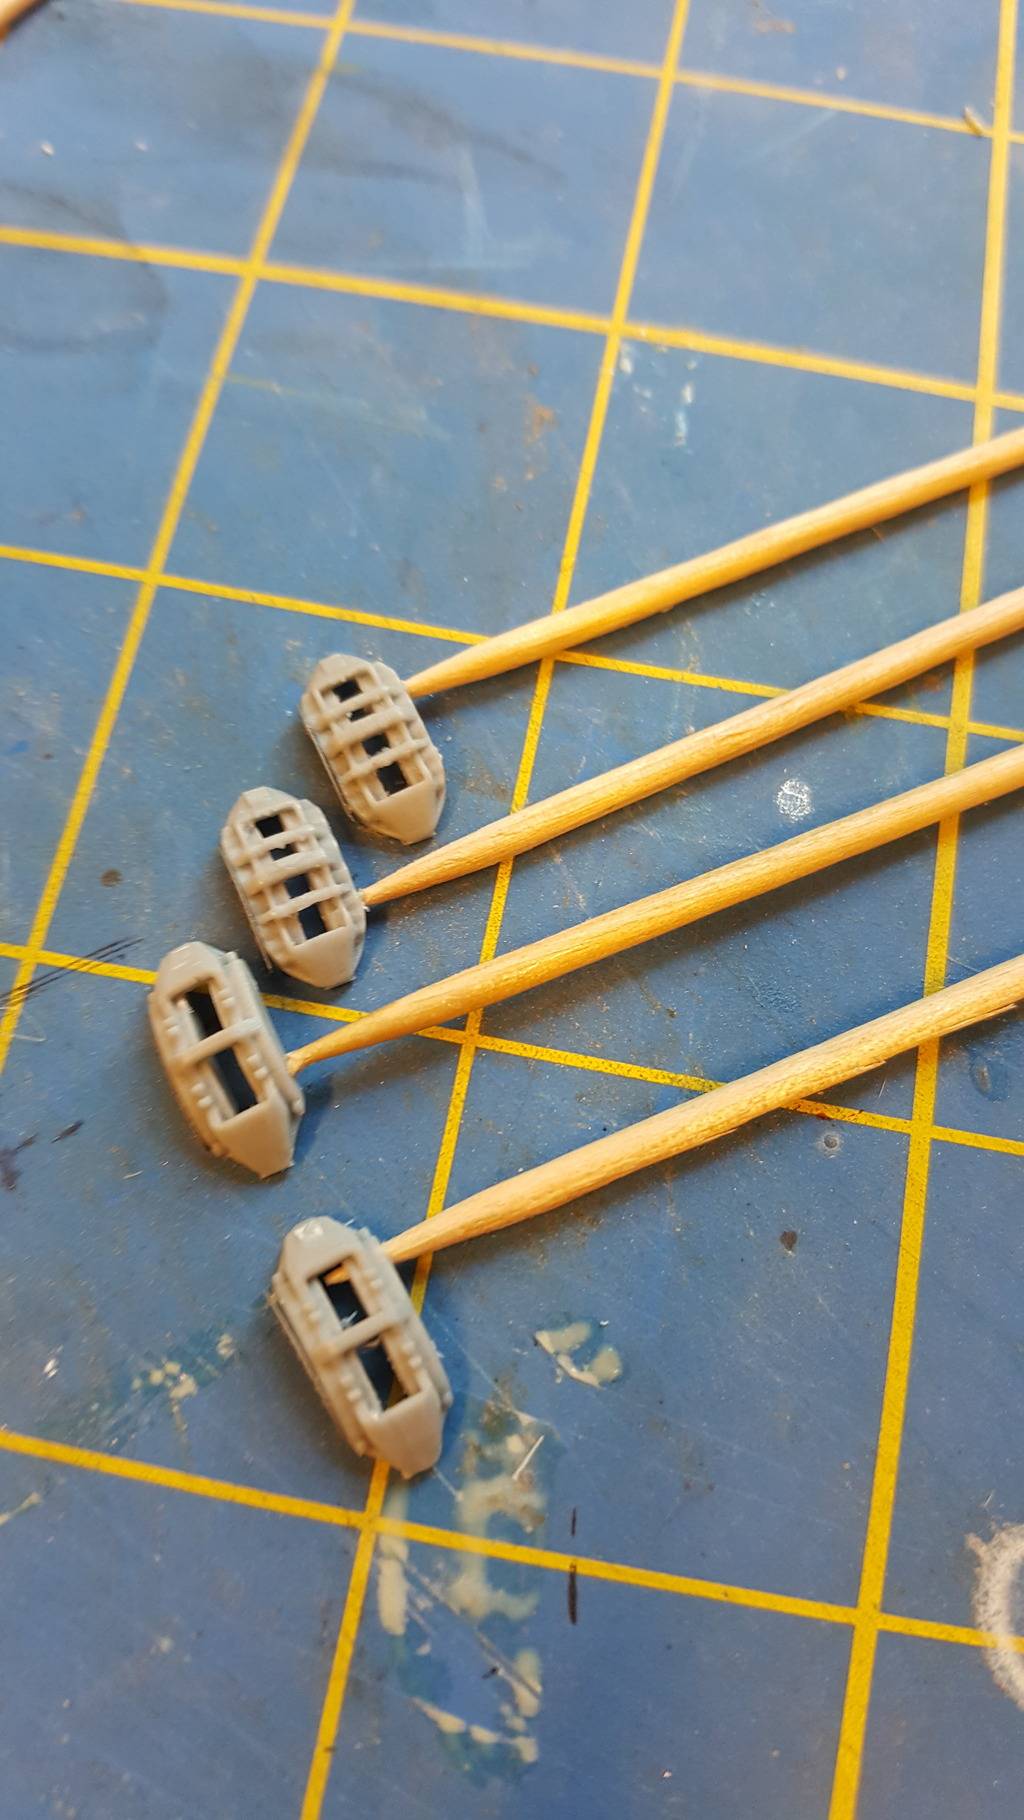
then used the holes i made for the hoses, to mount them up for paint
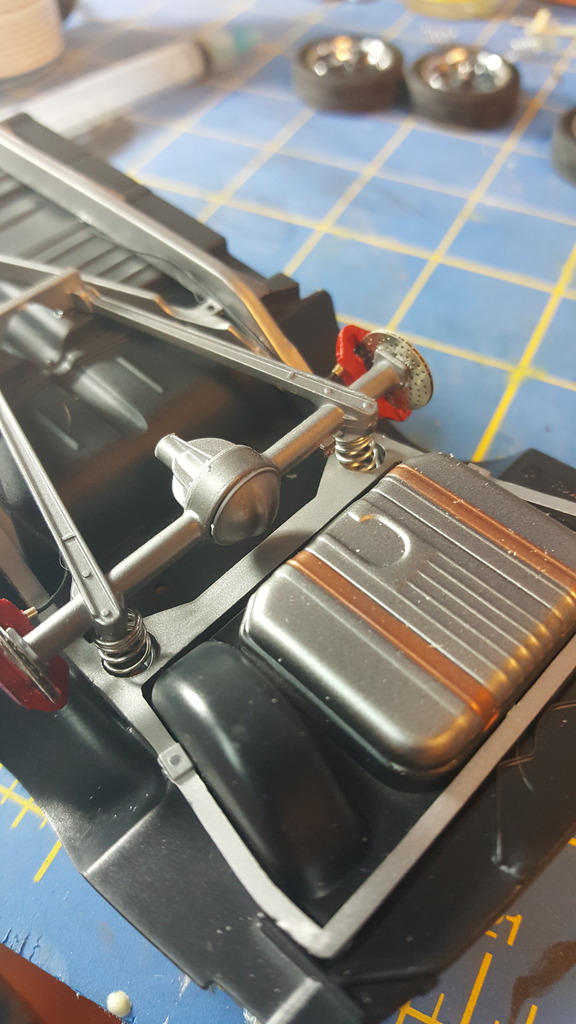
used some tamiya red through the airbrush
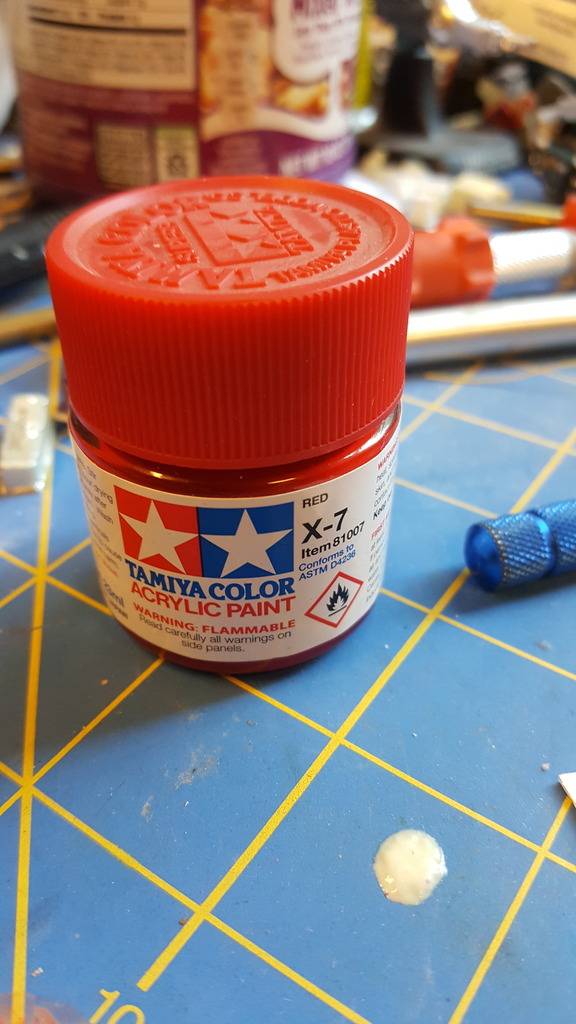
3 light coats look about right to me

then used some acrylic white to flow it into the recessed area on the front
pulled some wire from my wire bucket that will work as brake hoses

out come the crimp beads for the added detail
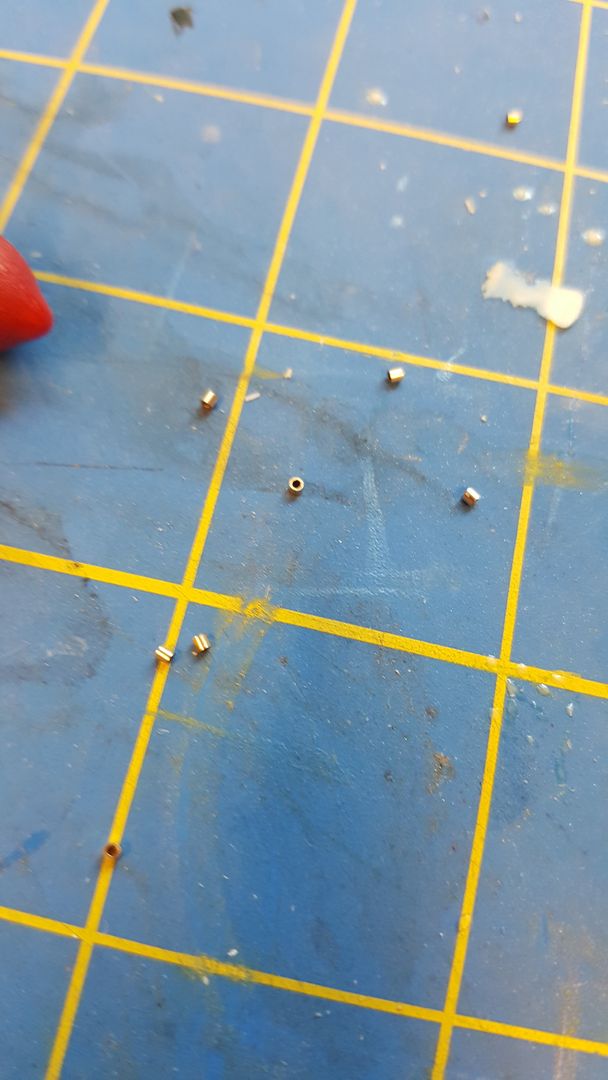
4 pieces of wire cut a bit long
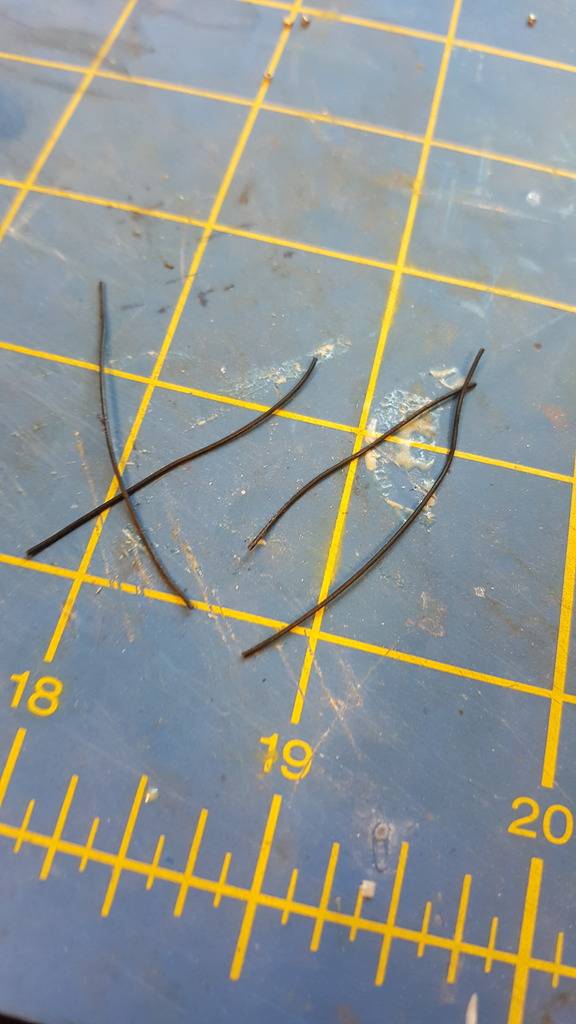
i glue the wire into the calipers first

then slide the crimp bead down the wire and attach it with a bit of thin super glue

not really feeling this engine for this build, might revert back to the original .......

ok now a bit more on the brakes


assembled

just checking, with the trimmed fender wells, original engine now fits again

hate plastic springs, so i collect small ones from anywhere i can get them

glued in place
glued the rotors in place as well with a bit of super glue gel
same on the rear axle

calipers glued in place

on all 4 corners

bright silver base coat applied

will work well for a base for this
3 coats on the lower half, now i will let it set a few days before i mask the top and spray some more
got a few new toys in the mail the other day

lot of detail for a caliper set

but yanno we always have to add a bit more

drilled holes for the brake hoses

added the front name badge labels

then used the holes i made for the hoses, to mount them up for paint

used some tamiya red through the airbrush

3 light coats look about right to me

then used some acrylic white to flow it into the recessed area on the front

pulled some wire from my wire bucket that will work as brake hoses

out come the crimp beads for the added detail

4 pieces of wire cut a bit long

i glue the wire into the calipers first

then slide the crimp bead down the wire and attach it with a bit of thin super glue

not really feeling this engine for this build, might revert back to the original .......

ok now a bit more on the brakes


assembled

just checking, with the trimmed fender wells, original engine now fits again

hate plastic springs, so i collect small ones from anywhere i can get them

glued in place

glued the rotors in place as well with a bit of super glue gel

same on the rear axle

calipers glued in place

on all 4 corners

bright silver base coat applied

will work well for a base for this

3 coats on the lower half, now i will let it set a few days before i mask the top and spray some more

 GHOK
GHOK- Posts : 189
Join date : 2015-07-18
Location : not anywhere, but still here
Re: cool fitty 50 olds mild custom
Mon Jun 13, 2016 9:38 am
Kewl
- KitbashAdmin
- Posts : 276
Join date : 2015-01-25
Age : 54
Location : Georgia
Re: cool fitty 50 olds mild custom
Wed Jul 06, 2016 1:48 am
ok i am a bit annoyed.....
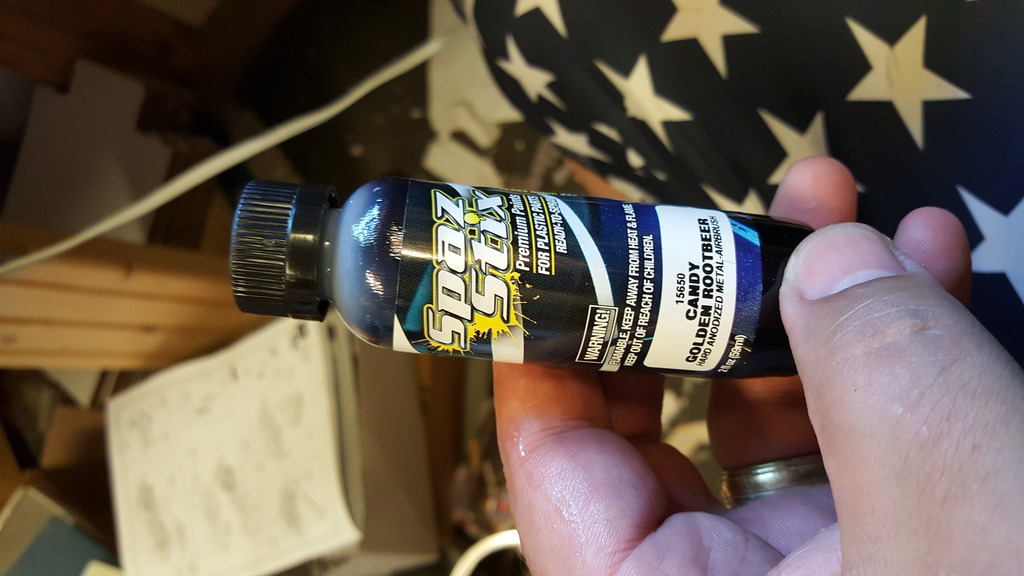
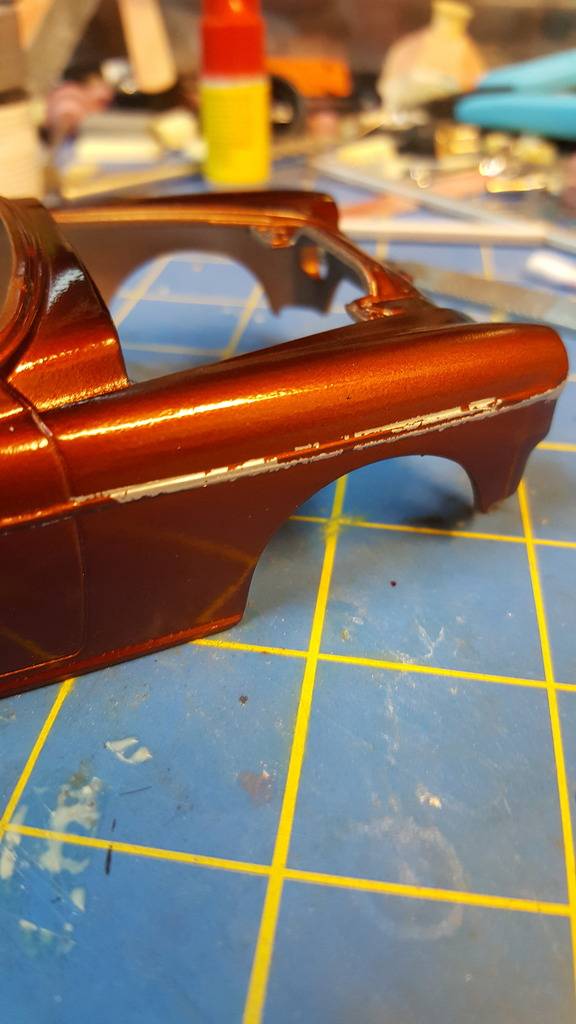
that spazstix paint looks great, awesome color, but fragile as hell
went to mask the roof as i was going off white, almost cream color for the contrast. i use low tack painters tape. lay a bit along the lower roofline ...didnt even burnish it down yet, went to re position it , up comes about half the paint off the body down to the primer...off to the pond it went.
so onto other parts while that takes a bath and gets reshot.
maybe i do some interior while i wait on the body..
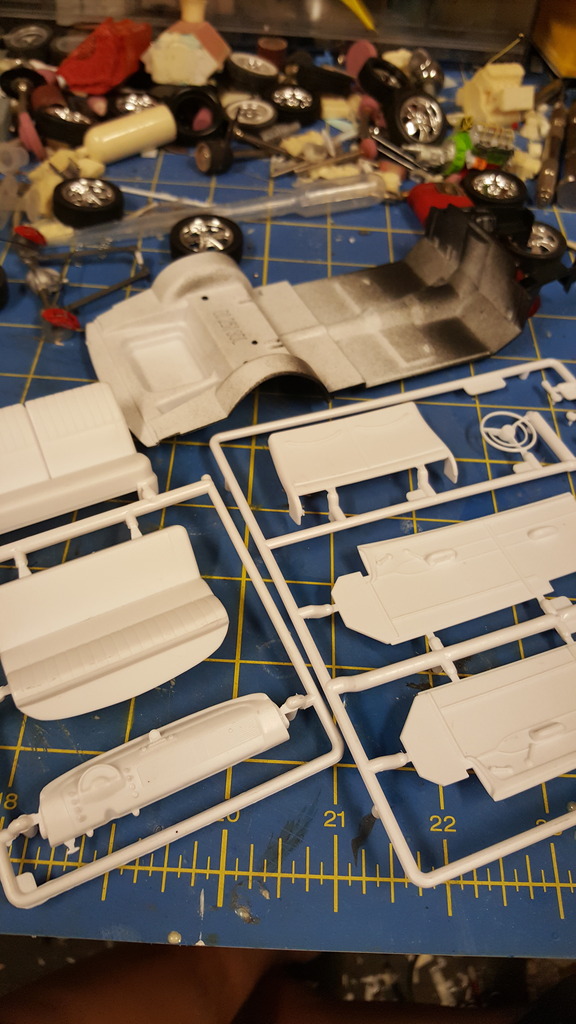
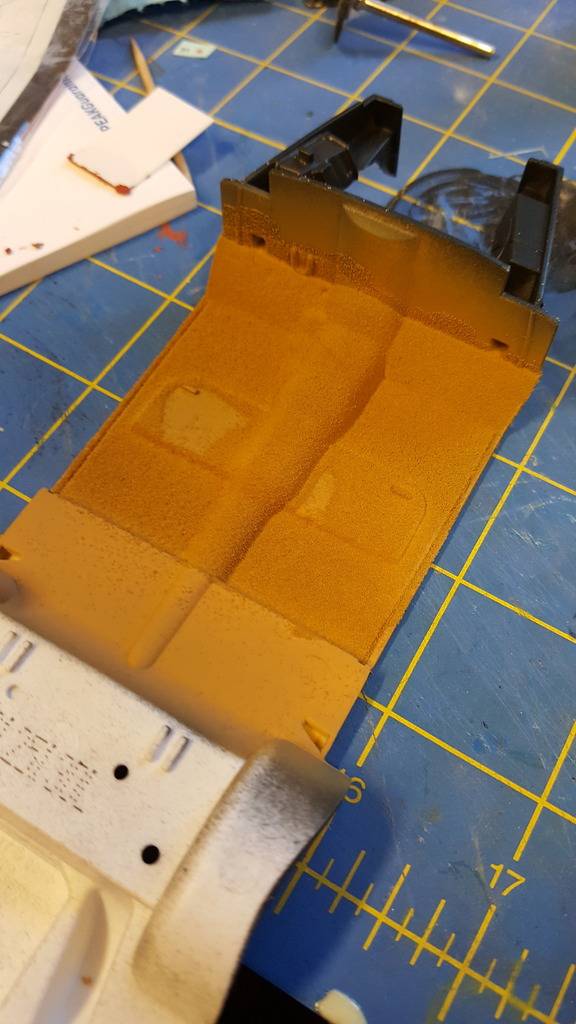
floor pan will be first
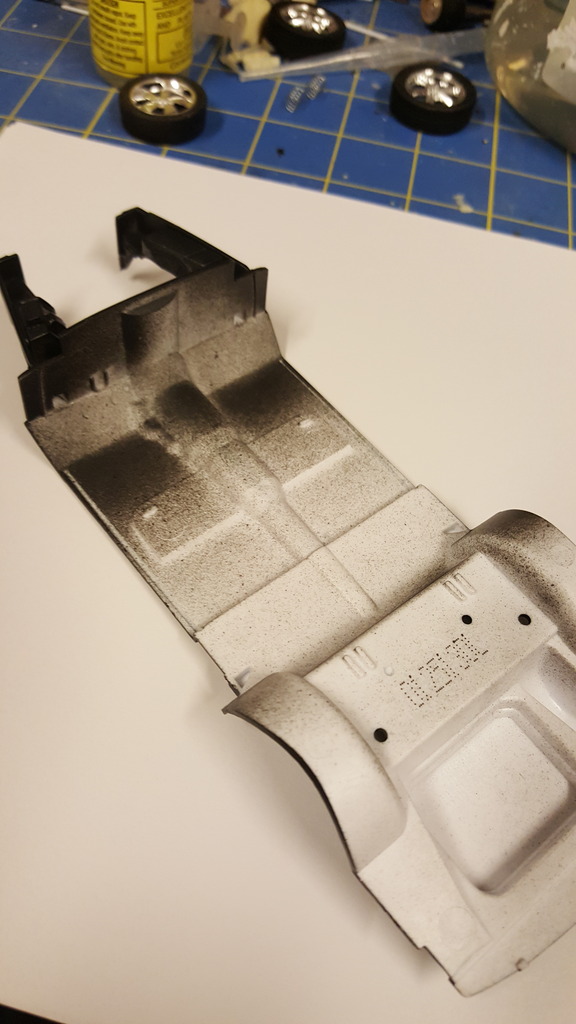
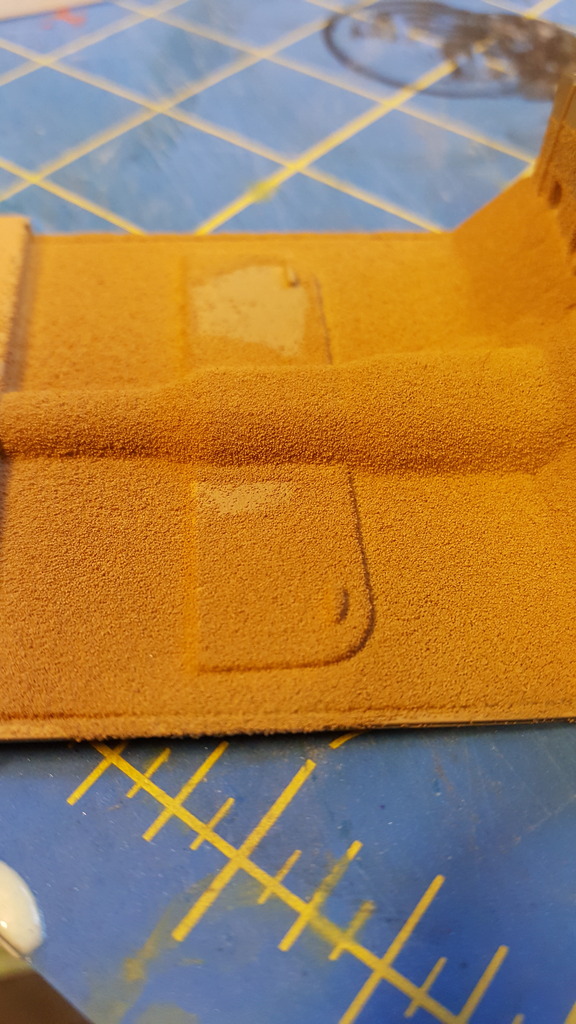
never liked the plastic carpet they mold into the kits. i prefer to make my own so out comes my adhesive of choice

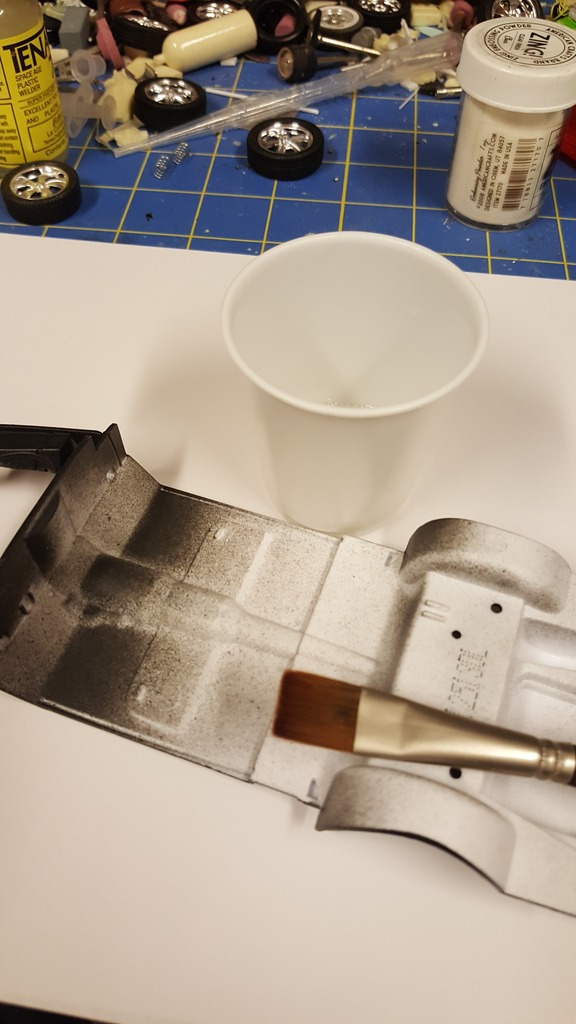
and my embossing powder, gives a better scale finish than the kit pieces

using a wide brush i apply the floor polish evenly everywhere i want to have carpet
nice wet coat, notice i am working over a clean sheet of paper
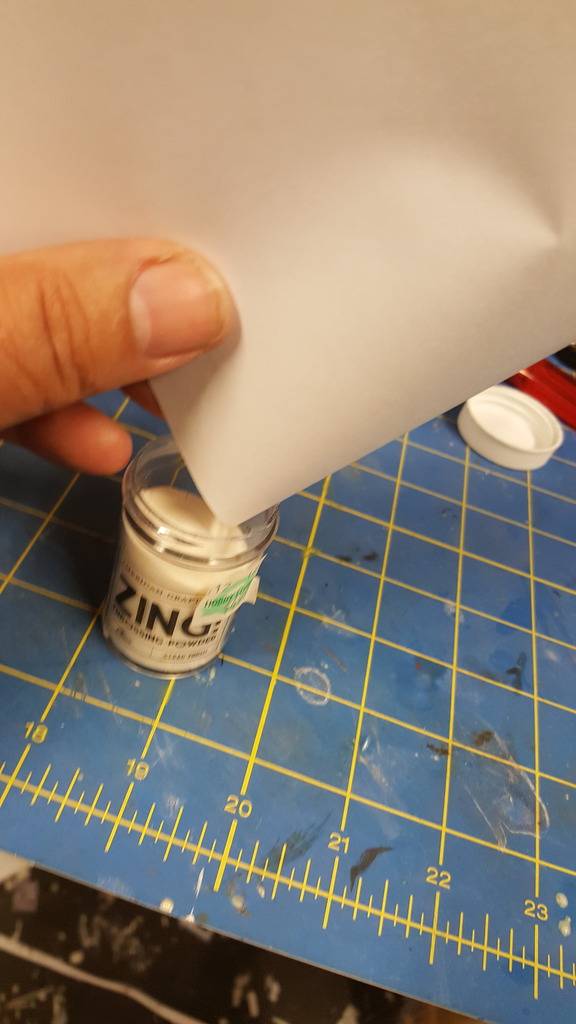
i use a liberal amount of embossing powder and i use my finger tips to lightly push it into the corners so i get even coverage

i let it sit for about 5 minutes and then tip the floor pan upside down to remove the excess powder

then i fold the sheet of paper in half and reclaim the left over embossing powder
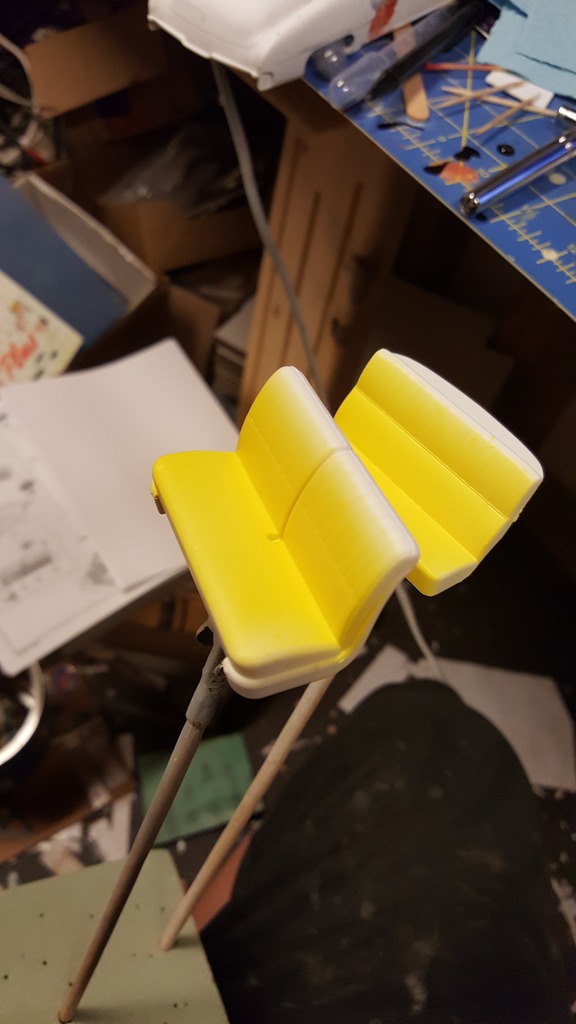
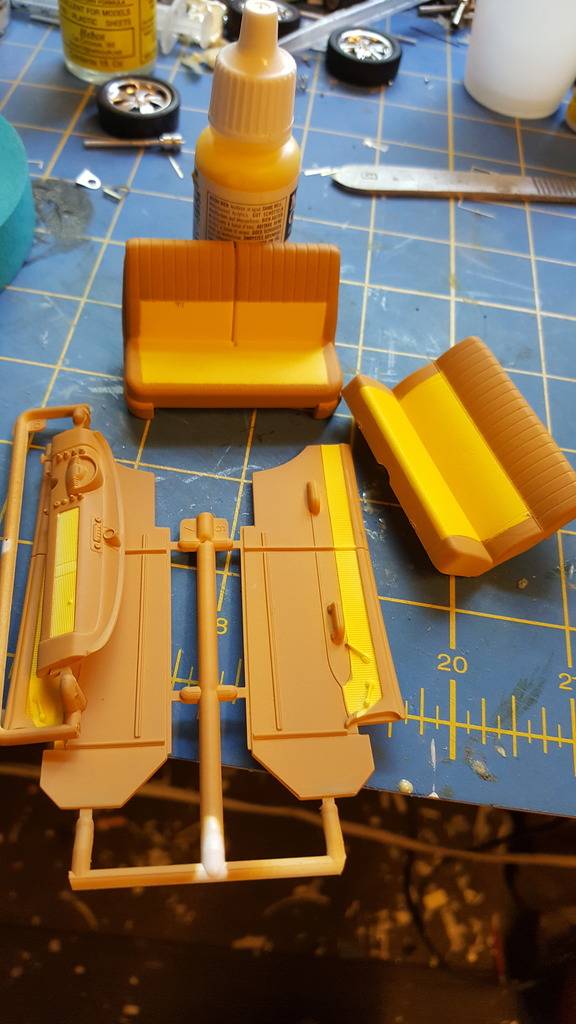
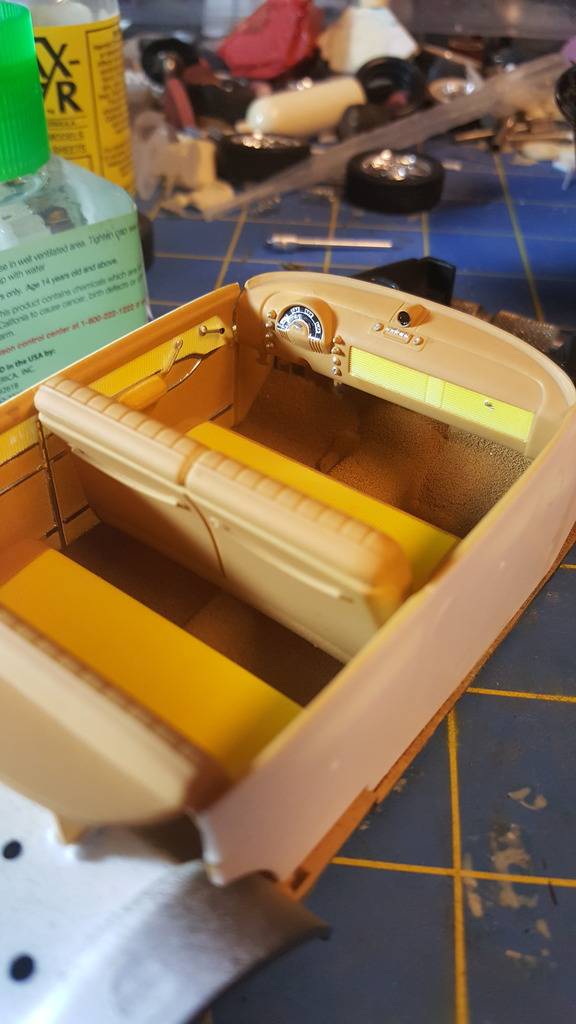
my interior colors
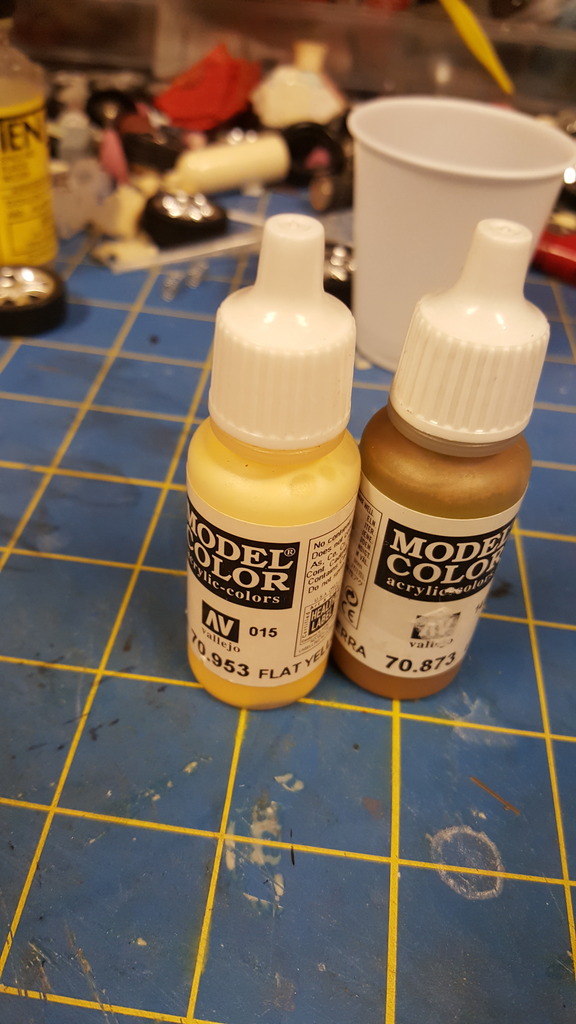
i airbrush the light yellow color first

while i was there i hit the seats as well
something else i am adding to this one is a turned aluminum steering column
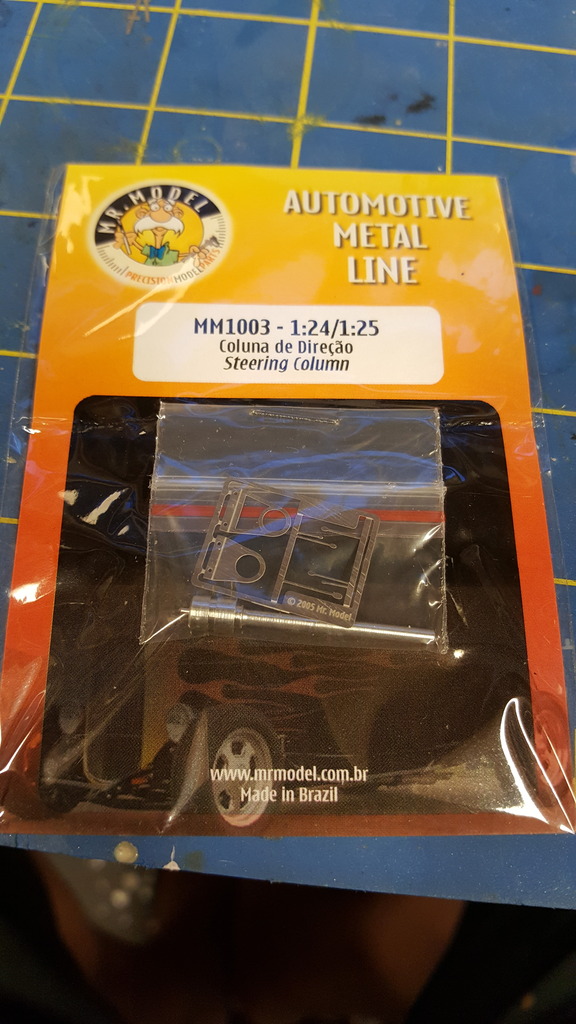
this one i got from overseas, 2 pieces, the column itself and the levers are a seperate photo etch piece you have to bend around the column and glue in place. then tweak the levers to the angles you want them

2 coats of the darker tan color on the floor pan
what the embossing powder looks like up close
once the yellow was dry, i masked off the insert areas

and airbrushed the darker tan

then once dry i removed the masks
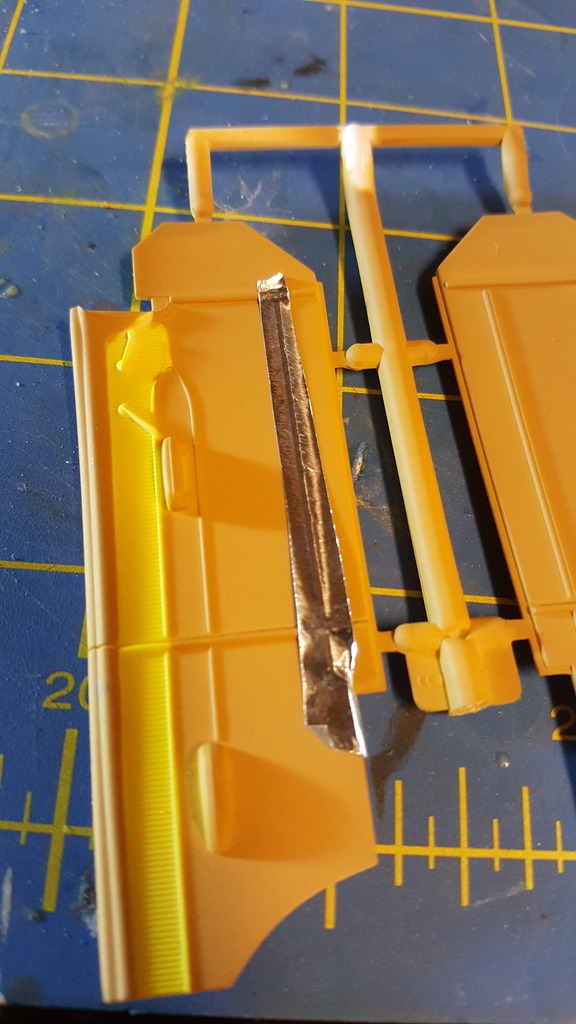
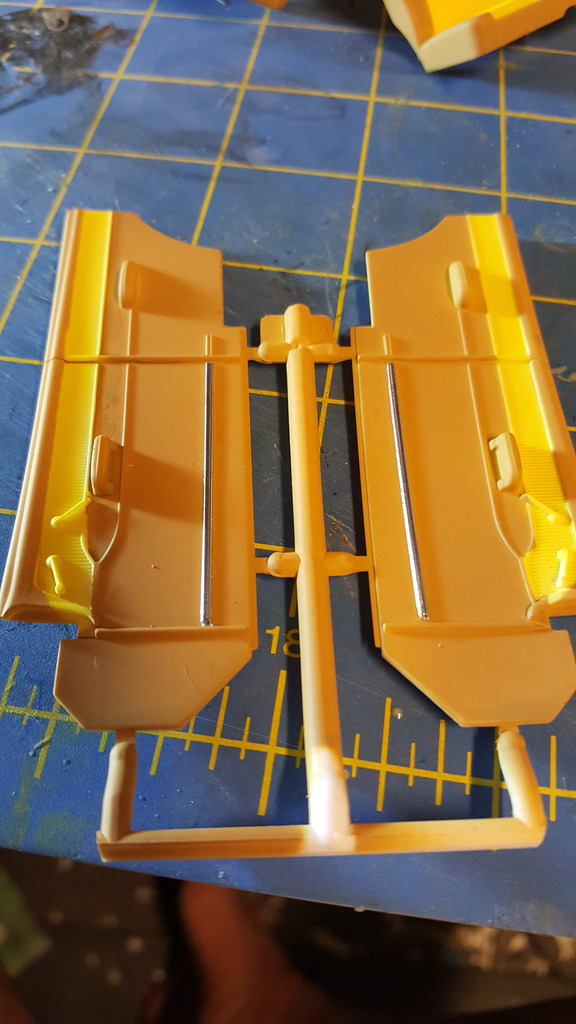
now its time to add a little trim

armed with my bare metal foil, a sharp hobby knife, a rounded toothpick and a q tip. here we go


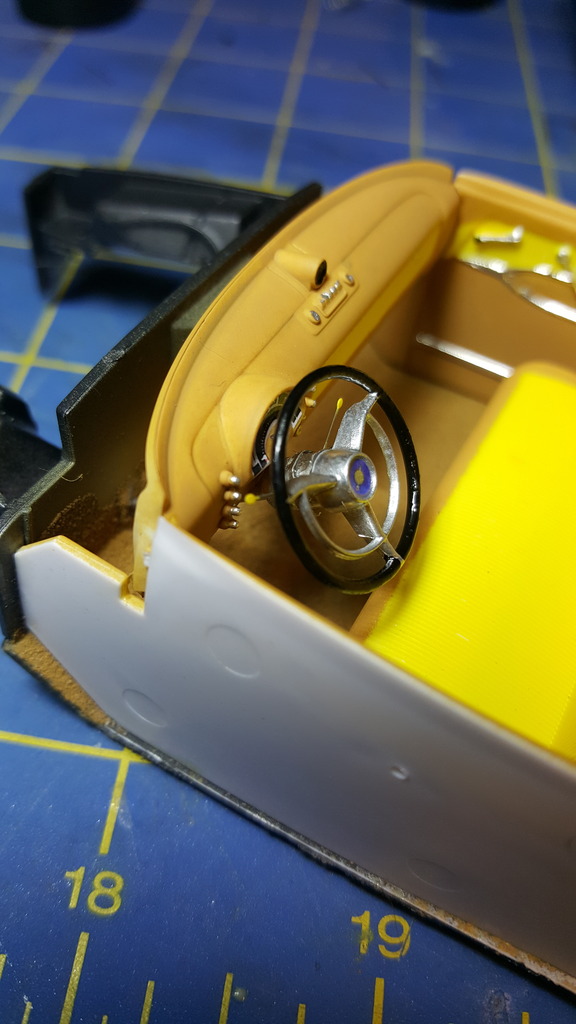
speedo decal was in the kit, used some micro sol to settle it into the dash panel

detail paints
picked out the handles with the silver
coming together
steering wheel in place

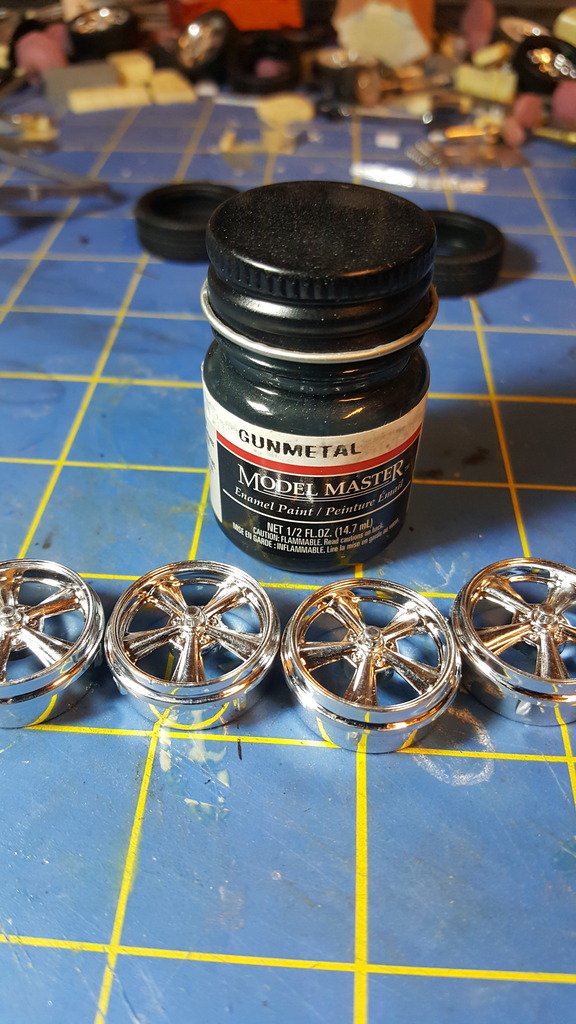
also taking a page from fletches book, the wheels need some contrast, out comes the gunmetal

front calipers mounted
rears in place
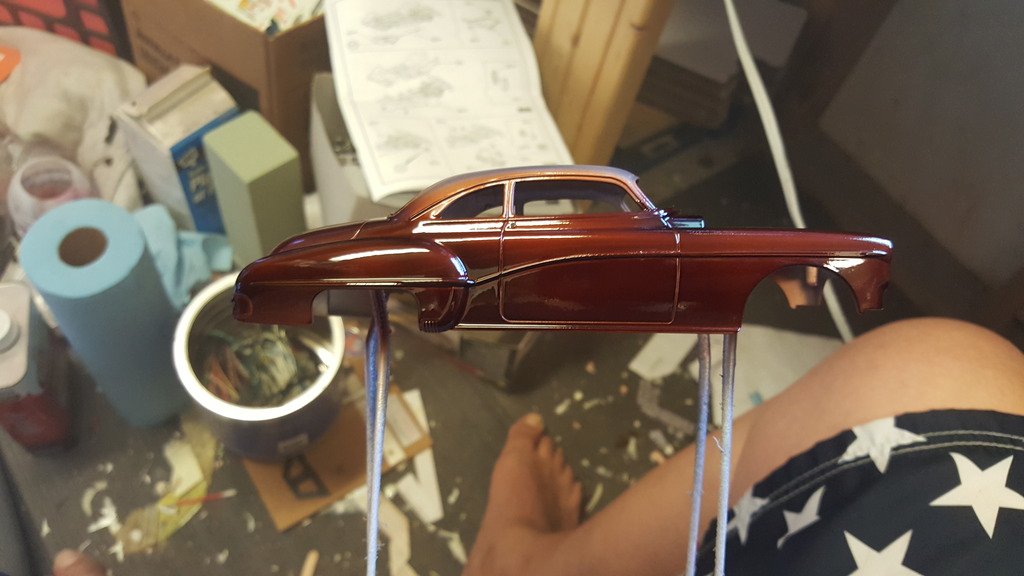
ok body is back from paint again....this time i am gonna leave the top as the silver base coat color and add some bare metal foil for the trim

FFS!!!!!!!!!!!!!!!! back to the pond again....and time to pick a different color. that spaz shits will never hit another one of my models
cya in a bit
that spazstix paint looks great, awesome color, but fragile as hell
went to mask the roof as i was going off white, almost cream color for the contrast. i use low tack painters tape. lay a bit along the lower roofline ...didnt even burnish it down yet, went to re position it , up comes about half the paint off the body down to the primer...off to the pond it went.
so onto other parts while that takes a bath and gets reshot.
maybe i do some interior while i wait on the body..

floor pan will be first

never liked the plastic carpet they mold into the kits. i prefer to make my own so out comes my adhesive of choice

and my embossing powder, gives a better scale finish than the kit pieces

using a wide brush i apply the floor polish evenly everywhere i want to have carpet

nice wet coat, notice i am working over a clean sheet of paper
i use a liberal amount of embossing powder and i use my finger tips to lightly push it into the corners so i get even coverage

i let it sit for about 5 minutes and then tip the floor pan upside down to remove the excess powder

then i fold the sheet of paper in half and reclaim the left over embossing powder

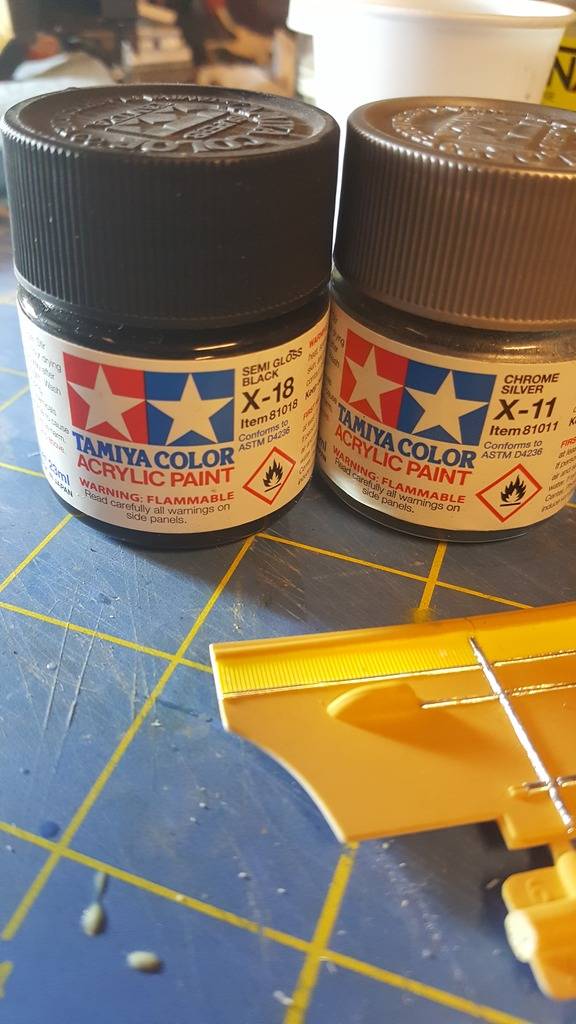
my interior colors

i airbrush the light yellow color first

while i was there i hit the seats as well

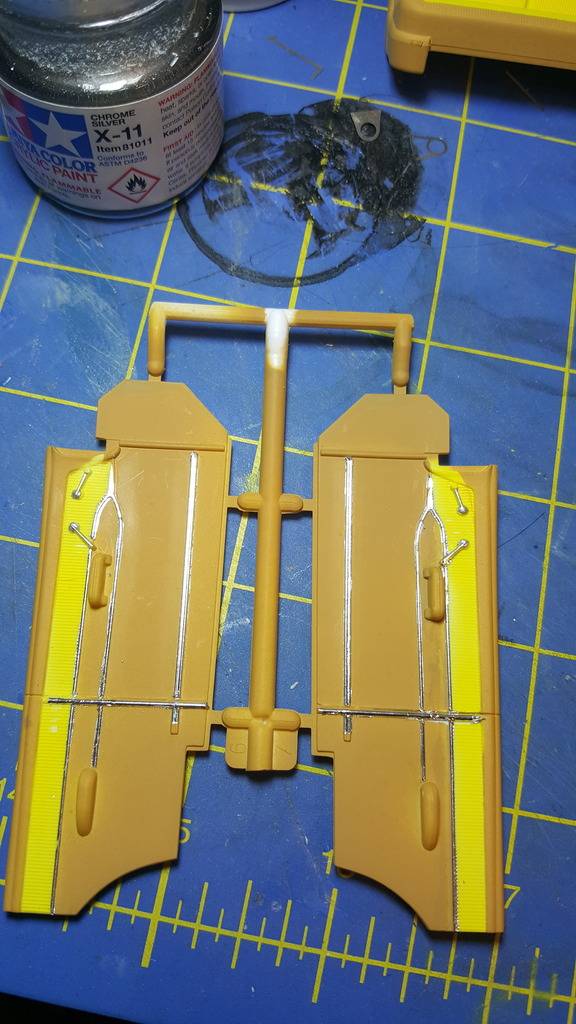
something else i am adding to this one is a turned aluminum steering column

this one i got from overseas, 2 pieces, the column itself and the levers are a seperate photo etch piece you have to bend around the column and glue in place. then tweak the levers to the angles you want them

2 coats of the darker tan color on the floor pan

what the embossing powder looks like up close

once the yellow was dry, i masked off the insert areas

and airbrushed the darker tan

then once dry i removed the masks

now its time to add a little trim

armed with my bare metal foil, a sharp hobby knife, a rounded toothpick and a q tip. here we go


speedo decal was in the kit, used some micro sol to settle it into the dash panel

detail paints

picked out the handles with the silver

coming together

steering wheel in place


also taking a page from fletches book, the wheels need some contrast, out comes the gunmetal


front calipers mounted

rears in place

ok body is back from paint again....this time i am gonna leave the top as the silver base coat color and add some bare metal foil for the trim

FFS!!!!!!!!!!!!!!!! back to the pond again....and time to pick a different color. that spaz shits will never hit another one of my models

cya in a bit
Page 4 of 5 • 1, 2, 3, 4, 5
Permissions in this forum:
You cannot reply to topics in this forum|
|
|