
Page 2 of 5 •  1, 2, 3, 4, 5
 KitbashAdmin
- Posts : 276
Join date : 2015-01-25
Age : 54
Location : Georgia 
 Re: 69 Dart GTS
Sun May 17, 2015 3:12 pm
i end up doing that quite a bit depending on if they give me multiple colors for different variations
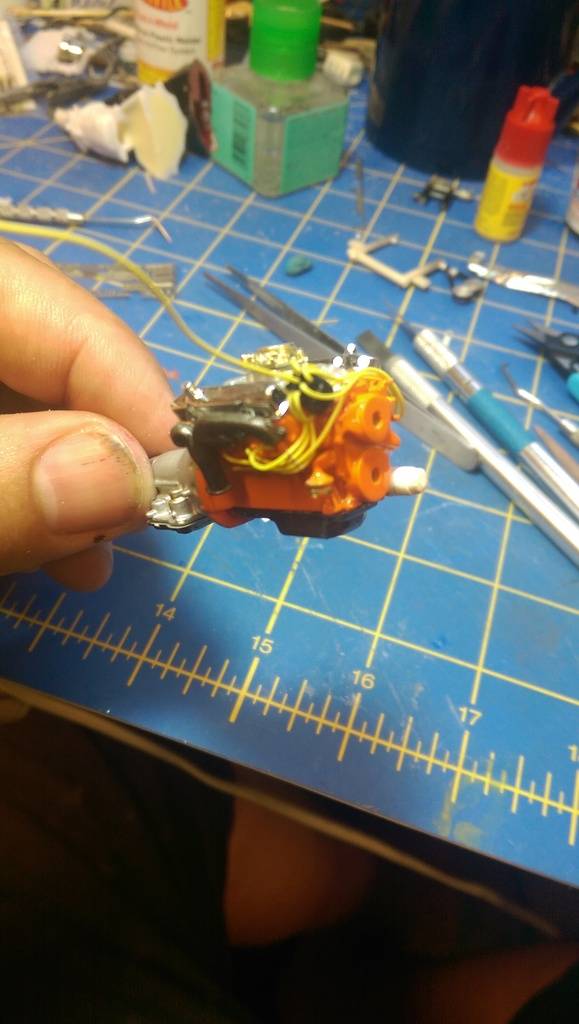
back to a bit of playing in the hobby room
gonna use the kit engine
and dress it up with some PE and a FatKid distributor later
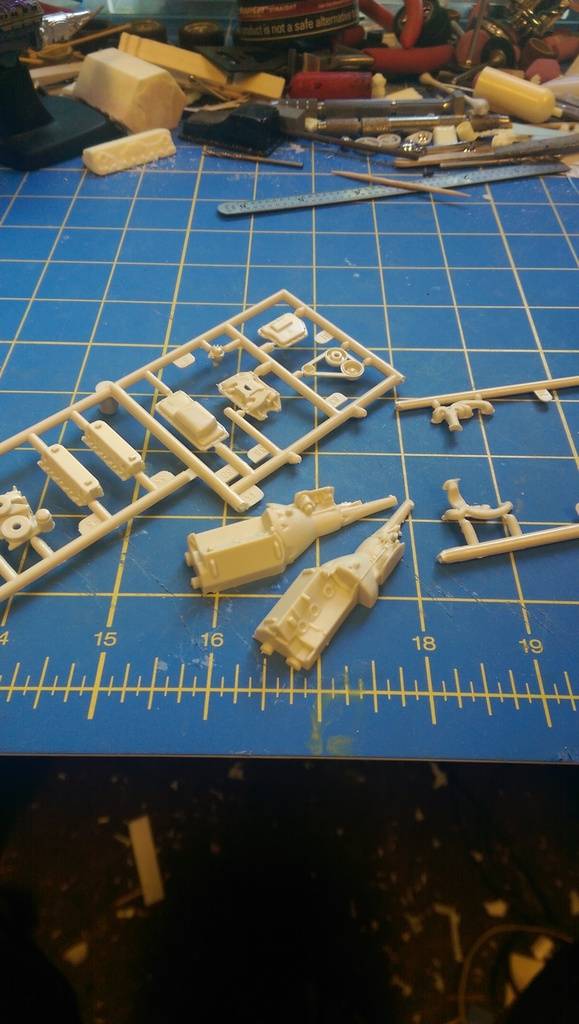
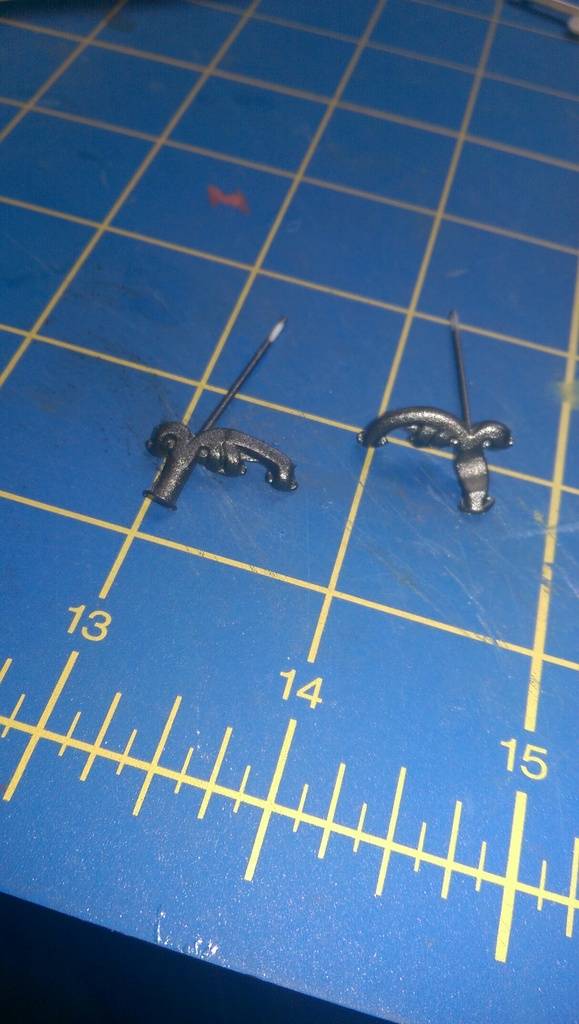
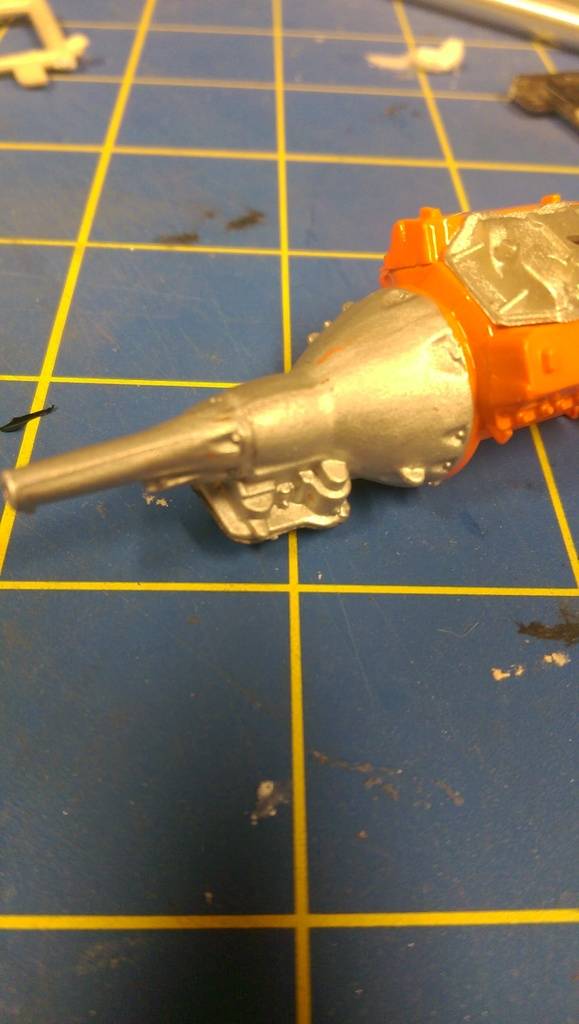
starting with the basic pieces

i grab my cement of the week
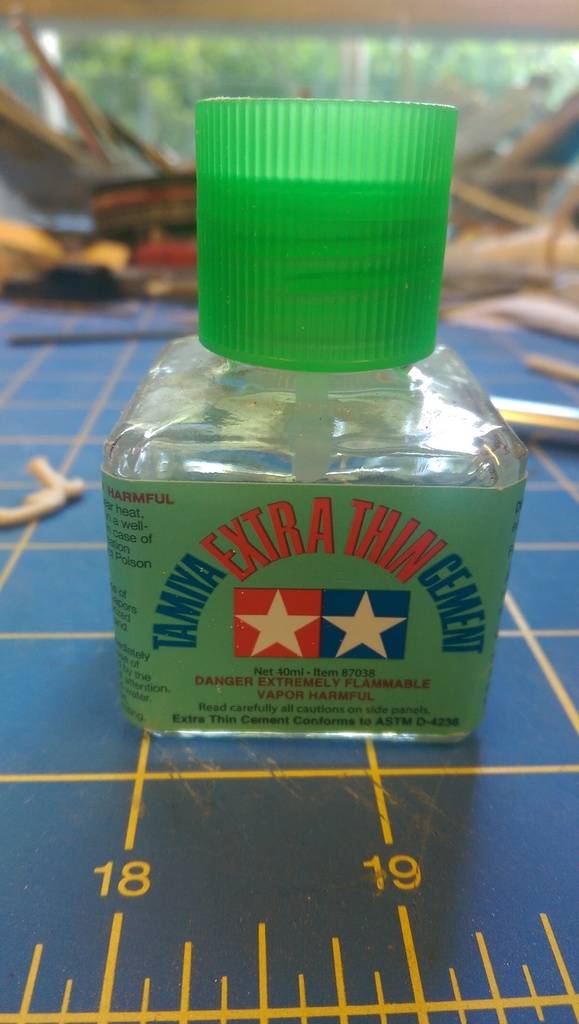
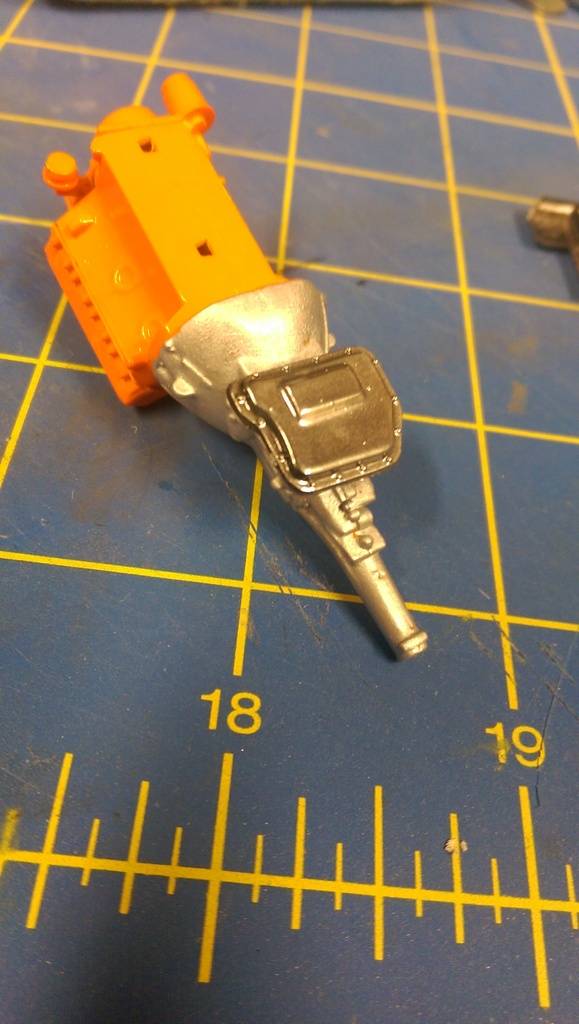
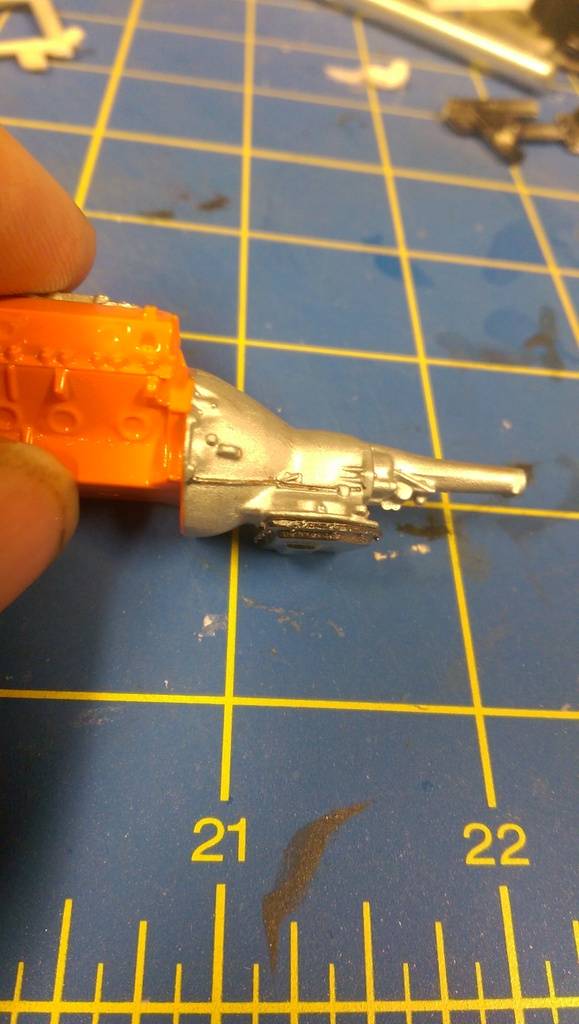
and mate the 2 halves of the block and tranny together
fancy schmancy clamps to hold thingss in line while it dries

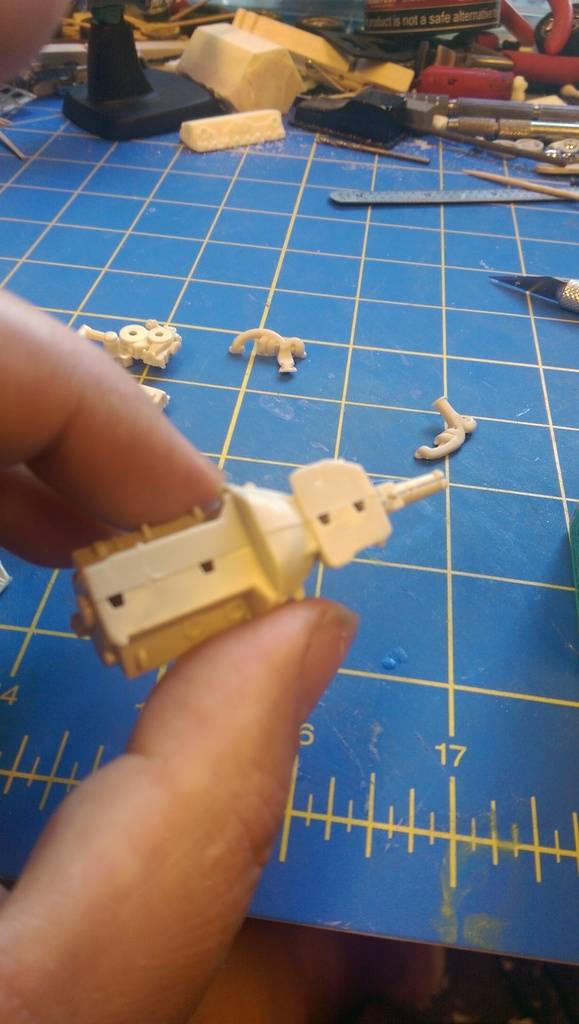
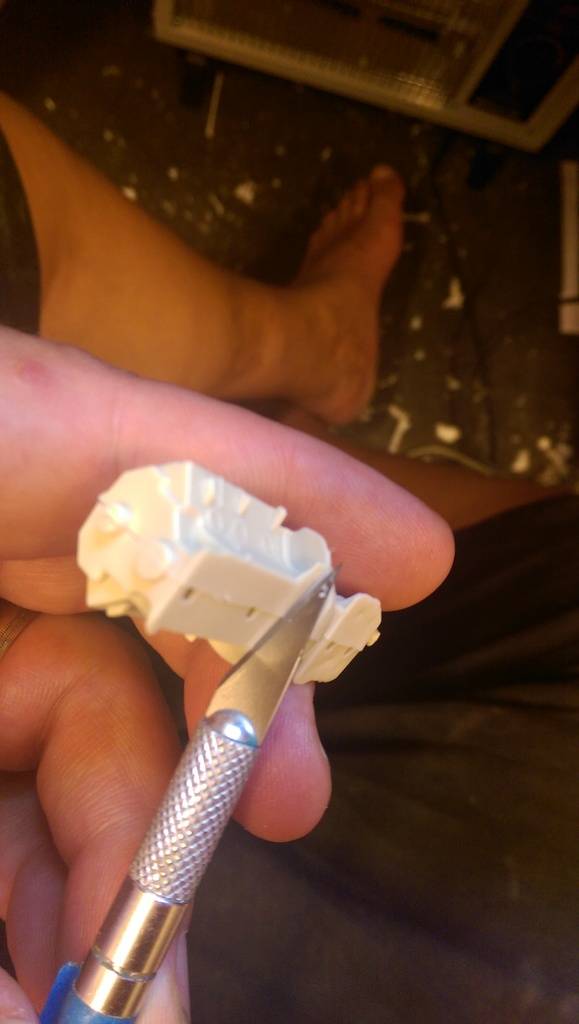
once glued, you can see the seam needs a bit of attention
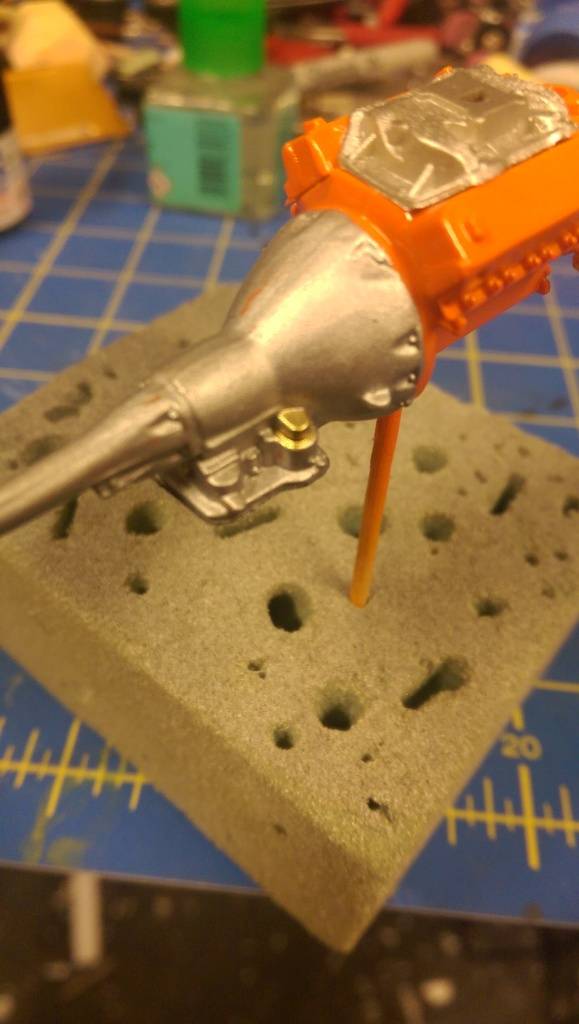
the easiest way i have found to take care of the flat surfaces is with the sharp edge of a hobby blade. use it to scrape aray the protruding area until everything is flush
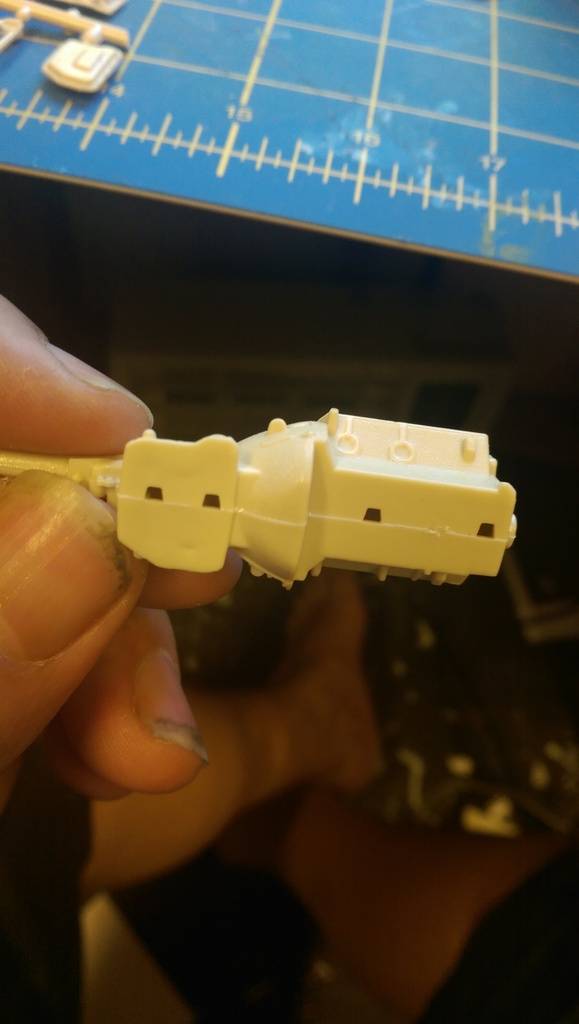
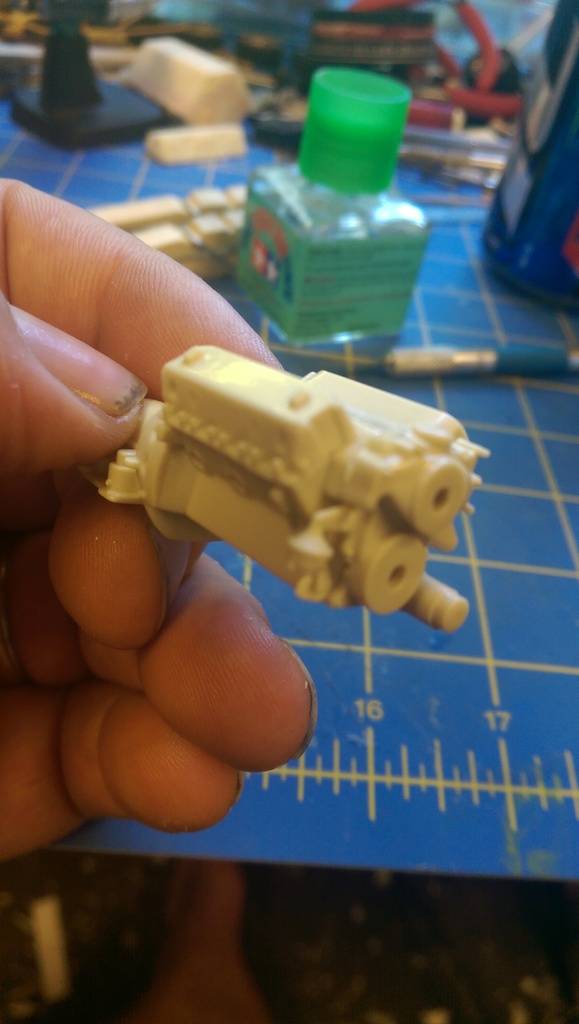
once seam lines are gone, its time forto add the heads

since this is a stock build, ( hurts me to even say those words lol )
i am using kit parts
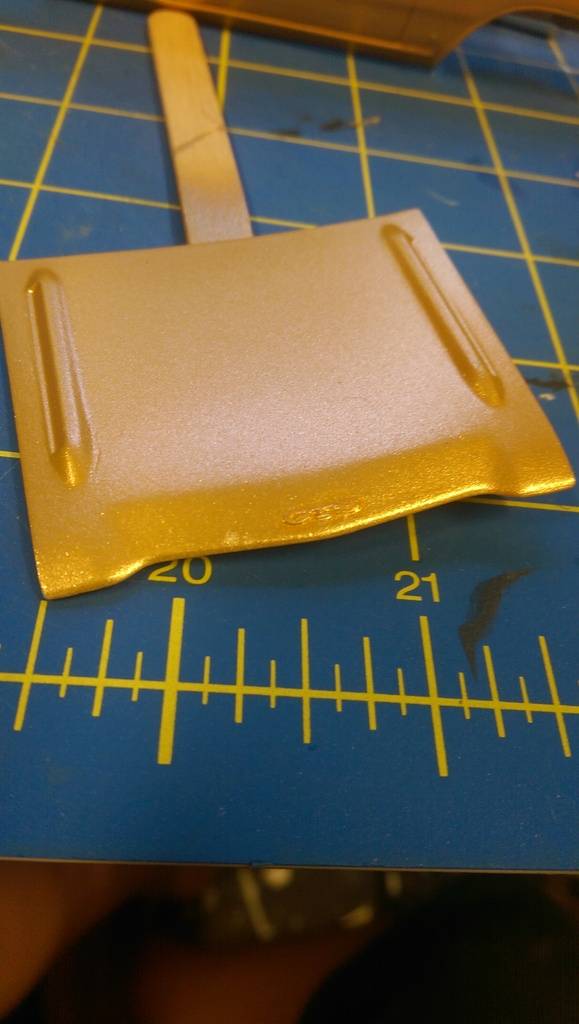
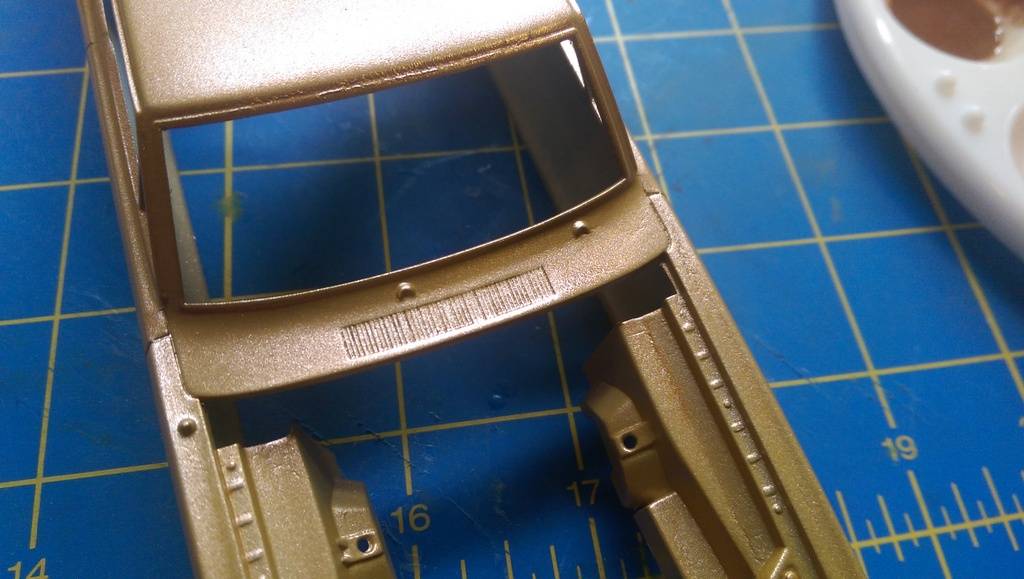
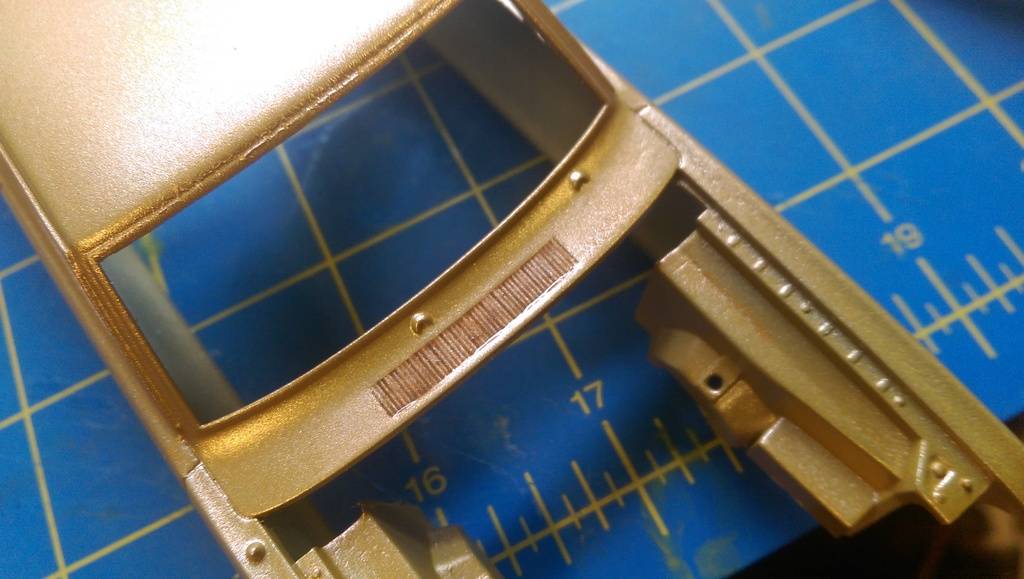
added front cover
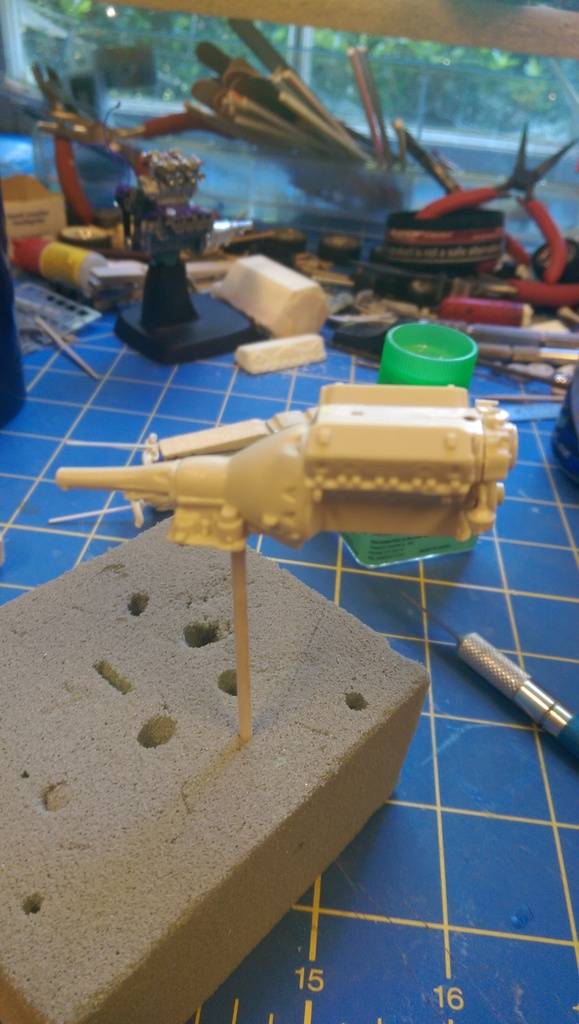
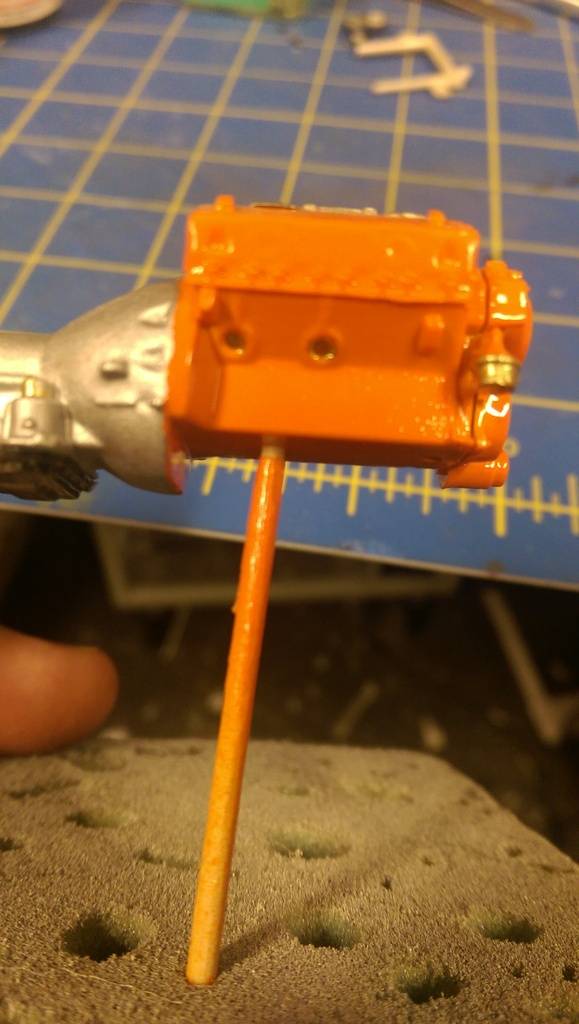
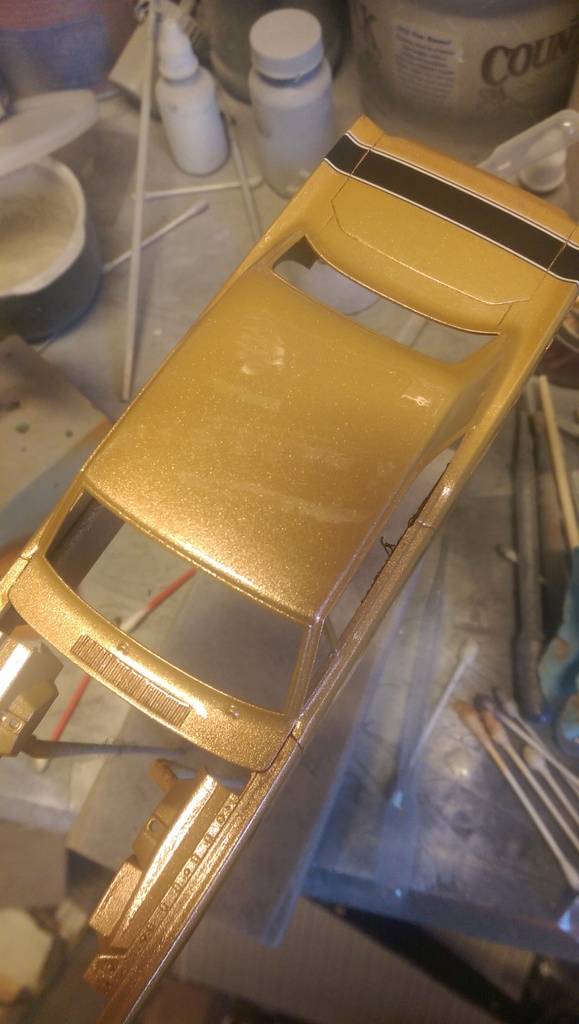
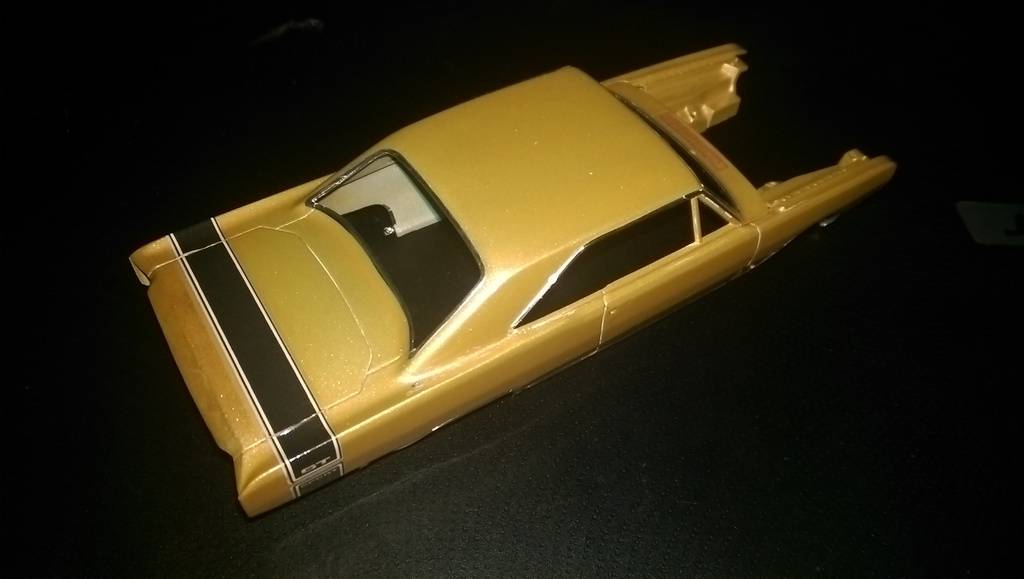
ready for the base colors
bit of rusto orange, yea yea, its not factory correct and i dont care so neener neener. its close enough for me


bit of dull aluminum on the tranny
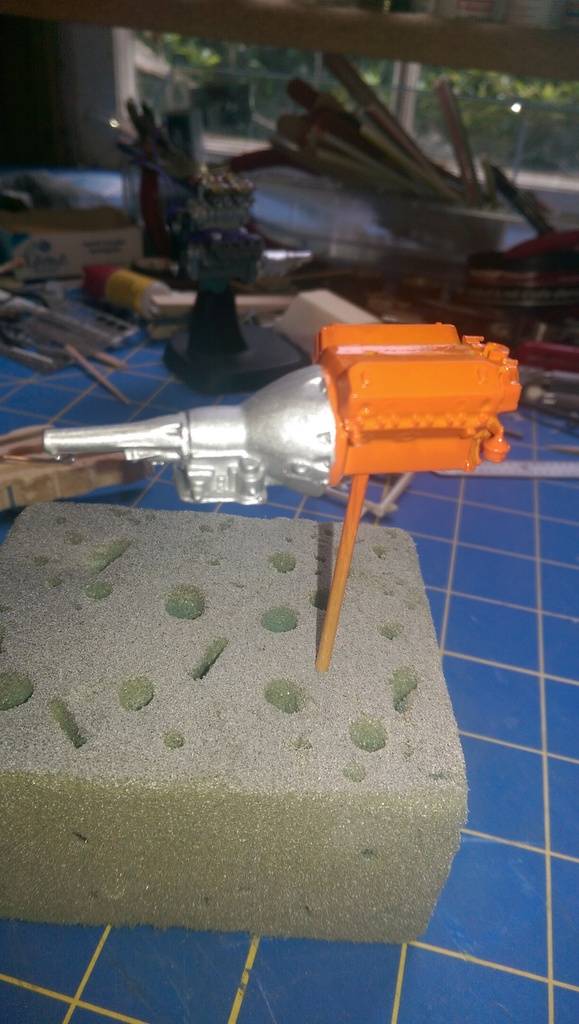
cast iron on the manifolds
and a bit of the aluminum on the intake and pulleys

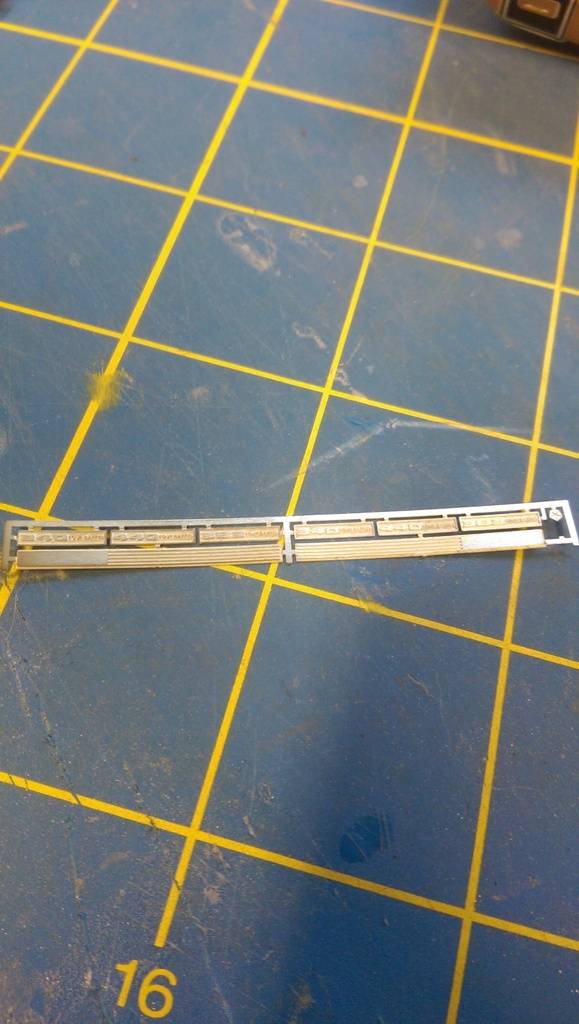
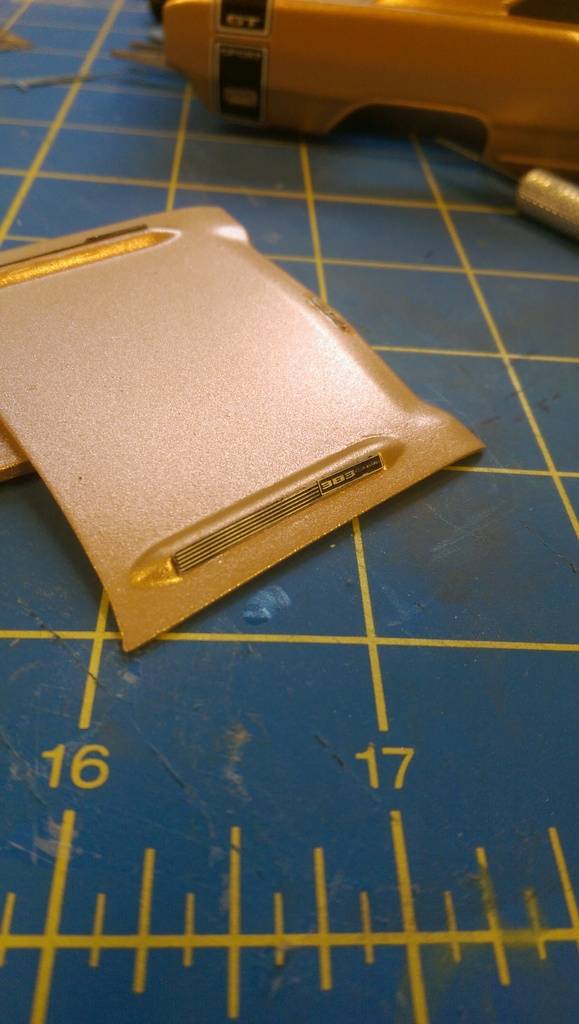
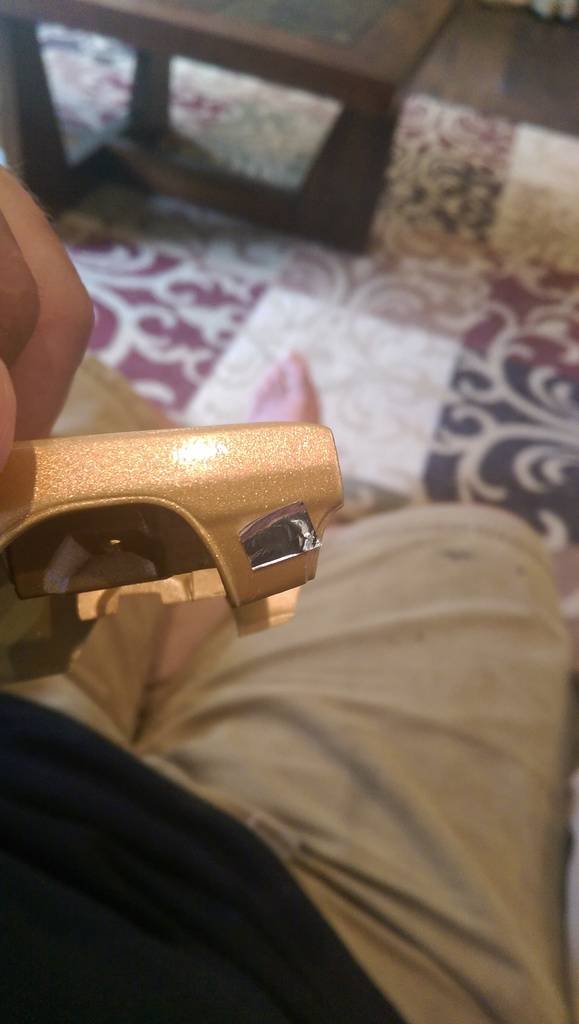
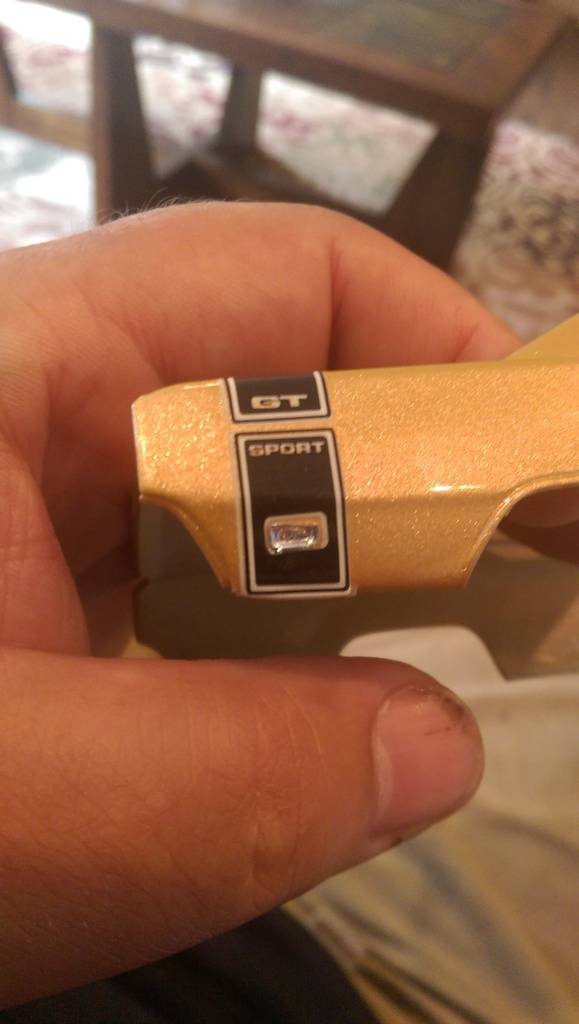
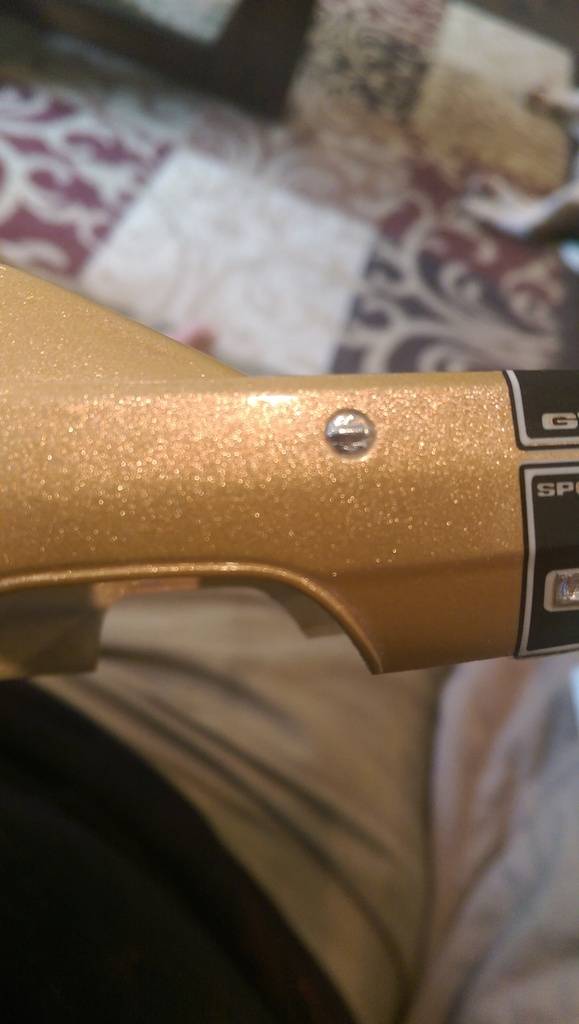
gonna add the PE GTS to the front of the hood
thats a picky little piece

while i am at it, there are pe side vents for the hood
i detail them first with a sharpie
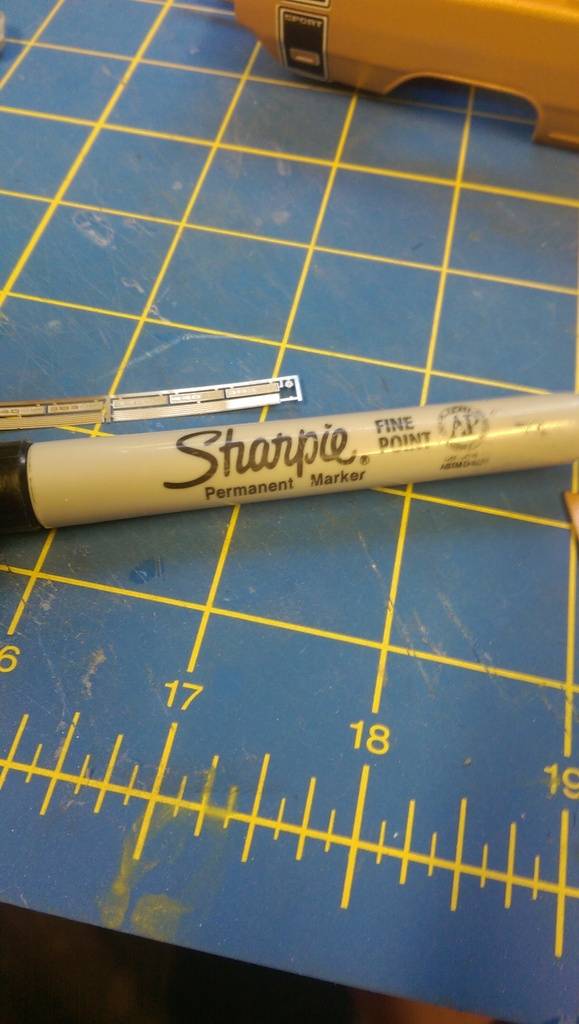
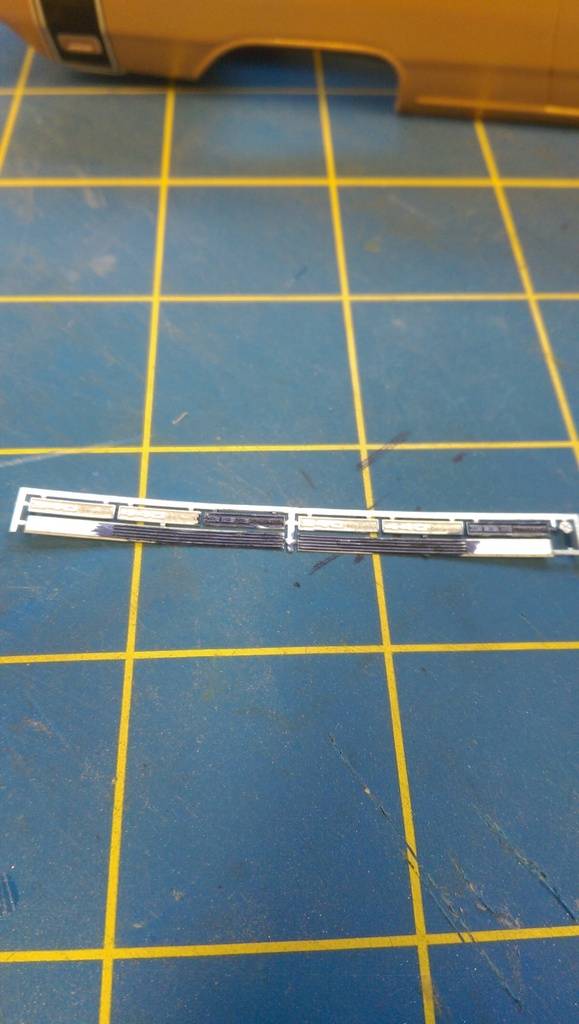
i use the marker to fill all the recesses and then use a fine sanding stick to remove the marker from the high spots
once detailed i glue them in place with super glue

what they look like installed
now the back bumper does not have any mesh so it will get a wash to bring out the details

cheap set of artists oil color, pull out the black and mix it about 10:1 with thinner so you have a very thin wash
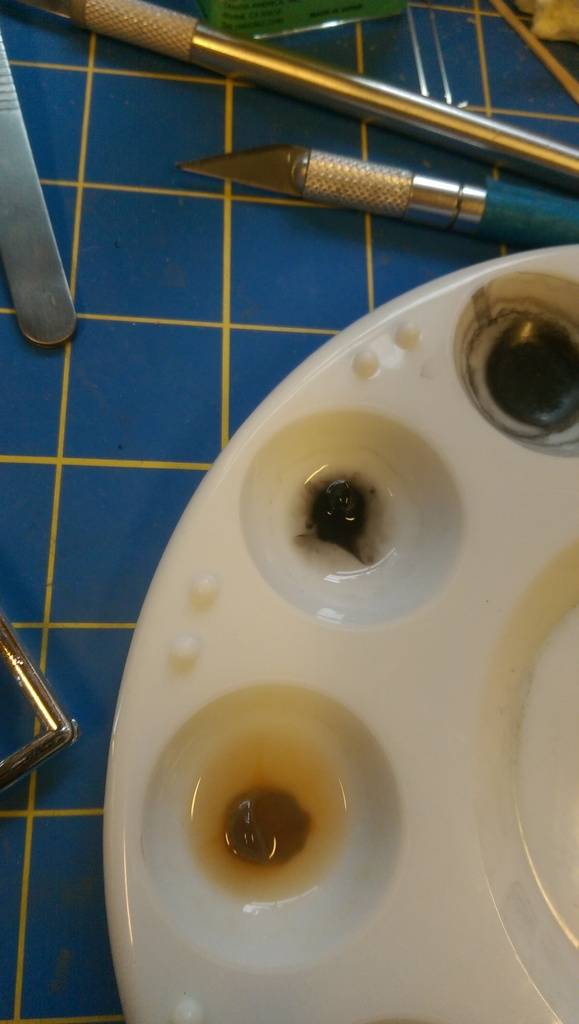
3 passes with the pin wash and this is what it looks like

now for the door panel lines i am doing something similar, just with burnt umber
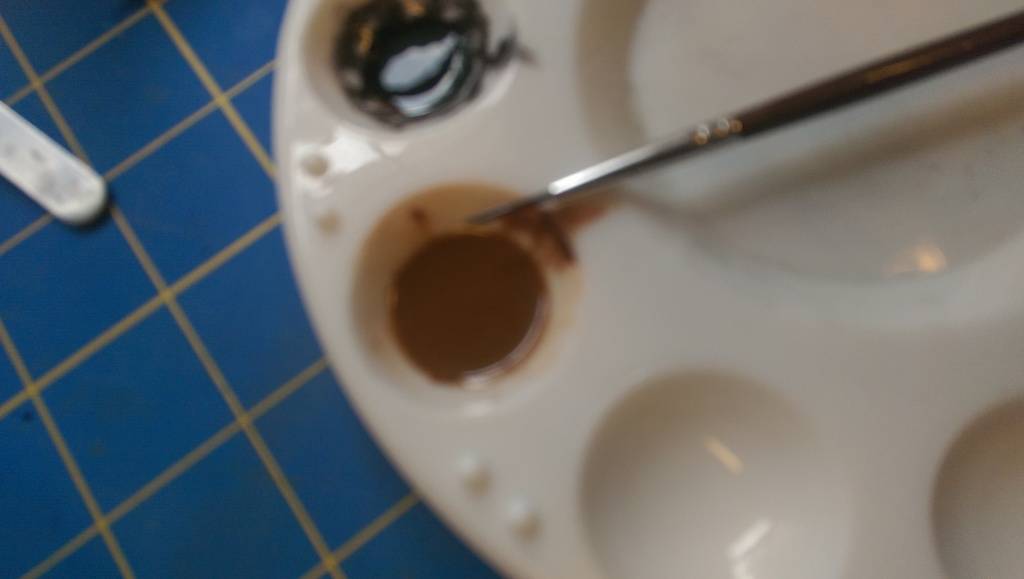
use that for the cowl vent
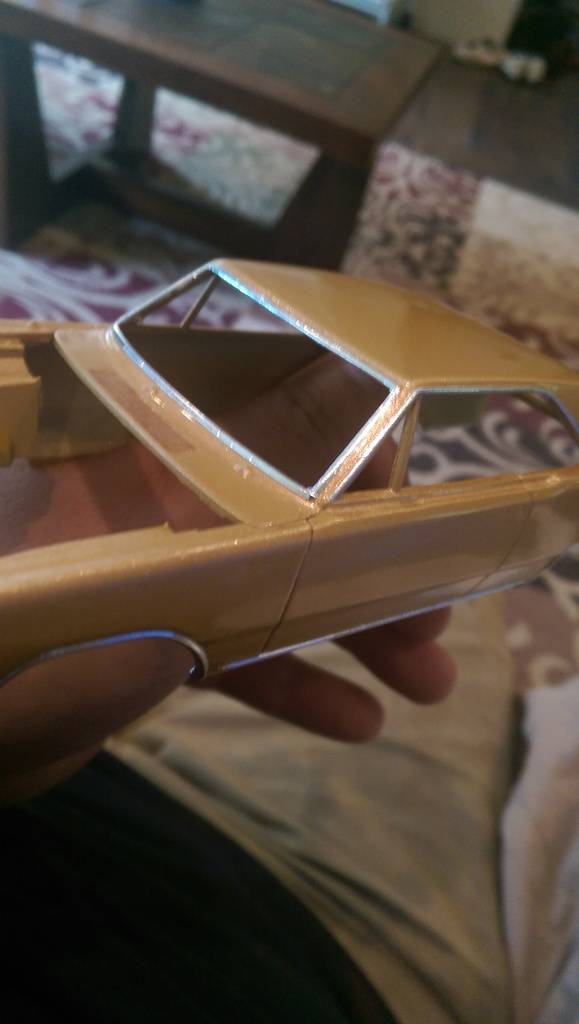
trunk and body lines

and door lines

cya next time
back to a bit of playing in the hobby room
gonna use the kit engine
and dress it up with some PE and a FatKid distributor later
starting with the basic pieces
i grab my cement of the week
and mate the 2 halves of the block and tranny together
fancy schmancy clamps to hold thingss in line while it dries
once glued, you can see the seam needs a bit of attention
the easiest way i have found to take care of the flat surfaces is with the sharp edge of a hobby blade. use it to scrape aray the protruding area until everything is flush
once seam lines are gone, its time forto add the heads
since this is a stock build, ( hurts me to even say those words lol )
i am using kit parts
added front cover
ready for the base colors
bit of rusto orange, yea yea, its not factory correct and i dont care so neener neener. its close enough for me
bit of dull aluminum on the tranny
cast iron on the manifolds
and a bit of the aluminum on the intake and pulleys
gonna add the PE GTS to the front of the hood
thats a picky little piece
while i am at it, there are pe side vents for the hood
i detail them first with a sharpie
i use the marker to fill all the recesses and then use a fine sanding stick to remove the marker from the high spots
once detailed i glue them in place with super glue
what they look like installed
now the back bumper does not have any mesh so it will get a wash to bring out the details
cheap set of artists oil color, pull out the black and mix it about 10:1 with thinner so you have a very thin wash
3 passes with the pin wash and this is what it looks like
now for the door panel lines i am doing something similar, just with burnt umber
use that for the cowl vent
trunk and body lines
and door lines
cya next time
- KitbashAdmin
- Posts : 276
Join date : 2015-01-25
Age : 54
Location : Georgia
Re: 69 Dart GTS
Sun May 31, 2015 11:01 pm
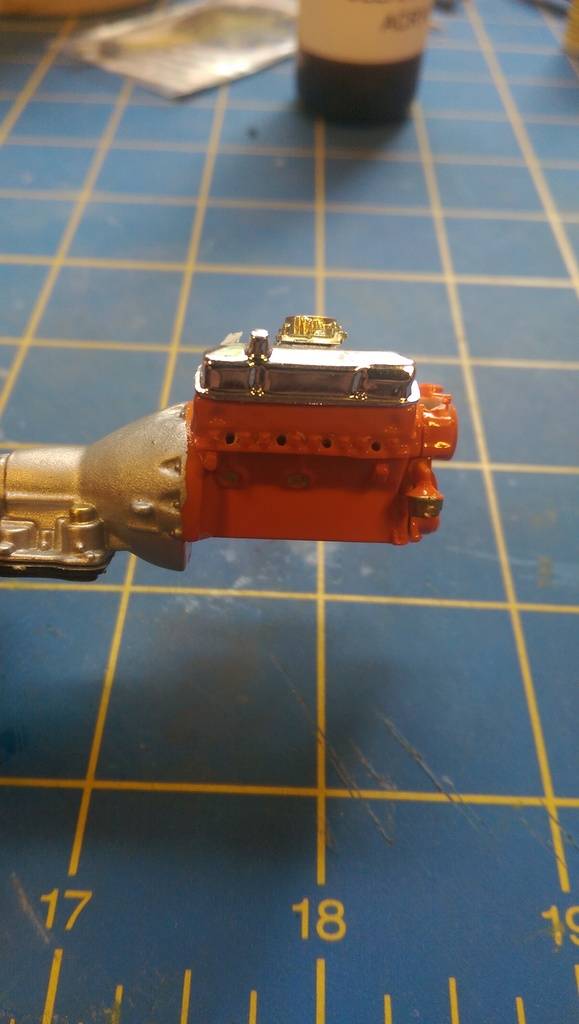
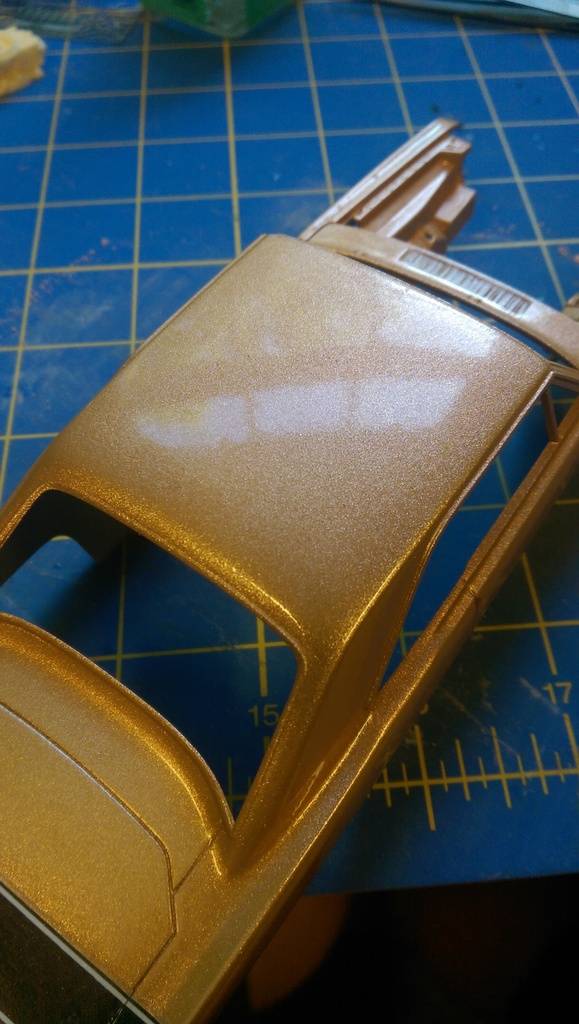
a bit of alclad on the 2 lower pans

installed on the tranny
got the aluminum on the pulleys

then a bit of flat black

just on the belt surfaces

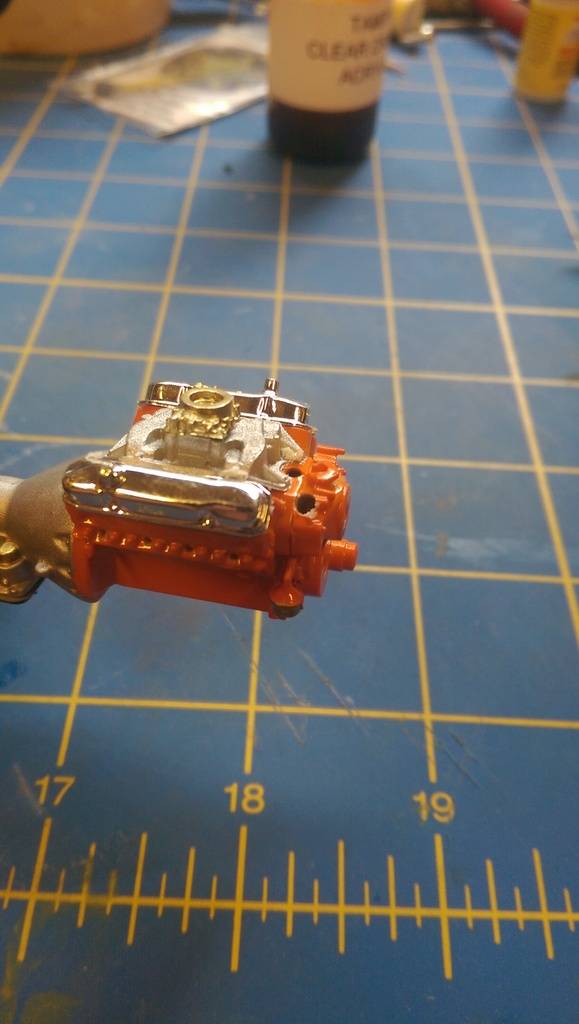
installed the intake on the block

using a black fine tipped marker i highlighted the line on the side of the tranny
now to pick out a bit of detail on the other side
a little bit of brass goes a long way
also brassed out the fuel pump and the freeze plugs
out comes the heavy artillery
and my 30 year old paasche H , i keep this around because it flows a great 1 inch pattern that is great for clear coats
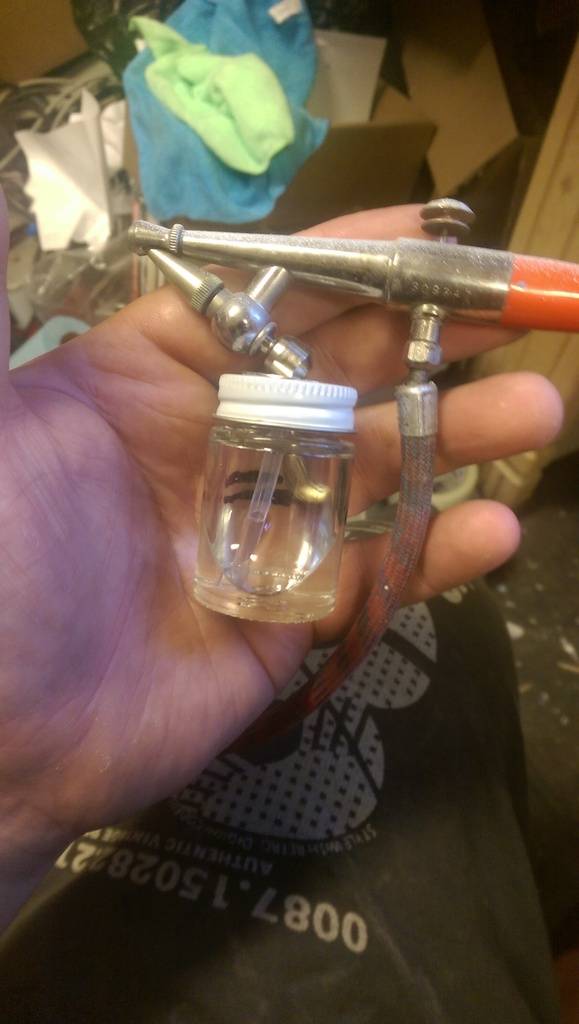
1 light coat and 2 medium wet coats later
couple small dust devils showed their face so i will polish it out a bit but overall its got good shine so far
brassed up the carb

installed it and decided on the color of the dizzy
but thats for next time
cya then
installed on the tranny
got the aluminum on the pulleys
then a bit of flat black
just on the belt surfaces
installed the intake on the block
using a black fine tipped marker i highlighted the line on the side of the tranny
now to pick out a bit of detail on the other side
a little bit of brass goes a long way
also brassed out the fuel pump and the freeze plugs
out comes the heavy artillery
and my 30 year old paasche H , i keep this around because it flows a great 1 inch pattern that is great for clear coats
1 light coat and 2 medium wet coats later
couple small dust devils showed their face so i will polish it out a bit but overall its got good shine so far
brassed up the carb
installed it and decided on the color of the dizzy
but thats for next time
cya then
 fletch
- Posts : 250
Join date : 2015-01-25
Age : 53
Location : Maryland
Re: 69 Dart GTS
Mon Jun 01, 2015 3:59 am
Looking really good! I love the grill work.
- KitbashAdmin
- Posts : 276
Join date : 2015-01-25
Age : 54
Location : Georgia
Re: 69 Dart GTS
Sun Jun 14, 2015 1:34 pm
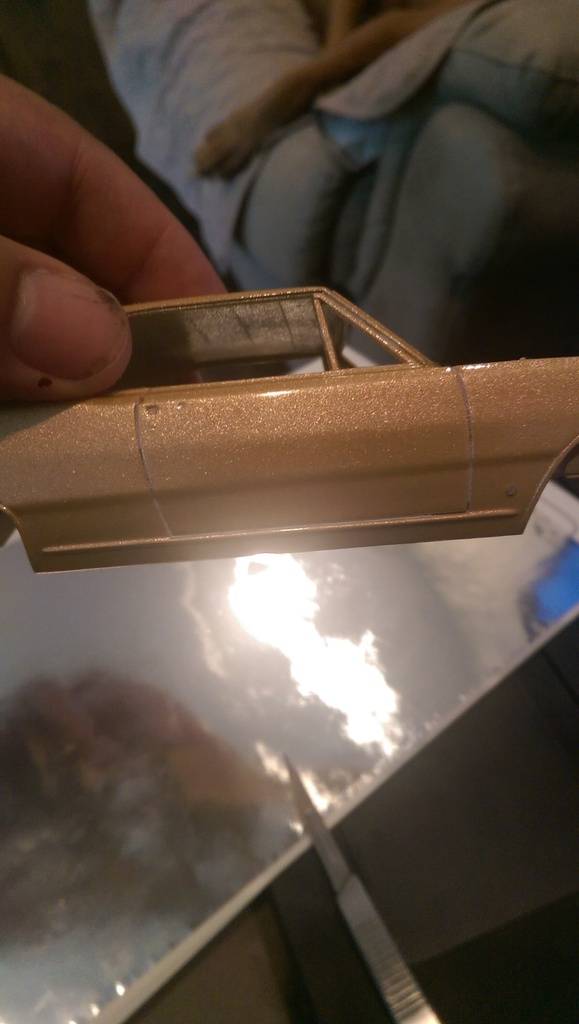
sorry its been a bit of time since my last post
had my mother pass away on monday so been working through some mind things here.
i figure i better catch up on what i had done so far before i forget bits
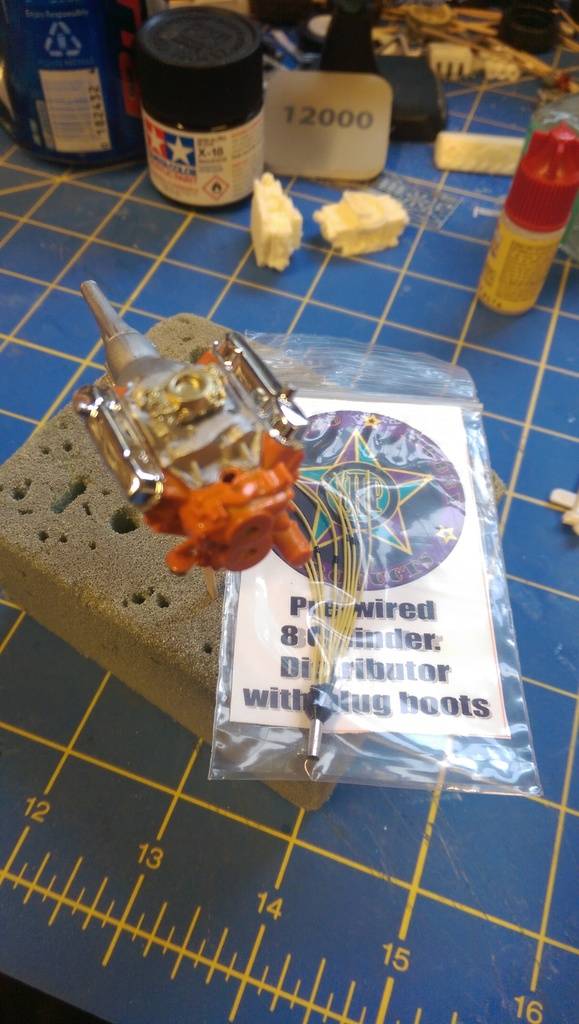
first up, a FatKid dizzy

i drill a hole in the front timing cover so i can slide the dizzy shaft into place
that oil filter annoys me so i will have to change the color of it but the rest looks OK for now
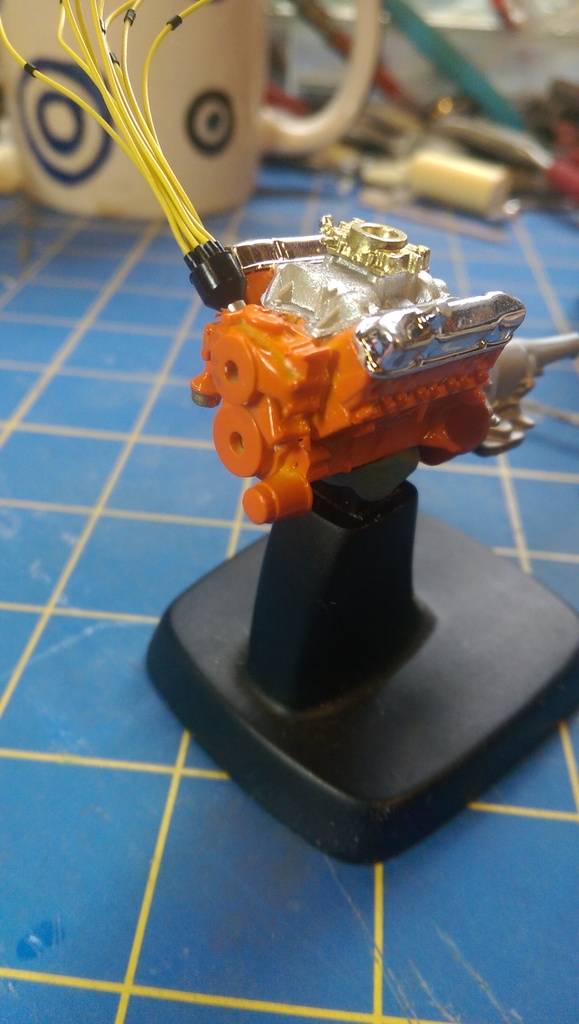
drilled out the holes where the plugs would be so i have somewhere to put the wires
i use super glue to mount the manifolds in place
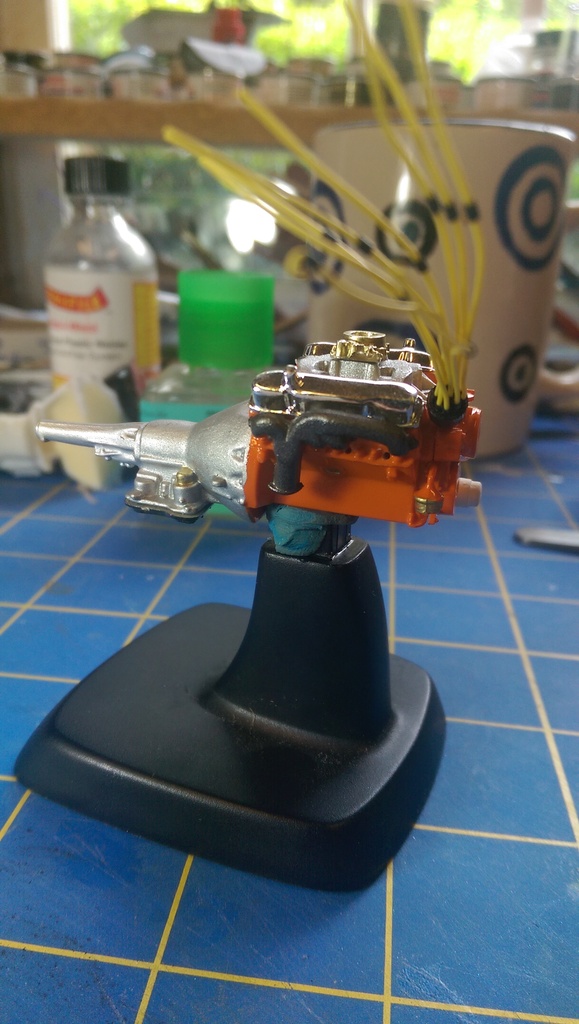
and i fixed the annoying oil filter
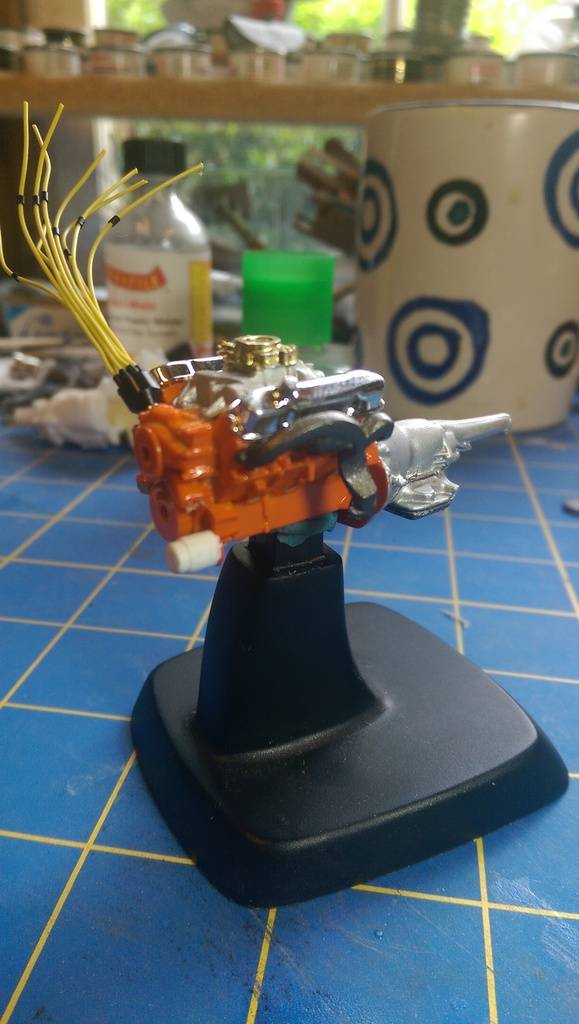
now i run the wires through the set of wire looms from the PE set and pay attention to how they lay on the motor. a little extra time drooping them here and there will make them look more realistic then if the wire just went straight to the plug.

now for some of modelings finest ADD
i saw the grille staring at me and realized i forgot something.. out came the tamiya clear orange.

also wet sanded the clear coat to get rid of the couple dust blemishes i had. that left the surface a bit dull. but i can fix that

starting with these

now i work in small sections as i polish, others try to do the whole car at once. i prefer going bit by bit as i seem to get better results that way.
i use the polishing compound first followed by the fine cut cleaner. that leaves me with this
now for a bit o polish to brighten it up some

oooooh shiney

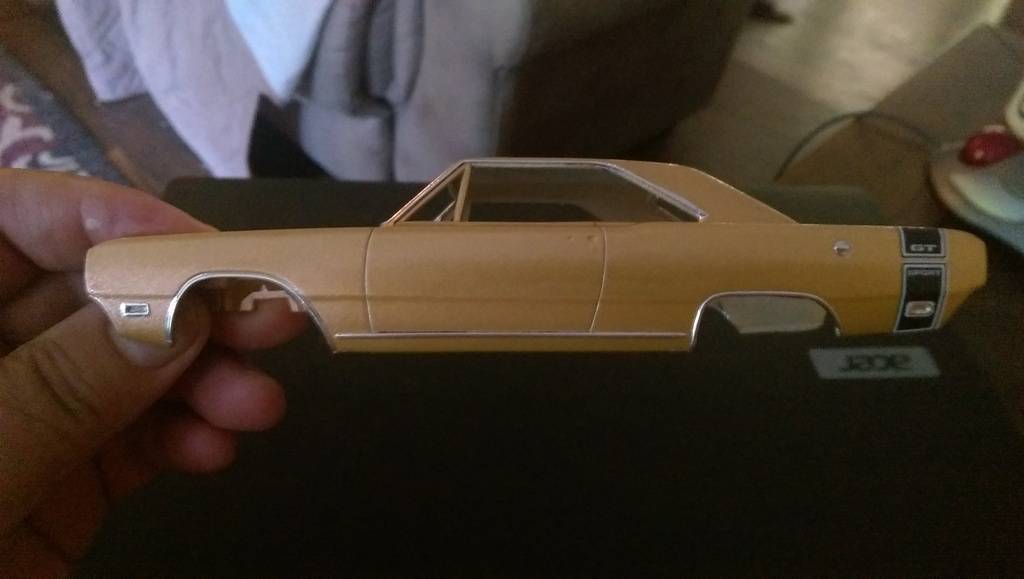
trim time

this car has a moderate amount of trim, rather than paint it i am using bare metal foil on it. i load up a new scalpel blade , grab a few q tips and 2 or 3 rounded tip tooth picks.
side trim first, i cut the foil slightly larger than i need and lightly press it into place with my finger

now i use the side of a q tip followed by the blunted tooth pick to work the foil flat and into all the curves

using just the weight of the blade, trim off the excess foil so you are left with something like this
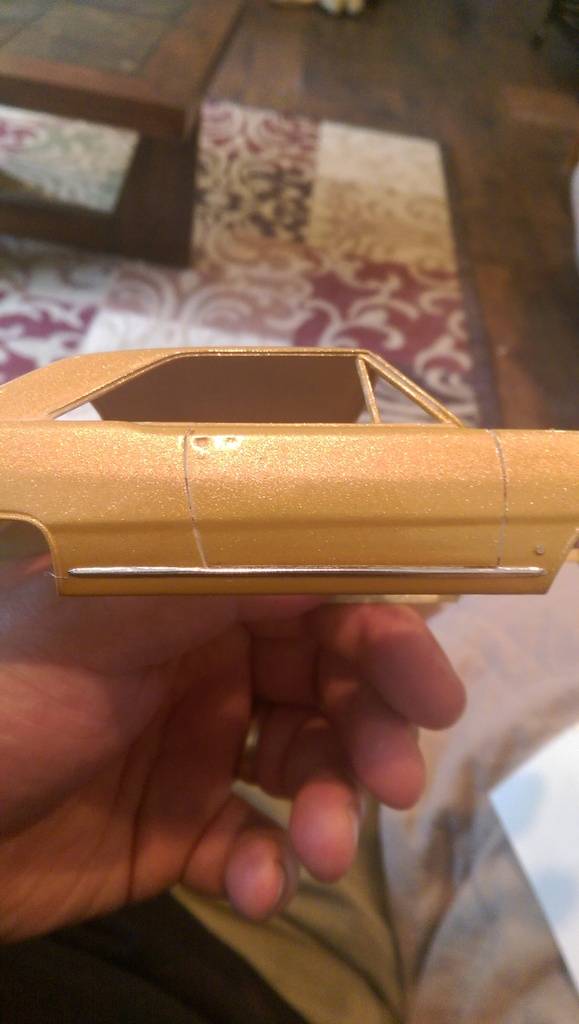
next i move onto the side marker lights


the gas cap
wheel trim finished up the side

front window moldings
trim done

cya next time
had my mother pass away on monday so been working through some mind things here.
i figure i better catch up on what i had done so far before i forget bits
first up, a FatKid dizzy
i drill a hole in the front timing cover so i can slide the dizzy shaft into place
that oil filter annoys me so i will have to change the color of it but the rest looks OK for now
drilled out the holes where the plugs would be so i have somewhere to put the wires
i use super glue to mount the manifolds in place
and i fixed the annoying oil filter
now i run the wires through the set of wire looms from the PE set and pay attention to how they lay on the motor. a little extra time drooping them here and there will make them look more realistic then if the wire just went straight to the plug.
now for some of modelings finest ADD
i saw the grille staring at me and realized i forgot something.. out came the tamiya clear orange.
also wet sanded the clear coat to get rid of the couple dust blemishes i had. that left the surface a bit dull. but i can fix that
starting with these
now i work in small sections as i polish, others try to do the whole car at once. i prefer going bit by bit as i seem to get better results that way.
i use the polishing compound first followed by the fine cut cleaner. that leaves me with this
now for a bit o polish to brighten it up some
oooooh shiney
trim time
this car has a moderate amount of trim, rather than paint it i am using bare metal foil on it. i load up a new scalpel blade , grab a few q tips and 2 or 3 rounded tip tooth picks.
side trim first, i cut the foil slightly larger than i need and lightly press it into place with my finger
now i use the side of a q tip followed by the blunted tooth pick to work the foil flat and into all the curves
using just the weight of the blade, trim off the excess foil so you are left with something like this
next i move onto the side marker lights
the gas cap
wheel trim finished up the side
front window moldings
trim done
cya next time
- fletch
- Posts : 250
Join date : 2015-01-25
Age : 53
Location : Maryland
Re: 69 Dart GTS
Sun Jun 14, 2015 7:05 pm
Wow, sorry to hear about your mom. I will be keeping you in prayer, I know that is a hard thing.
The model looks real good, wondered how best to do BMF, now I may try it sometime.
The model looks real good, wondered how best to do BMF, now I may try it sometime.
Page 2 of 5 • 1, 2, 3, 4, 5
Permissions in this forum:
You cannot reply to topics in this forum